Last January, during a particularly grey stretch that felt more like March than the first month of the year, I decided I needed something crispy. Something salty. Something that would make that satisfying crunch when I bit into it. I'd made regular burgers before - the thick, grill-marked kind that drip juice down your chin. But I wanted those thin, lacy-edged patties you get at a proper diner. The ones with the almost-burnt bits that taste like pure umami. So I dove headfirst into the world of smash burgers, specifically the tiny version, and after about six attempts (and three very salty dinners), I stumbled onto what I genuinely believe are the Best Mini Smash Burgers: 5 Easy Roundup Ideas you'll ever make.
Mini Smash Burgers: What I love about this recipe
I'm not usually a "follow the recipe exactly" person. I swap things. I guess at measurements. I once made a chocolate cake with sour cream because I was out of milk and it was... fine, not great. But this recipe? I follow it to the letter. Every single time. There's something about the ratio of fat to heat to smash-pressure that makes these little sliders almost magical.
Here's what I mean. I brought a batch to my brother's place last Super Bowl Sunday. He's the kind of guy who buys pre-made patties from the grocery store and calls it dinner. He took one bite of these mini smash burgers, stopped mid-sentence, and just stared at the slider in his hand. Then he ate four more. My sister-in-law texted me the next day asking for the recipe. That's when I knew I'd hit on something worth sharing. These aren't just good "for sliders" - they're genuinely the best burgers I've ever pulled off my stove.
And the texture! The edges get this paper-thin crispiness that shatters when you bite down. The center stays juicy - not pink, not raw, just tender and beefy. It's the kind of contrast you normally only get from a flat-top griddle at a restaurant. But you can do it in your own kitchen with a cast iron pan and a sturdy spatula. I honestly think the simplicity is what makes them so satisfying. No marinades, no binders, no eggs. Just beef, salt, heat, and a little aggression with the smashing.
What You'll Need

Let's talk about the beef first because that's the whole show. I use ground chuck with at least 20 percent fat. 80/20 is ideal. You need that fat to render out and create those crispy edges during the high-heat sear. If you use lean ground beef (like 93/7), you'll end up with dry, sad little pucks. Don't do it. I get my chuck from Costco in those big value packs - it's good quality and the price is right.
For the buns, go soft. I use the King's Hawaiian sweet rolls for mini sliders. They're slightly sweet, which plays beautifully against the salty beef and tangy sauce. But any soft mini slider bun will work. Stay away from crusty rolls or brioche that's too dense - you want the bun to be a supporting actor, not the star.
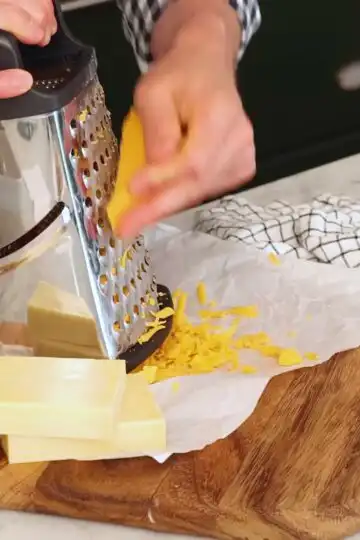
Cheese-wise, I stick with American singles. I know, I know. It's processed. But it melts like a dream in exactly 30 seconds, and the creamy texture is perfect for sliders. Cheddar works too, but use a mild one and shred it yourself so it melts faster. Pre-shredded bagged cheese has cellulose that messes with melting.

The Step-by-Step
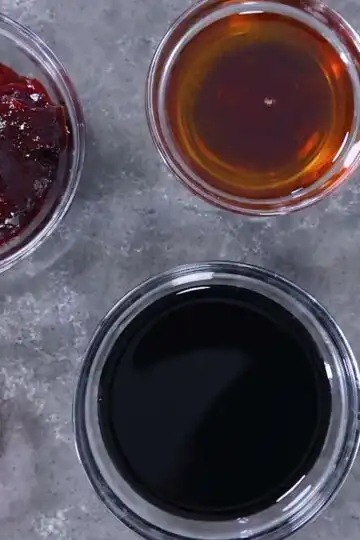
The whole process takes about 18 minutes from start to finish. That's including prep. You can't say that about many things that taste this good. I like to make the sauce first - just mix mayo, ketchup, relish, hot sauce, and some garlic and onion powder in a small bowl. Set it aside. It gets better as it sits.
Next, roll your beef into balls. About 2 inches in diameter, roughly 2 ounces each. I use a spring-loaded cookie scoop for this - it keeps them uniform and saves my hands from getting sticky. Place them on a parchment-lined tray so they don't stick. You can do this step a day ahead if you want; just keep them covered in the fridge.

Get your pan screaming hot. I mean hot. Medium-high heat for about 5 minutes before you even think about adding the beef. Cast iron is my preference because it holds heat like a champ, but a stainless steel pan works too. Just don't use non-stick - you need that aggressive sear that non-stick pans can't handle at high temperatures.
Drop the balls onto the hot surface and smash them immediately. And I mean immediately. Within 10 seconds of them hitting the pan. Use a firm metal spatula and press down hard until the patty is about half an inch thick. Season liberally with salt and pepper right after smashing. Let them cook for exactly one minute on the first side - don't peek, don't poke, just let that crust form.
Flip them, season the cook


Smash Burger Sliders Recipe
Equipment
- cast iron or stainless steel pan
- Spatula
- Measuring spoons
- parchment-lined tray
- serving plate
Ingredients
- ═══ FOR THE BURGERS ═══
- 1 kg ground chuck
- 10 slices cheddar cheese
- salt and pepper
- 10 soft mini slider buns
- iceberg lettuce
- tomato slices
- cooked bacon slices
- pickle slices
- ═══ FOR THE SAUCE ═══
- ½ cup mayo
- 2 tablespoon ketchup
- 1 tablespoon green relish
- 1 tablespoon Frank's Hot Sauce
- 1 teaspoon garlic powder
- 1 teaspoon onion powder
- ½ teaspoon salt
- ¼ teaspoon pepper
Instructions
- In a bowl, combine the mayo, ketchup, green relish, Frank's hot sauce, garlic powder, onion powder, and both salts and pepper. Mix well and set aside until needed.
- Roll the ground beef into balls, each about 2 inches in diameter, placing them on a parchment-lined tray. You can also measure out each patty to approximately 2 oz.
- Heat a cast iron or stainless steel pan over medium-high heat until hot. Prepare your burger balls and ensure they are spaced out on the griddle.
- Place the burger balls on the hot surface and immediately smash them down to a thickness of about ½ inch using a firm spatula. Season liberally with salt and pepper.
- Cook the patties for about one minute on the first side before flipping them and cooking for an additional 30 seconds. Be cautious not to overcook to avoid dryness.
- Once flipped, season the other side, place cheese on top, and cover to help the cheese melt within those 30 seconds. Scrape any cheese that spills off back onto the burger.
- Assemble your sliders by placing double patties on the buns with your favorite toppings such as lettuce, tomato, bacon, and pickles.
Notes
- Tip 1: For a juicier burger, do not overcook the patties; aim for a slight pink center.
- Tip 2: Leftover patties can be stored in an airtight container in the refrigerator for up to 3 days.
- Tip 3: You can substitute ground turkey or chicken for a leaner option if desired.
- Tip 4: If short on time, prepare the burger balls in advance and refrigerate until ready to cook.
- Tip 5: Pair these sliders with crispy fries or a fresh salad for a complete meal.
📝 Recipe Notes & Tips
- Tip 1: For a juicier burger, do not overcook the patties; aim for a slight pink center.
- Tip 2: Leftover patties can be stored in an airtight container in the refrigerator for up to 3 days.
- Tip 3: You can substitute ground turkey or chicken for a leaner option if desired.
- Tip 4: If short on time, prepare the burger balls in advance and refrigerate until ready to cook.
- Tip 5: Pair these sliders with crispy fries or a fresh salad for a complete meal.