I have been chasing the perfect Creamy Baked Mac and Cheese for what feels like a decade. My first attempt was a tragedy. The sauce split into greasy puddles, the pasta turned to mush, and the top resembled burnt sand. I stood there in my tiny apartment kitchen, holding a spatula covered in orange sludge, wondering what I had done wrong.
That was a Tuesday in late November. The kind of damp, gray day where all you want is a bowl of something warm and forgiving. And instead, I got a casserole dish full of regret. I have ruined this dish more times than I care to count. Grainy sauces. Watery sauces. Sauces that tasted like nothing but flour and regret. But I kept coming back to it, because when Creamy Baked Mac and Cheese works, it is pure magic.
The fix was not one thing. It was a dozen little things. And I am going to share every single one of them with you so you do not have to suffer through a decade of kitchen disasters like I did.
Creamy Baked Mac And Cheese: How This Recipe Came to Be
This recipe did not show up in my life as a gift. I had to wrestle it into existence. I tried every shortcut in the book. Velveeta. Canned cheese sauce. That powdered stuff in a box. Each time, I told myself it would be fine. Each time, I was wrong.
It was not until I asked myself what I actually wanted from a Creamy Baked Mac and Cheese that things started to change. I wanted the sauce to cling to the pasta. I wanted it to be rich without being heavy. I wanted a crust that shattered when you tapped it with a fork, not a soggy blanket of crumbs. And I wanted it to reheat without turning into a gluey mess. That took some serious trial and error.
- Real cheese only. Pre-shredded cheese is coated in anti-caking agents like potato starch and cellulose. Those powders prevent clumping in the bag, but they also prevent smooth melting. I learned this the hard way after a sauce that looked like cottage cheese.
- Whole milk, no substitutes. Skim milk makes a thin, sad sauce. Two percent is better but still not enough fat to carry the cheese. Whole milk gives the sauce body and a velvety texture that lower-fat options simply cannot match.
- A proper roux. I used to dump flour into cold milk and hope for the best. That is not cooking. That is chaos. Taking the time to cook the flour in butter until it smells nutty and toasty makes all the difference between a sauce that is silky and one that tastes like uncooked paste.
- Gruyère is non-negotiable. I love cheddar as much as the next person, but cheddar alone produces a greasy, grainy sauce. Gruyère melts like a dream. It adds a nutty, slightly sweet flavor that cheddar cannot provide on its own.
- Patience at every step. This is the hardest lesson. I wanted to rush. I wanted to dump everything together and shove it in the oven. But Creamy Baked Mac and Cheese rewards slow, deliberate action. Warm the milk. Whisk constantly. Let the sauce thicken properly. That patience pays off in the first bite.
What I Use and Why
Let me walk you through my equipment because the tools matter more than you might think. I use a heavy-bottomed Dutch oven for the sauce. The even heat distribution prevents scorching, which was a recurring problem when I used a thin saucepan. I also keep a microplane handy for grating fresh nutmeg into the sauce. It is a tiny detail, but that hint of warmth changes everything.
For the baking dish, a standard 9x13 glass or ceramic works perfectly. Metal pans conduct heat faster and can overcook the edges before the middle is hot. I learned that one the expensive way after serving a dish that was burnt on the ends and cold in the center.
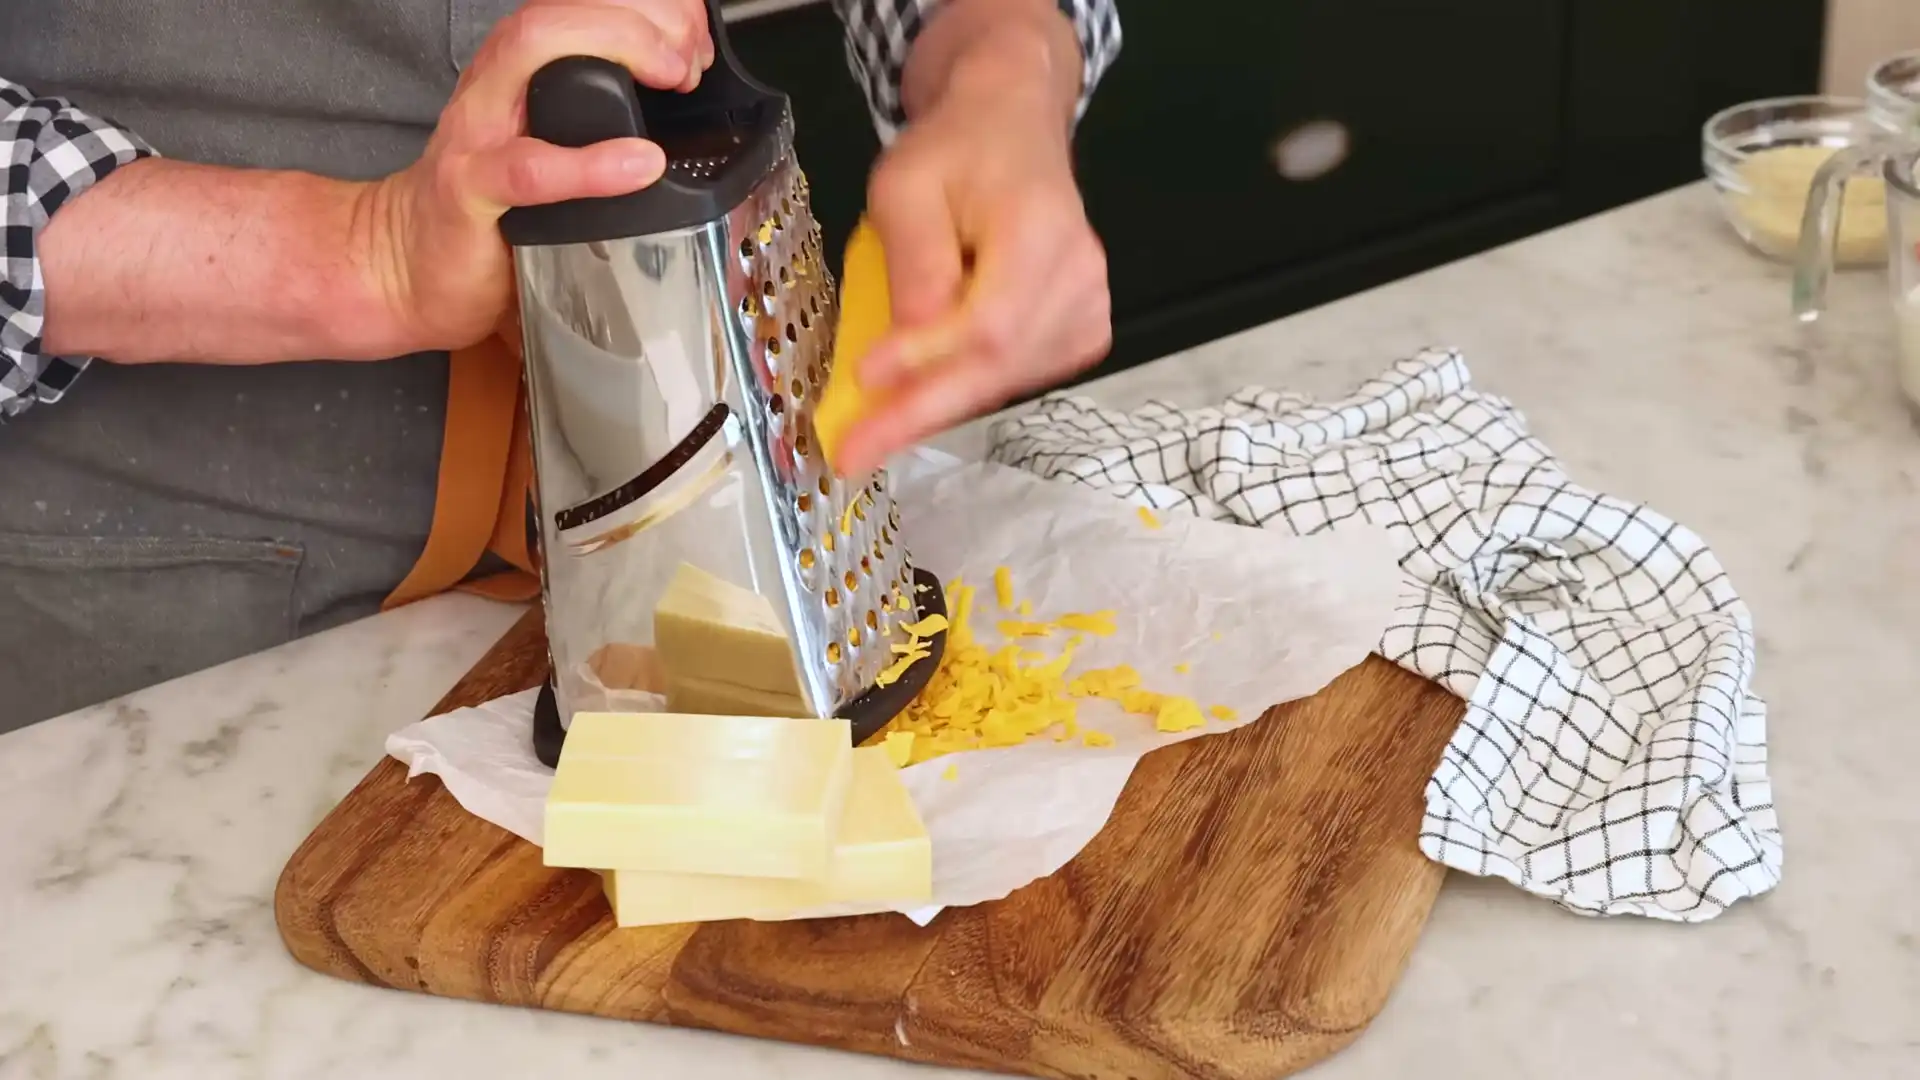
As for substitutions, here is what I have found. If you cannot find Gruyère, try Fontina or even a good quality Gouda. Both melt beautifully and add their own character. For the cheddar, buy a block and shred it yourself. I cannot stress this enough. It takes five extra minutes and saves you from the grainy sauce nightmare. If you want to skip the panko, crushed Ritz crackers or even crushed potato chips work in a pinch. I once used crushed cheese crackers in a moment of desperation and it was honestly fantastic.
Kitchen Time
The process is straightforward once you break it down. Start by boiling your pasta until it is just shy of fully cooked. Al dente is the goal because the pasta will continue cooking in the oven. Overcook it now and you end up with mushy noodles later.
While the pasta boils, warm your milk in a separate saucepan or in the microwave. Cold milk will shock your roux and create lumps. I heat mine until it is warm to the touch, about two minutes in the microwave. Meanwhile, melt your butter in the Dutch oven and whisk in the flour. Let that cook for exactly one minute, stirring constantly. It should smell like toasted biscuits, not raw flour.
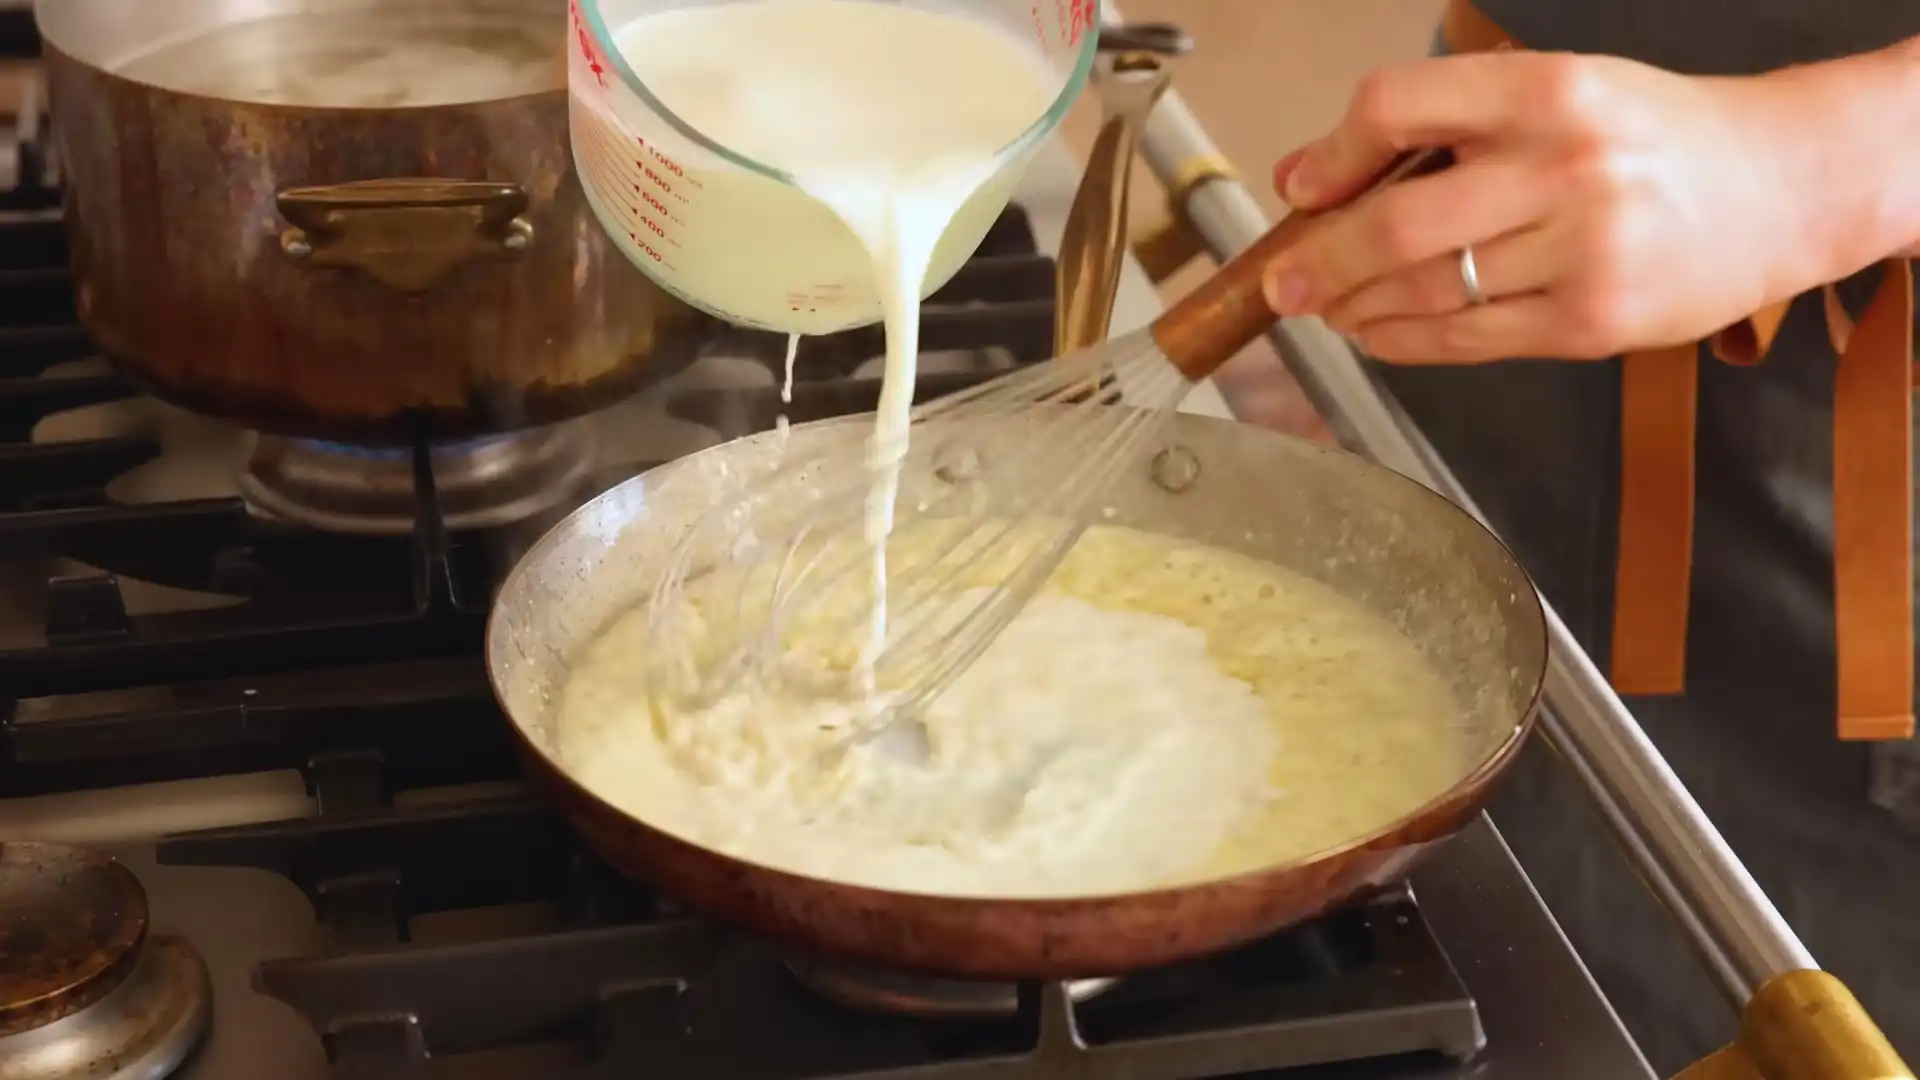
Now comes the part where I ruined countless batches. You pour the warm milk into the roux slowly, whisking the entire time. I am talking a steady stream, not a flood. If you dump it all at once, you will get lumps. I whisk for a solid five to seven minutes until the sauce coats the back of a spoon and does not drip off immediately. That is the moment of truth.
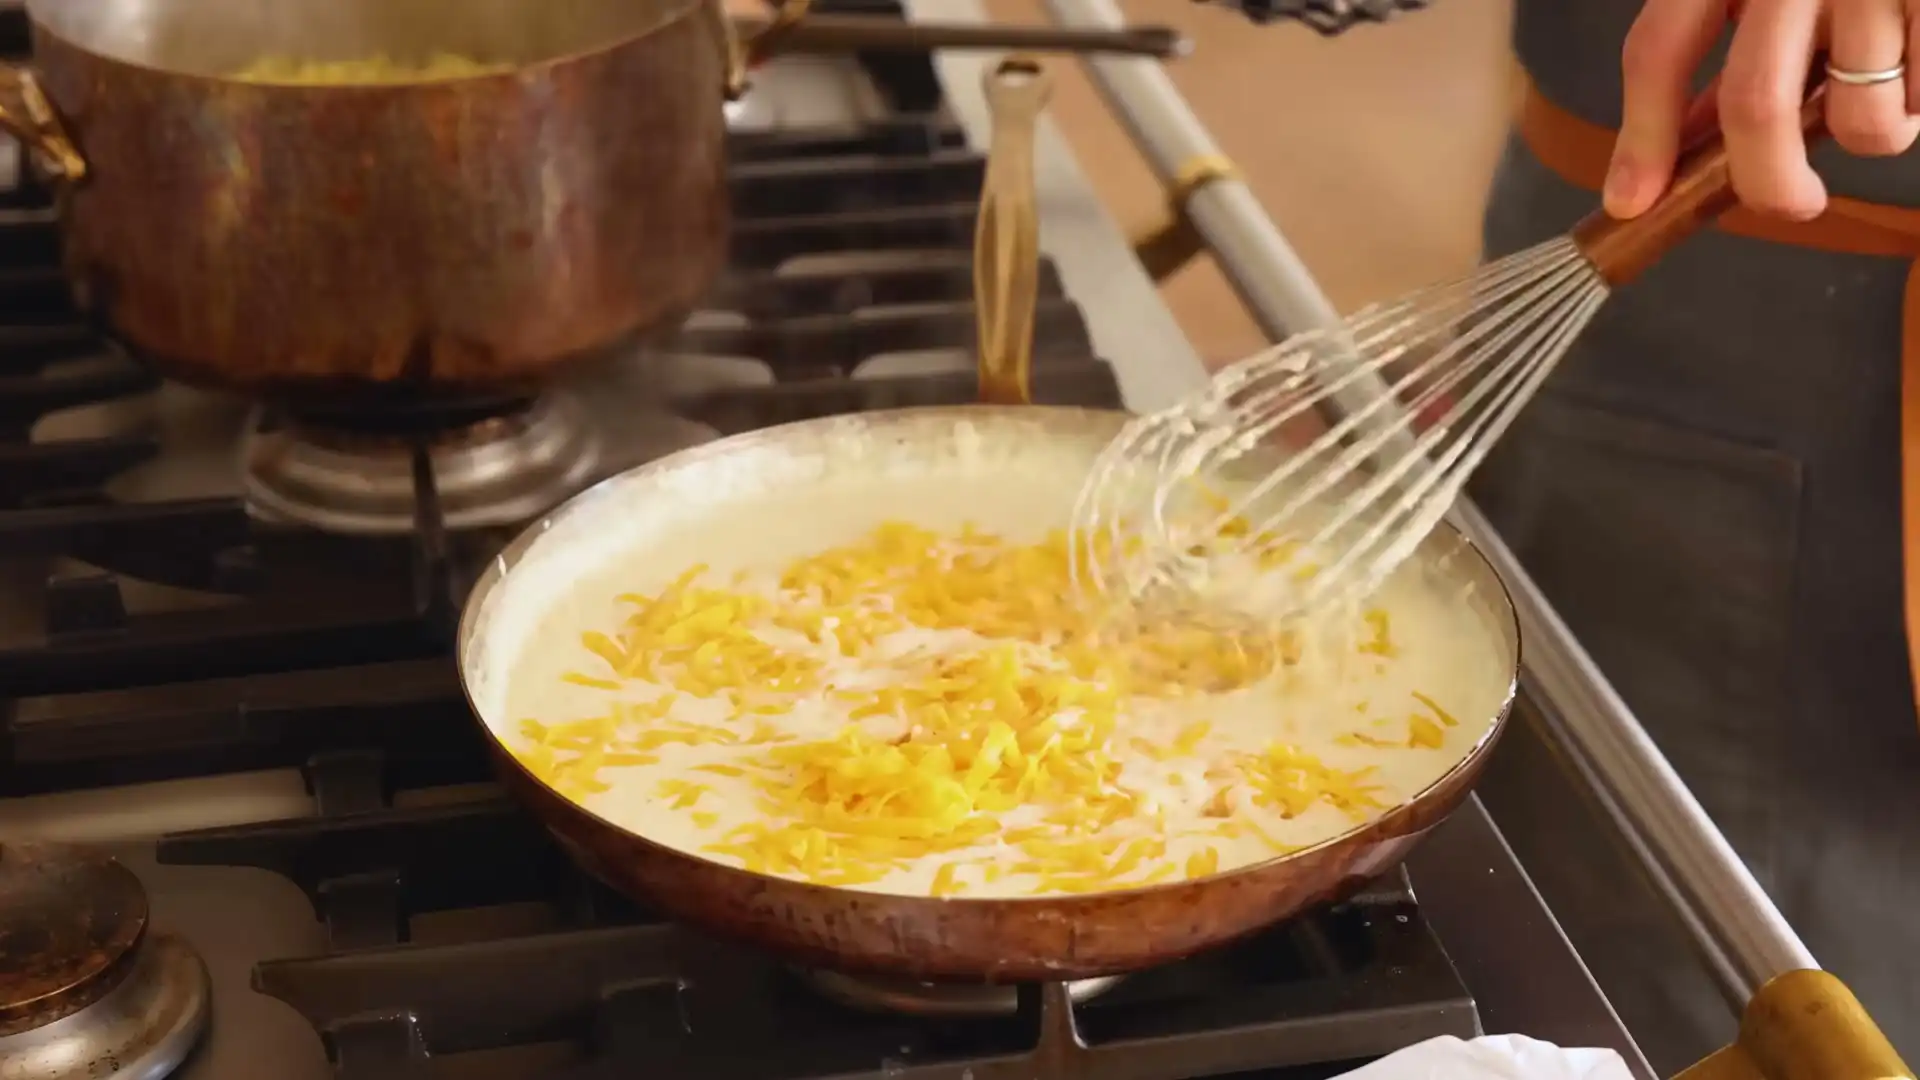
Off the heat, stir in your shredded cheeses. Do not turn the burner back on. The residual heat is enough to melt everything smoothly. Add your seasonings, fold in the cooked pasta, and pour the whole thing into your greased baking dish. Top with buttered panko and bake at 375°F for twenty to twenty-five minutes. Let it rest for ten minutes after it comes out. I know the wait is torture, but that rest time is what allows the sauce to set into something scoopable instead of soupy.
How This Recipe Found Me
The breakthrough came during a rainy Sunday in March. I had been avoiding Creamy Baked Mac and Cheese for months after my last failure. A friend was coming over for dinner and specifically requested it. I could not say no. So I pulled out every note I had scribbled over the years, every failed attempt documented in the margins of cookbooks, and I took a deep breath.
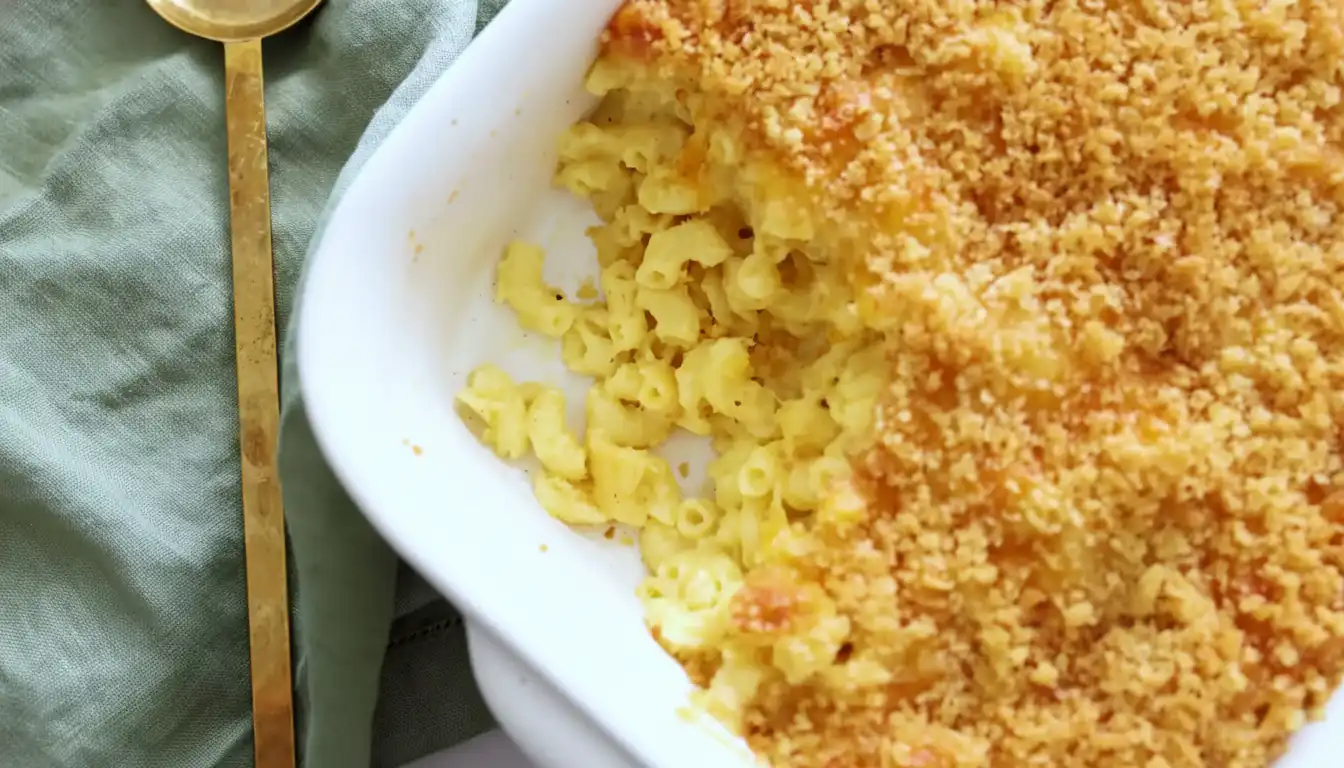
I decided to follow every rule I had broken before. I warmed the milk. I whisked with religious dedication. I used the expensive cheese. And when I pulled that dish out of the oven, something was different. The top was golden and puffed in places. The sauce bubbled lazily around the edges. I let it rest, trying not to hover. When I finally scooped out a serving, the spoon met resistance and then gave way to a creamy, silky interior. No graininess. No grease puddle. Just perfect, velvety Creamy Baked Mac and Cheese.
My friend ate three servings. I sat there in disbelief. All those years of failure, and it came down to a few simple changes that I had been too stubborn to make. I have made this recipe at least twenty times since that rainy Sunday. It has never failed me once.
When Things Don't Work
I want to be honest with you. Even with this recipe, things can go sideways. The first time I made it for a holiday gathering, I got distracted and let the roux cook for too long. It turned dark brown and the sauce tasted slightly bitter. I scrapped it and started over. That hurt. But it taught me to set a timer for the roux and stick to it.
Another time, I used a sharp cheddar that was too aged. The sauce came out gritty because the cheese had lost too much moisture. Young cheddar melts better. Save the extra sharp blocks for a cheese board, not for Creamy Baked Mac and Cheese.
And once, I forgot the salt entirely. The dish was edible but flat. Lifeless. Salt is what makes the cheese taste like more of itself. Do not skip it. Do not be shy with it. Taste your sauce before you add the pasta and adjust the seasoning. That is your last chance to fix it before it goes into the oven.
My Go-To Sides
I rarely serve this dish alone. It is rich and filling, so I like to balance it with something bright or fresh. A simple green salad with a sharp vinaigrette cuts through the creaminess perfectly. I use a mix of arugula and spinach, some shaved red onion, and a dressing heavy on the lemon juice and Dijon mustard.
Roasted broccoli is another favorite. I toss the florets with olive oil and salt, roast them at 400°F until the edges char, and squeeze a little lemon over the top. The bitterness of the charred broccoli plays beautifully against the rich cheese sauce.
If I want something heartier, I serve it alongside pan-seared chicken thighs with crispy skin. The savory crunch of the chicken skin and the creamy pasta is a combination I could eat every single week without getting tired of it.
My Best Advice
Here is the counterintuitive thing I learned. The sauce will look too thin when you pour it into the baking dish. Do not panic. Do not add more cheese. Do not add more flour. That thin sauce will thicken as it bakes and even more as it rests. If you thicken it too much on the stovetop, the baked version will come out stiff and paste-like.
Trust the process. Trust the ratios. I have included specific measurements for a reason. Every time I tried to eyeball it or adjust it on the fly, I ended up disappointed. Follow the recipe exactly the first time. Then tweak it once you understand how the sauce behaves.
One more thing. Do not skip the dry mustard powder. It does not make the dish taste like mustard. It deepens the cheese flavor in a way that is hard to describe. It works like a flavor enhancer, similar to how a pinch of salt makes chocolate taste more chocolatey. Add it. You will not regret it.
Remix Options
Once you have the base down, the variations are endless. Here are the ones I come back to most often.
- Lobster mac. Fold in chunks of cooked lobster meat right before baking. I did this for New Year's Eve one year and it felt impossibly fancy for a dish that starts with elbow macaroni and butter.
- Spicy jalapeño popper. Stir in diced pickled jalapeños, crumbled cooked bacon, and a layer of cream cheese dolloped into the sauce before baking. Top with extra panko. The heat and tang cut through the richness.
- Truffle version. Drizzle a little truffle oil over the finished dish just before serving, or stir finely shaved truffle into the cheese sauce if you are feeling luxurious. I do this maybe once a year as a special treat, usually on a cold January night when I need maximum comfort.
❤️ I once made this recipe for my grandmother, who had not been eating well for months. She finished her whole bowl and asked for the recipe. I wrote it out by hand on a notecard. She keeps it taped to the inside of her kitchen cabinet. That is the kind of power a good Creamy Baked Mac and Cheese holds.
What You're Wondering
Can I use pre-shredded cheese if I am in a hurry?
You can, but I strongly advise against it. The anti-caking agents in pre-shredded cheese prevent the sauce from becoming silky. You will end up with a slightly grainy texture. If you are truly short on time, buy block cheese and use the shredding disc on your food processor. It takes thirty seconds and saves the texture of your sauce.
Can I make this Creamy Baked Mac and Cheese ahead of time?
Yes, you can assemble the dish up to twenty-four hours in advance. Do not add the breadcrumb topping until right before baking. Cover the dish tightly with foil and refrigerate. When you are ready to bake, add the panko topping and increase the baking time by five to ten minutes because the dish will start cold from the fridge.
Why did my sauce turn out grainy?
Grainy sauce usually means the cheese was overheated or the cheese was too aged. Always remove the pot from the heat before stirring in the shredded cheese. Let the residual warmth do the work. If you keep the burner on, the cheese proteins tighten up and the sauce turns gritty. Also, avoid using pre-shredded cheese as mentioned above.
Can I freeze this Creamy Baked Mac and Cheese?
You can freeze it, but the texture will change slightly. The sauce can become a bit grainy after thawing and reheating. If you do freeze it, assemble the dish without the breadcrumb topping, wrap it tightly in plastic wrap and then foil, and freeze for up to three months. Thaw overnight in the refrigerator, add the panko topping, and bake as directed. A splash of warm milk stirred in after reheating can help restore some creaminess.
Frequently Asked Questions
What types of cheese are best for creamy baked mac and cheese?
A combination of cheeses often works best for a rich flavor and creamy texture. Cheddar is a popular choice, but adding cheeses like Gruyère or mozzarella can elevate the dish with added creaminess and depth.
Can I make creamy baked mac and cheese ahead of time?
Yes, you can prepare creamy baked mac and cheese in advance. Simply assemble the dish, cover it, and refrigerate; then bake it when you're ready to serve, possibly adding a few extra minutes to the cooking time.
What can I add to enhance my creamy baked mac and cheese?
There are many delicious add-ins to consider, such as cooked bacon, sautéed vegetables, or different spices like paprika or mustard powder. Topping it with breadcrumbs or crumbled cheese before baking can also add a delightful crunch.
Creamy Baked Mac and Cheese
Equipment
- Large pot (for pasta)
- Colander
- large saucepan or Dutch oven
- Whisk
- 9x13-inch baking dish
- Small bowl
- measuring cups and spoons
Ingredients
- ═══ FOR THE PASTA AND CHEESE SAUCE ═══
- 1 lb elbow macaroni
- ½ cup unsalted butter (divided, 6 tablespoon for sauce)
- ½ cup all-purpose flour
- 4 cups whole milk (warmed)
- 2 cups sharp cheddar cheese (shredded)
- 1 cup Gruyère cheese (shredded)
- 1 teaspoon dry mustard powder
- ½ teaspoon smoked paprika
- 1 teaspoon salt (or to taste)
- ½ teaspoon black pepper (freshly ground)
- ═══ FOR THE TOPPING ═══
- remaining 2 tablespoon unsalted butter
- 1 cup panko breadcrumbs
Instructions
- Preheat the oven to 375°F (190°C) and grease a 9x13 inch baking dish. Cook the elbow macaroni according to package directions until al dente, then drain well and set aside.
- In a large saucepan or Dutch oven, melt 6 tablespoons of butter over medium heat. Whisk in the flour and cook for one minute, stirring constantly, to create a smooth roux.
- Gradually pour in the warm milk while whisking continuously to prevent lumps. Continue cooking, stirring frequently, until the sauce thickens enough to coat the back of a spoon, about 5-7 minutes.
- Remove the saucepan from the heat and stir in the shredded cheddar and Gruyère cheeses until fully melted and the sauce is smooth. Season with salt, pepper, dry mustard powder, and smoked paprika.
- Add the cooked macaroni to the cheese sauce and stir until everything is well combined. Pour the mixture into the prepared baking dish and spread into an even layer.
- In a small bowl, melt the remaining 2 tablespoons of butter. Add the panko breadcrumbs and toss to coat. Sprinkle the buttered breadcrumbs evenly over the top of the macaroni and cheese.
- Bake for 20-25 minutes, or until the sauce is bubbly and the topping is golden brown and crispy. Let the mac and cheese rest for 10 minutes before serving to allow the sauce to set.
Notes
- Tip 1: For a richer flavor, use a combination of cheddar, Gruyère, and a touch of Parmesan. Avoid pre-shredded cheese as it contains anti-caking agents that may affect smoothness.
- Tip 2: Leftover mac and cheese can be stored in an airtight container in the refrigerator for up to 4 days. Reheat in the oven or microwave, adding a splash of milk to restore creaminess.
- Tip 3: To make this dish gluten-free, use gluten-free pasta and substitute the all-purpose flour with a 1-to-1 gluten-free flour blend. Use gluten-free panko or crushed rice crackers for the topping.
- Tip 4: Save time by preparing the cheese sauce while the pasta cooks. You can also assemble the dish up to a day ahead; refrigerate and add 5-10 minutes to the baking time.
- Tip 5: This mac and cheese pairs wonderfully with a side of roasted vegetables, a crisp green salad, or grilled chicken. For a touch of sweetness, add a pinch of nutmeg to the cheese sauce.
📝 Recipe Notes & Tips
- Tip 1: For a richer flavor, use a combination of cheddar, Gruyère, and a touch of Parmesan. Avoid pre-shredded cheese as it contains anti-caking agents that may affect smoothness.
- Tip 2: Leftover mac and cheese can be stored in an airtight container in the refrigerator for up to 4 days. Reheat in the oven or microwave, adding a splash of milk to restore creaminess.
- Tip 3: To make this dish gluten-free, use gluten-free pasta and substitute the all-purpose flour with a 1-to-1 gluten-free flour blend. Use gluten-free panko or crushed rice crackers for the topping.
- Tip 4: Save time by preparing the cheese sauce while the pasta cooks. You can also assemble the dish up to a day ahead; refrigerate and add 5-10 minutes to the baking time.
- Tip 5: This mac and cheese pairs wonderfully with a side of roasted vegetables, a crisp green salad, or grilled chicken. For a touch of sweetness, add a pinch of nutmeg to the cheese sauce.