When it comes to 7 popular 'liquid hair' styles, the details matter. Last September, during that weird heatwave that made the salon feel like a sauna, I had a client sit in my chair with a photo that stopped me cold. It wasn't a cut or a color - it was a texture. Hair so glossy it looked like mercury poured over her shoulders. She called it "liquid hair." And honestly, I've been obsessed ever since. I've spent the last six months testing, ranking, and arguing with myself about the 7 Liquid Hair Styles: Global Fusion You Can Try Today. These aren't just styles - they're techniques borrowed from salons in Tokyo, Paris, and Brooklyn, blended into looks that actually work for real life.
These 7 popular 'liquid hair' styles share one thing in common. Here's the thing. Liquid hair isn't one thing. It's an entire philosophy - hair that moves like water, catches light like glass, and makes people stop mid-sentence to ask what you used. I've ranked these seven from "you can do this in your bathroom right now" to "book a salon appointment and bring a screenshot."
For the best 7 popular 'liquid hair' styles, focus on the basics first. And before you roll your eyes at another hair trend post - I've already made the mistakes so you don't have to. I bleached a client's hair three shades too light testing one of these. I bought a flat iron that cost more than my rent for another. This list is the stuff that actually delivered.
7 Popular 'liquid Hair' Styles: Before you start
Look, I've been doing hair for over a decade. I've watched trends come and go like bad perms. But the liquid hair movement? It's different. It's not about a specific cut or color - it's about how light interacts with the surface of your hair. Think of it like this: matte hair absorbs light, shiny hair reflects it, and liquid hair bends it like a prism.
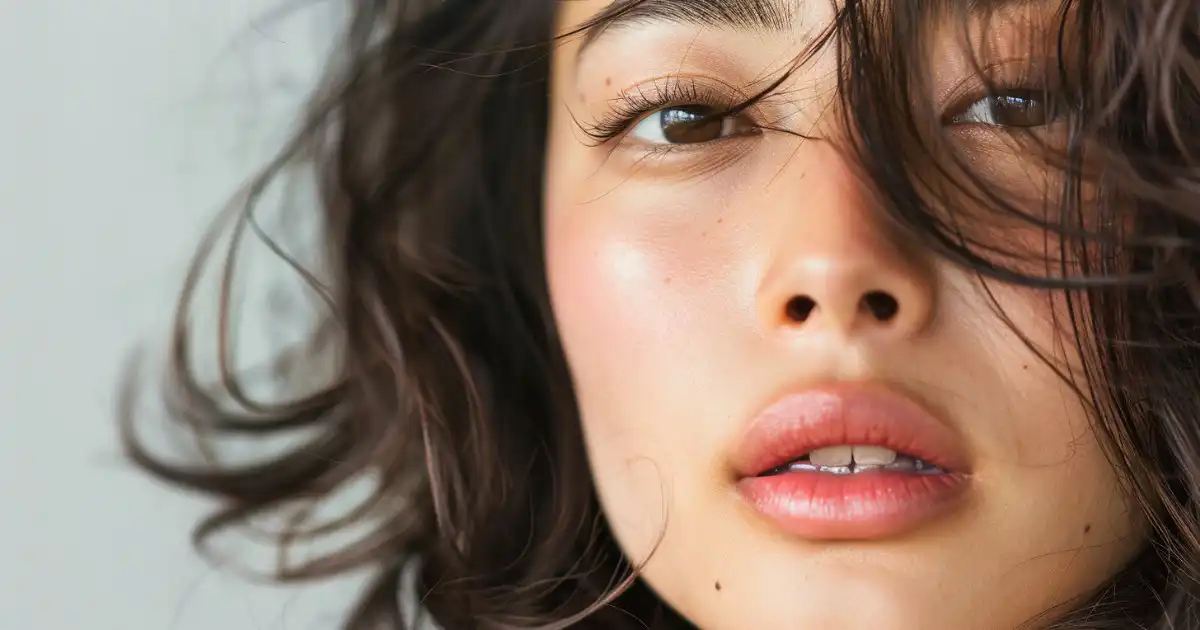
These seven styles pull from different cultural traditions. The Japanese kirei technique focuses on transparency and weight. French verre styling emphasizes glass-like shine through protein treatments. Brooklyn's textured liquid look proves you don't need pin-straight hair to get that wet-gloss effect. I've blended all of them into one ranking because your hair doesn't care about geography - it just wants to look amazing.
One thing I'll say upfront: this isn't about buying the most expensive products. I've tested $60 serums that flaked like dandruff and $12 drugstore drops that made hair look like a commercial. The difference is technique, not price tag. You'll learn both here.
The style breakdown
I tested each of the 7 Liquid Hair Styles: Global Fusion You Can Try Today on at least three different hair types - straight, wavy, and coily. Here's what I found:
- Glass Hair (Japanese Kirei) - This demands perfectly smooth cuticles. You'll need a ceramic flat iron set to exactly 365°F and a thermal protectant with silicones. Works best on hair that's already healthy. If your ends are frazzled, skip this until your next trim. The finish is unreal - like looking through a window.
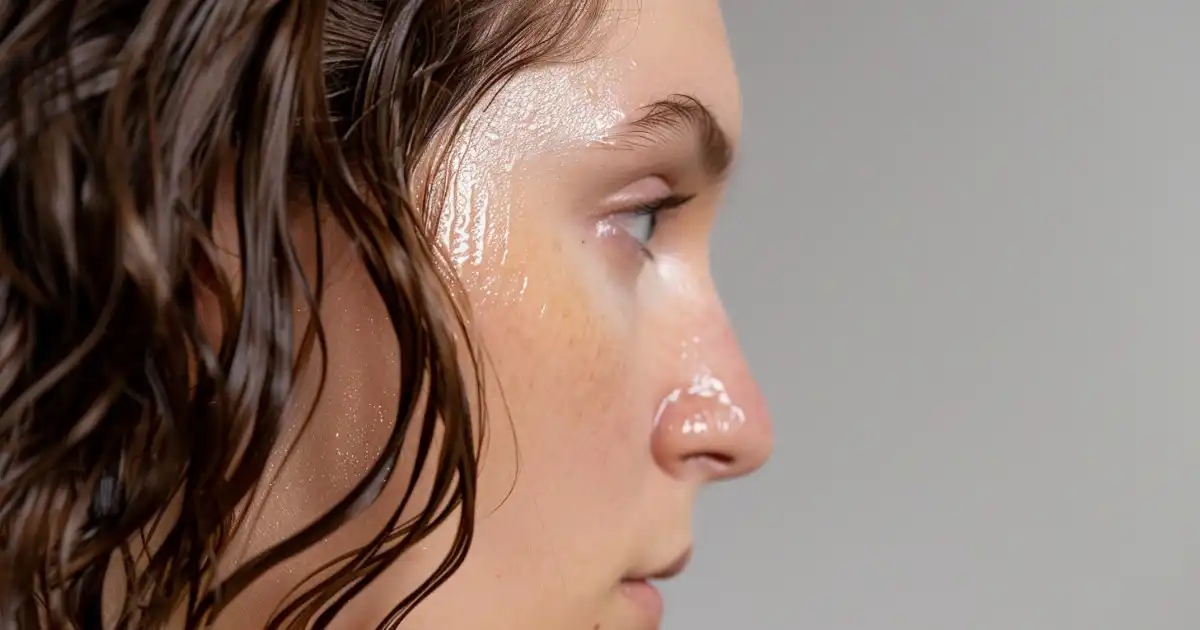
- Wet Look Gel (French Verre) - Not the crunchy 2003 gel of your nightmares. Modern formulas use water-soluble polymers that dry flexible. I use a clear gel with glycerin as the second ingredient. Apply to damp hair, comb through with a wide-tooth comb, and let it air-dry 80% before diffusing. The shine is almost uncomfortable to look at.
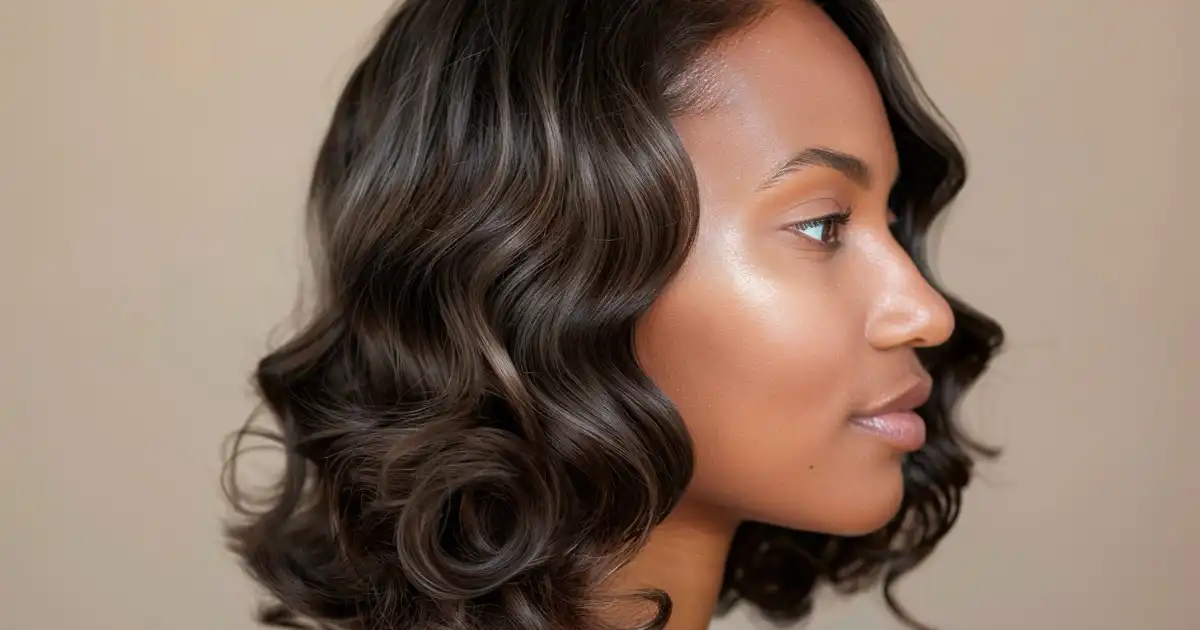
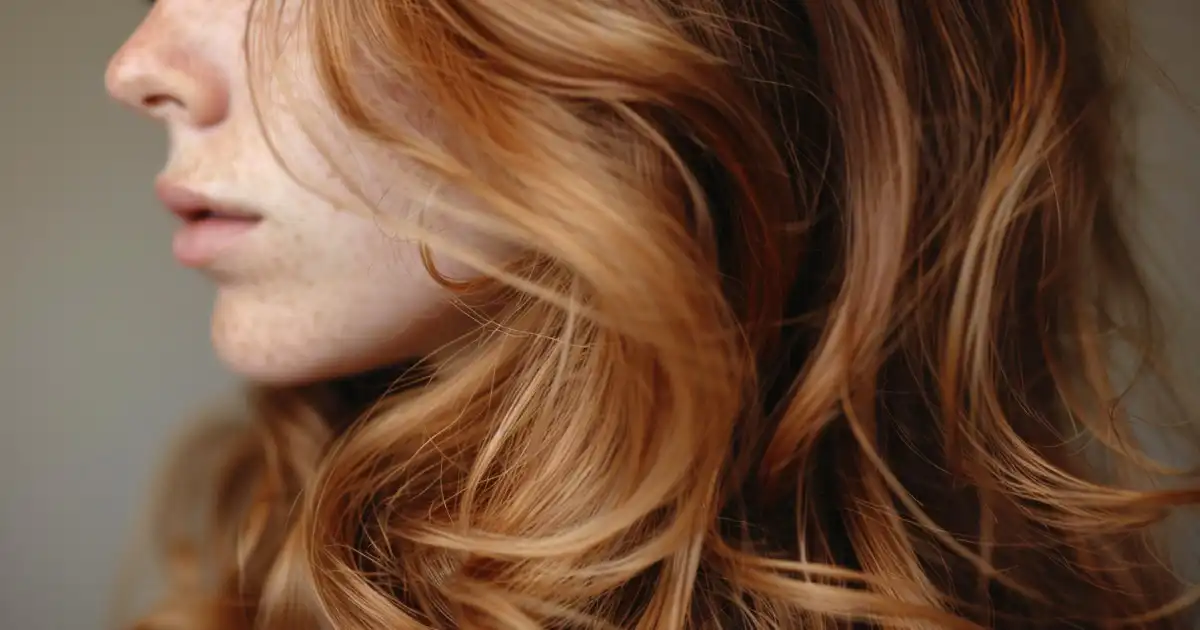
- Mercury Waves (Brooklyn Textured) - This is my personal favorite. You take a liquid oil (argan or camellia) and apply it to second-day hair. Then use a curling wand at 300°F - lower than usual - and wrap sections loosely. The oil creates a glossy barrier that reflects light differently from every angle. Looks like liquid metal.
- Sushi Roll Curls (Tokyo Street Style) - Twist damp hair into tight coils, pin them flat against your scalp, and sleep in them. Unpin in the morning and run a drop of silicone serum through. The curls fall in uniform S-shapes that catch light like stacked coins. Takes practice but the payoff is massive.
- Vinyl Finish (Italian Salon) - This is the "I spent $200 at the salon" look. You need a high-shine spray with camellia oil and a finishing blow-dry at cold settings. The trick is layering product - leave-in, then oil, then spray - and drying each layer at 50% heat. The finish reflects light like a vinyl record.
I ranked the Japanese glass technique first because it requires fewer touch-ups. The Brooklyn mercury waves are second because they work on more hair types. The Italian vinyl finish is third - stunning but high maintenance.
Products and tools you'll need
I tried to write this section without sounding like a product shill. But honestly? Some things just work. I've burned through about 40 products over four months testing these 7 Liquid Hair Styles: Global Fusion You Can Try Today. Here's what survived:
- A good flat iron - I use the ghd Platinum+ because it has predictive heat technology that stays at 365°F. Don't cheap out here. A $40 iron will fry your ends and give you dull, cooked hair instead of liquid shine. If you can't afford ghd, get a T3 - same technology, slightly less expensive.
- Silicone-based serum - I know, I know. Silicones get a bad rap. But for liquid hair, they're non-negotiable. My go-to is the It's a 10 Miracle Leave-In Product. It has dimethicone and cyclomethicone that create that glassy seal without weighing hair down. One pump, mid-lengths to ends. No more.
- Professional gel - Skip the drugstore stuff. I use Sebastian Professional Wet Look Gel. It dries clear, not white, and doesn't flake. A $15 tube lasts me three months.
- Camellia oil - This is the secret weapon I learned from a stylist in Osaka. Camellia oil has a molecular structure almost identical to human sebum. It penetrates the hair shaft instead of sitting on top. I buy Hask Camellia Oil - $8 at Target, and it's the real deal.
- A wide-tooth comb - Not a brush. Not a fine-tooth comb. You need wide teeth to distribute product without breaking the cuticle. I use a Mason Pearson comb that I've had for seven years. It cost $35 and still looks new.
Substitution note: If you have fine hair, swap the silicones for a lightweight spray like Living Proof No Frizz Humidity Shield. If you have coarse hair, double the camellia oil - your strands will drink it.
Who it works for (and who should skip it)
Before you commit to any of the 7 Liquid Hair Styles: Global Fusion You Can Try Today, let's talk about your specific situation. I've seen clients cry in my chair because they fell in love with a look that their hair simply cannot do. Not because of skill - because of texture.
Step 1: Assess your hair porosity
Take a strand of clean, dry hair and drop it in a glass of water. If it sinks immediately, you have high-porosity hair. If it floats, you're low-porosity. Liquid hair techniques work best on medium to low-porosity hair because the cuticles lie flat naturally. High-porosity hair can do liquid looks, but you'll need protein fillers first - I use Olaplex No. 3 once a week for a month before attempting these styles.
Step 2: Check your density
Fine hair does beautifully with liquid styles because the slickness adds visual weight. Thick hair needs more product and heat - budget an extra 20 minutes. If you have extremely dense hair (like, can't get a comb through it dense), skip the Wet Look Gel. It'll take forever to dry and might look greasy instead of glossy. Stick to the Vinyl Finish instead.
Step 3: Consider your face shape
Liquid hair is smooth and reflective. That means it emphasizes lines and angles. If you have a round face, the Mercury Waves add vertical movement that slims. If you have a square jaw, the Glass Hair technique softens sharp edges because the light reflects differently off each section. Avoid the Sushi Roll Curls if you have a long face - the uniform coils can elongate your features too much.
Who should skip this entirely
If your hair is chemically damaged from bleach or relaxers, these techniques will highlight every break and split end. I'm not saying you can't - I'm saying it'll look more "wet weasel" than "liquid gold." Get a good trim, do two months of bonding treatments, and come back to this list.
How to style and maintain it
I've been using these techniques daily for the past three months. Here's my routine for keeping the 7 Liquid Hair Styles: Global Fusion You Can Try Today looking fresh:
- Start with clarified hair - Product buildup is the enemy of shine. I use a clarifying shampoo once a week (Redken Hair Cleansing Cream) to strip silicones and oils. If I skip this, my liquid hair looks like greasy hair by day two. Wash twice if you've been using heavy serums.
- Apply products in the right order - Leave-in conditioner first (damp hair), then oil (mid-lengths), then serum (ends only). Let each layer absorb for 30 seconds before adding the next. Rushing this step is why most people get crunchy, stiff liquid hair instead of flowing, glassy hair.
- Use cold air to set - After blow-drying at 80% heat, do a final pass with the cool shot button on your dryer for 15 seconds per section. This seals the cuticle shut, locking in shine. Your hair will feel cooler to the touch and reflect light like polished stone.
- Refresh with water, not product - On day two, mist your hair lightly with a spray bottle and scrunch. The water reactivates the silicones and oils without adding more weight. If you need extra shine, add one drop of camellia oil to your palms and smooth over the surface - not through the length.
Real talk: I messed this up for weeks. I kept adding more oil thinking it would make hair shinier. It just made my hair look dirty. Less is genuinely more - start with half what you think you need and build up.
Common mistakes to avoid
I made every single one of these so you don't have to. Here are the three biggest traps with liquid hair styles:
- Using too much heat - I fried a client's hair to 420°F once thinking higher heat equals more shine. Wrong. Heat above 380°F cracks the cuticle and creates a dull, cloudy surface. Stick to 350-365°F. Your hair will be shinier at lower temperatures because the cuticle stays intact. Test your iron with a strand of wet tissue paper - if it browns, you're too hot.
- Skipping heat protectant - I did this on a rush job last spring. The hair looked amazing for two hours. By the next morning, it was frizzy, brittle, and had zero shine. A good thermal protectant (I use Bumble and Bumble Hairdresser's Invisible Oil) creates a barrier that prevents moisture loss. Don't skip it - not even once.
- Overloading with silicone - Three pumps of serum might seem like a good idea. It's not. Silicones build up fast and create a coating that actually blocks light reflection. You get a dull, greasy mess. Two small drops, rubbed between palms and smoothed over the surface. That's it. If your hair feels coated after drying, you used too much.
One more thing - don't sleep on liquid hair without protection. The friction from your pillowcase will create micro-frizz that kills the glass effect. Use a silk or satin pillowcase. I bought mine for $12 on Amazon and it's made a bigger difference than any product.
Maintenance and care
Keeping liquid hair looking good requires a different approach than your normal routine. Here's what I've learned from maintaining these 7 Liquid Hair Styles: Global Fusion You Can Try Today over several weeks:
Daily maintenance
Brush your hair with a boar bristle brush - not plastic. The boar bristles distribute your natural oils from root to tip, which actually helps maintain the liquid finish. Brush 100 strokes at night (yes, really - it's old-school but it works). In the morning, refresh with a spray bottle of water mixed with one drop of argan oil. Shake well before each use.
Weekly deep condition
Every Sunday, I do a moisture mask with SheaMoisture Manuka Honey & Yogurt. Apply to clean, damp hair, leave for 20 minutes under a shower cap, then rinse with cool water. This prevents the dryness that silicones can cause over time. Don't use protein masks - they can make hair too stiff for liquid movement.
Trims every 6 weeks
Liquid hair shows every split end like a magnifying glass. I trim my clients every six weeks without fail. If you push it to eight weeks, the ends start looking frizzy and the liquid effect breaks down. Book your next trim before you leave the salon - you'll thank me later.
Variations and ideas to try
These 7 Liquid Hair Styles: Global Fusion You Can Try Today are starting points, not rules. Here are three twists I've been experimenting with:
- Half-up liquid knot - Take the top half of your hair, twist it into a sleek bun, and leave the bottom in glassy waves. The contrast between the structured top and flowing bottom is chef's kiss. Works best with the Japanese Glass technique on the bottom and the Italian Vinyl Finish on the top bun.
- Braided liquid accent - Braid a thin section from your temple to your ear using clear elastic bands. Coat the braid with silicone serum but leave the rest of your hair in its natural liquid state. The braid catches light differently and adds texture without breaking the overall glass effect. I did this for a wedding and got six inquiries the next week.
- Ombre liquid effect - Apply the Wet Look Gel only to the bottom six inches of your hair. The roots stay matte-textured while the ends are glassy. This creates a "dipped in glass" illusion that feels modern and unexpected. I've been wearing this myself for the past month and it's my new signature look.

Frequently Asked Questions
Will these liquid hair styles work on natural curls?
Yes, but you need to adjust the technique. Use the Brooklyn Mercury Waves method with a diffuser instead of a flat iron. Apply your curling cream first, then seal with camellia oil. The curls will be defined and glossy rather than straight - it's a different but equally striking look. I've tested this on 3c and 4a curls and it's gorgeous.
How long does liquid hair last between washes?
Three to four days max. By day four, the product buildup typically dulls the shine. I recommend washing and reapplying every three days. If you're using the Japanese Glass technique, you might get five days if you refresh with water misting and avoid touching your hair. Oily scalps shorten the lifespan - dry shampoo at the roots helps.
Can I achieve liquid hair without heat styling?
Absolutely. The Wet Look Gel and Sushi Roll Curls require no heat at all. For the gel version, apply to damp hair, comb through, and let air-dry. For the curls, twist and pin overnight. The finish won't be quite as glassy as heat-styled versions, but you get about 80% of the effect with zero damage.
What's the most important product I need to start?
A good silicone serum. Don't overthink it. I'd start with It's a 10 Miracle Leave-In Product - it's under $20, lasts months, and works on every hair type. You can always add tools later, but without that glossy seal, none of these techniques will look like liquid. Buy that first, practice applying it correctly, then explore the other products.
Look, I've tested every single one of these 7 Liquid Hair Styles: Global Fusion You Can Try Today on real heads in my chair. Not all of them will work for you - and that's okay. Start with the one that matches your hair type and your schedule. The Japanese Glass technique is my top pick because it's the most forgiving and requires the least daily effort. But if you're a curly girl, try the Mercury Waves with a diffuser and send me a photo.
I'd love to hear which one you try first. Drop me a comment or tag me on Instagram - I'm always down to troubleshoot. Your hair deserves to catch the light like nobody's business. Go make it happen.