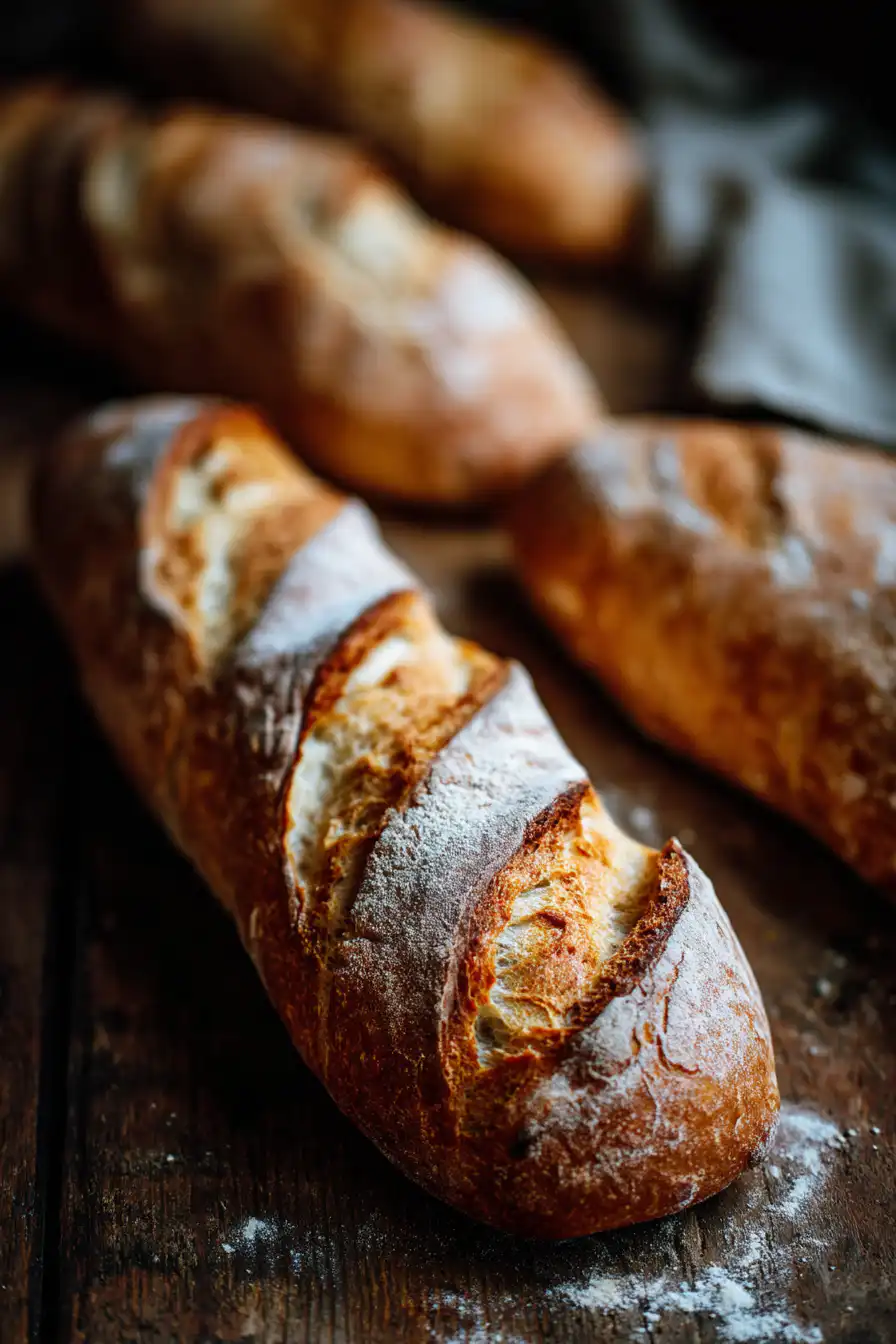
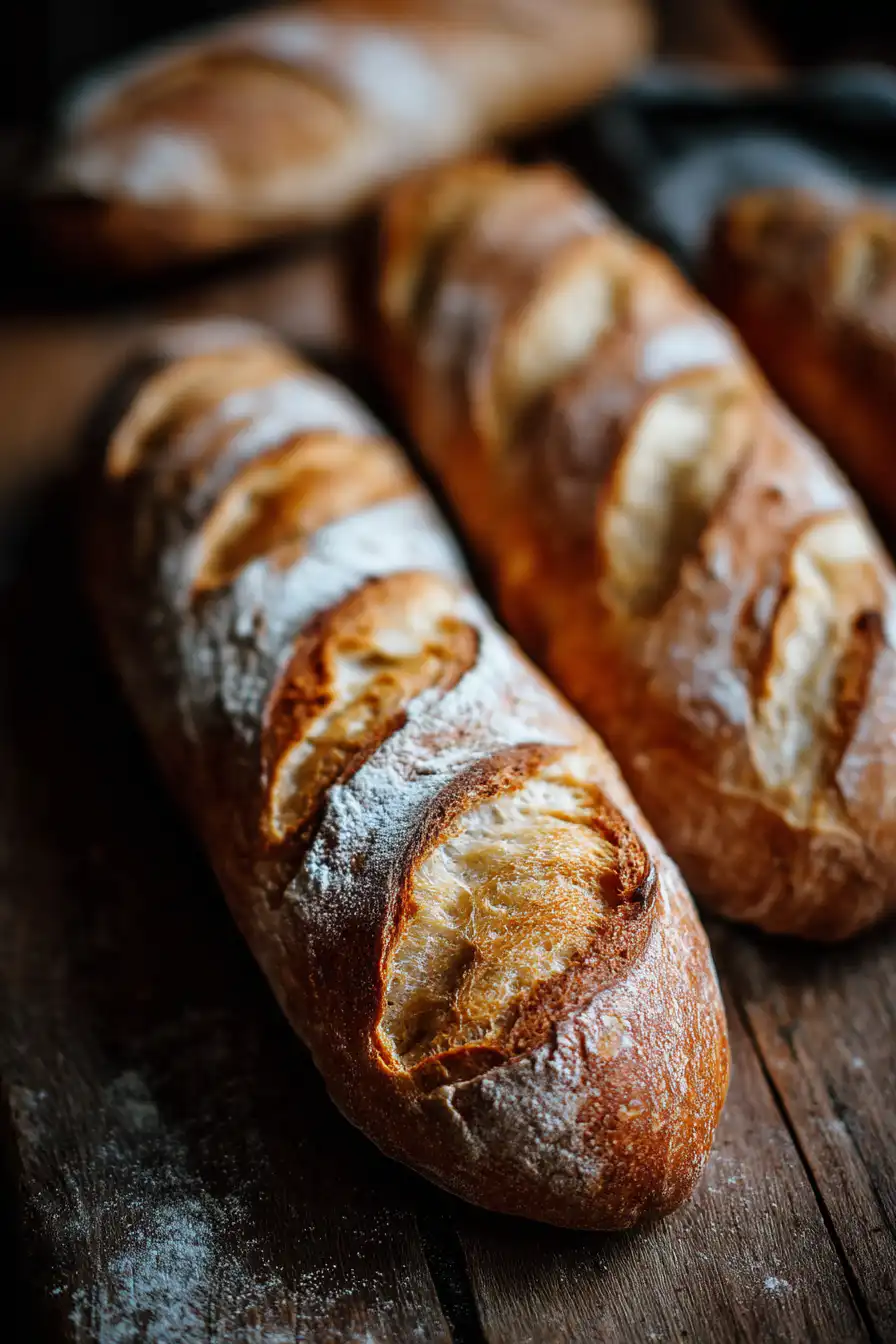
Crusty Chewy French Bread Rolls are a staple in French cooking that many folks love, cuz they offer a special mix of texture and flavor. They show the traditional ways of French baking where good quality ingredients and solid techniques come together to make bread that's both comforting and supremely satisfying. Whether you enjoy them with a meal, for mopping up yummy sauces, or even on their own with a bit of butter spread on top, these rolls have become a must on many dinner tables.
The big appeal of these crusty, chewy bread rolls is how they master a golden, crispy outside with a soft, airy inside. This mix not only makes them great to eat but also shows off the hard work behind each roll. In this ultimate guide, you'll take a little trip through the history of French bread rolls, learning about their origins and how they have changed over time. Plus, we'll share a step-by-step recipe along with some tips and techniques so you can get that perfect crusty-chewy texture in your own kitchen.
Even if you're just starting out in baking or have done it a while, this guide should help inspire and guide you to make your own Crusty Chewy French Bread Rolls. You'll find out what ingredients are the best, what tools you need, and how to steer clear of some common baking mistakes. With these tips, pretty soon you'll be on your way to making this classic French treat at home, filling your kitchen with that irresistible smell of fresh bread.
The History of French Bread Rolls
The history of French bread rolls is long and kinda interesting. Their story goes way back many centuries, starting with the really early days of bread-making in Europe. Even during the Roman Empire, bread was important to people's diets, but it was in the Middle Ages that the French really got good at baking. It was during those times things like the crusty baguette and the country style pain de campagne started to show up.
French bread got better over the years as bakers fine-tuned their skills, moving from heavy, plain breads to the lighter, airier kinds we know today. The famous baguette, which is seen as the face of French bread, only became super popular in the late 19th century. When industrialization began, long fermentation times and special artisan techniques were often replaced by faster, mass-produced ways, which led to the split between store-bought and homemade breads.
Recently, making bread at home has become more popular, giving a big boost to artisan baking. Now, French bread rolls, known for their crusty exterior and chewy inside, are adored not just in France but around the world. They don't only stand for good food but also for a cultural heritage that keeps changing with every baker who takes up the challenge.
Characteristics of Perfect Crusty Chewy French Bread Rolls
For the perfect Crusty Chewy French Bread Roll, a few key things need to be just right. The texture is the most important part; a good roll has a golden, crispy crust but also a soft, light inside. This tricky balance makes eating them really fun, whether you eat them on their own or with another dish.
The flavor in these rolls gets better because of the fermentation process, letting the dough develop deep flavors. The ingredients are super important too; using high-protein flour helps give the dough its strength, and just enough salt not only adds taste but also controls the fermentation. When everything comes together it makes a roll that's not only tasty but also really satisfying.
When you look at a perfect roll, it should be golden-brown outside with a kind of rustic look that shows the care taken in making it. It should all be in a nice even size, too, so they look good on the table. All these features together make eating these bread rolls a true art and a nod to the old-fashioned French baking style.
Why Homemade Bread Rolls Are Worth It
Some people might wonder if it's really worth it to put time into baking your own rolls instead of buying them at the store. The truth is, homemade bread rolls have lots of benefits that go way beyond just convenience.
First, when you bake at home, you get to pick the best ingredients and keep it fresh. Using good quality flour, fresh yeast, and limiting the use of additives can make your rolls much healthier than many store-made ones which sometimes have extra stuff like preservatives.
Baking your own bread is also a lot more customizable. You can play around with different flavors, shapes, and sizes so that each batch fits your taste. Whether you decide on adding herbs, spices, or even trying different types of flour, the options are pretty endless, making the baking process fun and creative.
Plus, the feeling of pulling a batch of yummy, warm rolls out of your oven is totally satisfying. The whole process can be kind of therapeutic, like a break from the stress of everyday life. The smell of fresh bread filling your home can make your meals feel extra special.
Ingredients for Crusty Chewy French Bread Rolls
To make the perfect Crusty Chewy French Bread Rolls, its important to use the right ingredients. Here's a list of what you need:
- High-Protein Flour: Bread flour is best because it has more protein, which helps build that chewy texture. You can use all-purpose flour but the results might not be exactly the same.
- Water: Warm water (around 110°F) helps wake up the yeast. It is really important to get the right temperature since water that's too hot can kill the yeast and too cold can slow everything down.
- Yeast: Active dry yeast is the most common pick for this recipe. You can also use instant yeast but you might need to adjust the proofing time.
- Salt: Salt does more than just add flavor; it also helps manage fermentation and boost the dough's gluten structure for a better texture.
- Optional: A teaspoon of sugar can be added to the yeast mixture to help it foam up quicker.
When you pick your ingredients, try to go for high quality brands that focus on freshness and the natural stuff needed to get a great flavor and texture.
Equipment Needed
Having the right equipment can really help with your baking. Here's a list of tools you need to make crusty chewy French bread rolls:
- Mixing Bowl: You need a big bowl to mix and knead your dough.
- Measuring Cups and Spoons: Getting the measurements right is pretty important for baking.
- Baking Sheets: A strong baking sheet is necessary for putting the rolls on before baking. Using parchment paper makes cleaning up easier.
- Kitchen Scale: If you like being super precise, a kitchen scale is a big help, especially when measuring flour.
- Baking Stone or Cloche: This is optional, but these tools can help mimic a professional setup by holding heat and moisture to create a better crust.
Each tool plays its part in helping you make the perfect bread rolls, so it's a good idea to gather everything beforehand to make the process smoother.
Detailed Recipe for Crusty Chewy French Bread Rolls
Here's a detailed recipe to help you create Crusty Chewy French Bread Rolls at home:
Ingredients
- 4 cups bread flour
- 1 ½ cups warm water (about 110°F)
- 2 teaspoons active dry yeast
- 2 teaspoons salt
- Optional: 1 teaspoon sugar (for helping the yeast get started)
Directions
- Activate Yeast: In a small bowl mix the warm water, yeast, and sugar (if you are using it). Let it sit for 5-10 minutes until it gets bubbly and foamy.
- Mixing: In a large bowl, stir together the bread flour and salt. Slowly add the yeast mixture into the flour and mix till you get a shaggy dough.
- Kneading: Put the dough on a lightly floured surface and knead for about 10 minutes until it gets smooth and stretchy. You can also use a stand mixer with a dough hook if you prefer.
- First Rise: Place the kneaded dough in a greased bowl, cover it with a damp cloth, and let it rise in a warm spot for 1-2 hours or until it doubles in size.
- Shaping: Once risen, punch the dough down to let the air out. Divide it into equal pieces and shape each piece into a roll. Put the rolls on a baking sheet lined with parchment.
- Second Rise: Cover the rolls with a damp cloth once again and let them rise for another 30-45 minutes until they look puffy.
- Scoring: Preheat your oven to 450°F (230°C). Use a sharp knife or a razor to make a shallow cut on the top of each roll.
- Baking: Bake the rolls for 20-25 minutes, or until they turn crusty and golden brown. They should sound a bit hollow when you tap the bottom.
- Cooling: After baking, move the rolls to a wire rack so they can cool completely before you enjoy them.
Tips and Advice
- Hydration Levels: You can tweak the water amount to get the texture you want; a wetter dough might give you a more open crumb.
- Fermentation Time: Letting the dough rise slowly in the fridge overnight can really boost the flavors.
- Storage: Keep any leftover rolls in an airtight container at room temperature for a few days, or freeze them if you wont use them right away.
Common Mistakes When Baking Bread Rolls
Baking bread is super rewarding but can be tricky too. Here are some common mistakes to watch out for:
- Over or Under-Kneading: You need to knead just enough to develop gluten, which holds the roll together. Not kneading enough may make the roll dense, while too much kneading can make it tough.
- Incorrect Ingredient Ratios: Baking is kind of like a science, so you really have to measure ingredients right. Even a small mistake can mess up your results.
- Improper Rising Times: If you rush the rising time, the dough might not develop enough flavor or proper texture. Give it time to rise properly.
- Not Preheating the Oven: Always heat your oven fully before you start baking so that your rolls cook evenly and get that crusty outside.
Creative Variations of French Bread Rolls
Once you get the hang of making the basic Crusty Chewy French Bread Rolls, you might want to try out some fun twists:
- Herbed or Garlic Rolls: Mix in some fresh herbs or minced garlic with the dough for an extra flavor kick.
- Cheese-Filled Rolls: Try adding a bit of cheese inside each roll before you shape them for a melty, gooey treat.
- Whole Grain or Seeded Rolls: Replace some of the flour with whole wheat flour or sprinkle some sesame or poppy seeds on top before baking.
Pairing Suggestions for French Bread Rolls
These rolls can really jazz up a meal. Here are some ideas on what to pair them with:
- Ideal Soups and Stews: They go great with hearty soups like French onion or chicken noodle, making for a comforting meal.
- Dips and Spreads: Spread a little butter, hummus, or even a tapenade on them for a tasty appetizer.
- Complementary Cheeses and Wines: Try pairing your rolls with soft cheeses like Brie or Camembert and a glass of red wine for a nice French feel.
FAQs about Crusty Chewy French Bread Rolls
Here are some questions that people often ask that might help you out with your bread baking:
- What is the secret to crusty bread? Using a super hot oven, adding steam in the first few minutes of baking, and having a dough with the right amount of water are pretty important for that crusty finish.
- How do I get a chewy texture in bread rolls? Use bread flour, knead well and let the dough ferment for enough time. This helps the bread develop its strength and chewiness.
- Can I make this recipe without a stand mixer? Yes, you absolutely can mix and knead the dough by hand. It might just need a little more time and elbow grease.
- What should I do if my bread doesn't rise? First, check to make sure your yeast isnt expired and that the water isn't too hot or too cold for it to work properly.
- How do I store leftover rolls? Store baked rolls in an airtight container at room temperature for a few days, or freeze them if you need to keep them longer.
Conclusion
Crusty Chewy French Bread Rolls are not just a really tasty treat but also show the love and skill that goes into baking. With all the tips and the recipe in this guide, you should feel ready to start your own bread-making adventure. Have fun with it, try out new variations, and enjoy the cozy smell of freshly baked bread filling your home.

Crusty Chewy French Bread Rolls
Equipment
- 1 large mixing bowl
- 1 whisk
- 1 measuring cups and spoons
- 1 wooden spoon or dough scraper
- 1 baking sheet
- 1 parchment paper
- 1 clean kitchen towel or plastic wrap
- 1 oven
Ingredients
- 4 cups all-purpose flour
- 1 ½ teaspoons salt
- 2 teaspoons sugar
- 2 teaspoons active dry yeast
- 1 ½ cups warm water
- 1 tablespoon olive oil
Instructions
- In a large mixing bowl, combine warm water, sugar, and active dry yeast. Stir gently and allow the mixture to sit for about 5-10 minutes until it becomes frothy.
- Add the olive oil and salt to the yeast mixture, mixing well.
- Gradually add the flour, one cup at a time, mixing with a wooden spoon or a dough scraper until a shaggy dough forms.
- Turn the dough onto a floured surface and knead it for about 10 minutes until smooth and elastic. Add more flour as needed if the dough is too sticky.
- Place the kneaded dough in a lightly greased bowl and cover it with a clean kitchen towel or plastic wrap. Let it rise in a warm room for about 1 hour or until doubled in size.
- Once risen, punch down the dough to release the air. Divide it into 12 equal pieces and shape each piece into a round roll.
- Place the rolls on a baking sheet lined with parchment paper, leaving space between each roll. Cover with a towel and let them rise for another 30 minutes.
- Preheat the oven to 425°F (220°C). While the oven is heating, lightly score the top of each roll with a sharp knife.
- Bake the rolls in the preheated oven for about 25 minutes or until they are golden brown and sound hollow when tapped on the bottom.
- Remove the rolls from the oven and allow them to cool on a wire rack for at least 10 minutes before serving.