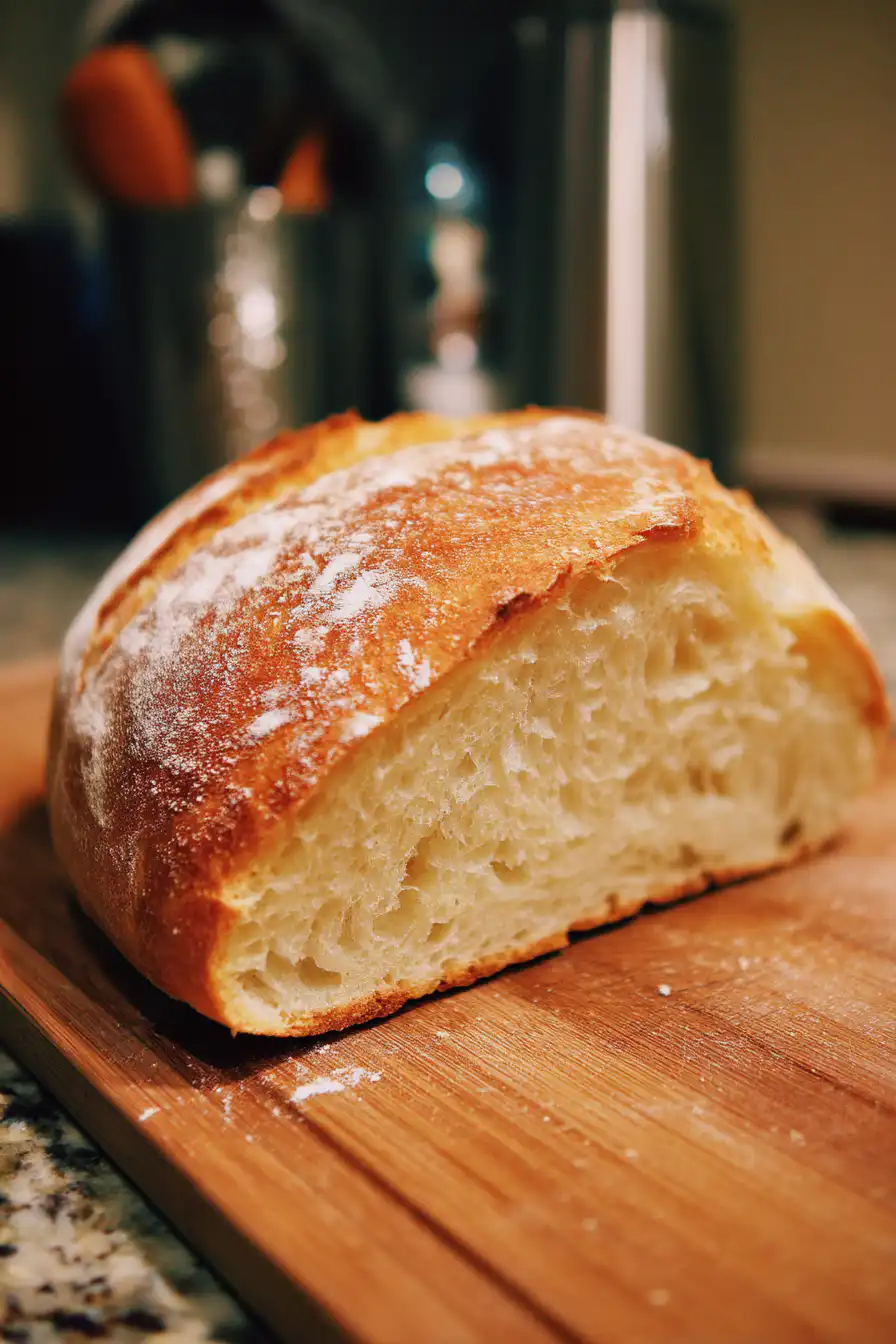
There's something real special about the smell of homemade bread making its way through your kitchen. The act of baking bread brings back lots of warm memories of hanging out with family, helping out at the table, and just enjoying life. It's not only about making some bread to eat; it's about keeping a part of your family's story and traditions alive. When you whip up a recipe like Grandma's Perfect Homemade Bread, you're not only using secret ingredients but also a whole lot of love that's been passed from one generation to the next.
Bringing down family recipes is a cool way to keep history alive and pass on skills that can get lost these days. Every piece of bread tells a little tale, and every time you knead, it's like you're showing care. This recipe is called "perfect" because it's so simple yet flavorful, so even if you are just starting out, you can get a tasty end result. With only a few basic ingredients and some time, anyone can create bread that's good for both the tummy and the heart. You can even explore different methods, like our sourdough bread recipe for a tangy twist. Stick with us and let's dive into the world of homemade bread and check out the magic behind Grandma's classic recipe that has withstood the test of time.
I. Why Grandma's Bread is Special
Grandma's bread is more than just a set of steps; it's a reminder of all the love, warmth, and care that went into making every loaf. Each time you follow her method, it's like taking part in a tradition that has been around for ages. Family recipes like this mean you can always connect with where you came from and enjoy the flavors of the past. Baking bread at home turns into a special ritual full of laughters, memories, and that cozy feeling you get when the oven is on.
The love and care that goes into making this bread is something you really can't get from store bought ones. Every time you knead the dough, you add a bit of your own heart in it. There's also a personal touch in picking out good quality ingredients, tweaking the recipe to match your taste, and knowing that every bite is kinda a piece of your story. Plus, baking brings us together, giving us a chance to share more than just food but moments filled with tradition.
II. Ingredients for Grandma's Perfect Homemade Bread
A. Essential Ingredients
To make Grandma's Perfect Homemade Bread, you just need a few basic things that are really important:
- Flour: The main stuff that gives the bread its structure.
- Water: Needed to wake up the yeast and mix with the flour.
- Yeast: The little miracle worker that makes the dough rise.
- Sugar: Helps to feed the yeast and gives a touch of sweetness.
- Salt: Brings out the flavors and helps the dough develop.
- Fat (butter or oil): Makes your bread rich and soft.
B. Optional Add-Ins
While the basic ingredients make a tasty loaf, you can always have some fun by adding a few extras to give your bread a twist:
- Herbs: Like rosemary or thyme for a nice aroma.
- Seeds: Sunflower or flaxseeds can add crunch and extra nutrition.
- Nuts: Chopped walnuts or pecans to add a bit of crunch.
- Dried fruit: Raisins or cranberries can make for a sweet surprise.

III. The Recipe: Grandma's Perfect Homemade Bread
A. Preparation
Before you start your adventure with Grandma's Perfect Homemade Bread, be sure to get all your ingredients and tools together.
1. Gathering Ingredients
Here are the stuffs you'll need:
- Flour: 4 cups (all-purpose or bread flour)
- Water: 1 ½ cups, warm (but not too hot)
- Yeast: 2 ¼ teaspoons (or 1 packet of active dry yeast)
- Sugar: 2 tablespoons
- Salt: 1 ½ teaspoons
- Fat: 4 tablespoons (melted butter or oil)
2. Tools Needed
Make sure you have these tools handy:
- A mixing bowl
- Measuring cups and spoons
- A wooden spoon or dough scraper
- A loaf pan (9x5 inch)
- A clean kitchen towel
- An oven
B. Directions
1. Activating the Yeast
Start by waking up the yeast: in a small bowl, mix together warm water, sugar, and yeast. Stir it up gently and let it sit for 5-10 minutes till it foams a bit. This means the yeast is good to go.
2. Making the Dough
In a big bowl, mix the flour and salt. When the yeast mix is bubbly, pour it into the bowl along with the melted fat. Stir with a wooden spoon until you see a shaggy dough start to form. Then, put the dough on a floured surface and knead it for 8-10 minutes until it feels smooth and a bit elastic. If it's too sticky, you can add a little more flour.
3. First Rise
Shape your dough into a ball and pop it into a greased bowl. Cover it with a clean kitchen towel and let it sit in a warm spot for about 1 to 1.5 hours until it doubles in size.
4. Shaping the Dough
After the dough has risen, give it a quick punch to get rid of extra air. Then, place it on a floured surface and shape it into a loaf. To do this, flatten the dough into a rectangle and roll it up tight from one of the short sides. Make sure you pinch the seams to keep everything together.
5. Second Rise
Put the shaped loaf, seam side down, into a greased loaf pan. Cover it with your towel again and let it rise for another 30 to 45 minutes, or until it has risen above the sides of the pan.
6. Baking Instructions
Preheat your oven to 350°F (175°C). Once the dough has finished its second rise, bake it in the oven for 30-35 minutes, or until the top is golden brown and it sounds hollow when you tap it. If it starts getting too brown, you can cover the top with aluminum foil loosely.
7. Cooling and Storing
Take the bread out of the oven and let it sit in the pan for 10 minutes. Then, move it onto a wire rack to cool completely. For best taste, keep the bread in an airtight container or wrap it in plastic wrap. Homemade bread is best if eaten within a few days but you can also freeze it for longer.
C. Advice for Perfecting Your Bread
1. Common Mistakes to Avoid
Making the perfect loaf can sometimes be hard. Avoid mistakes like over-kneading which can make your bread tough, or not letting your dough rise long enough so it turns out too dense. Every step matters.
2. Tips for Variations
Don't be afraid to experiment! You can change up the recipe by adding different herbs, spices, or extras like seeds and nuts. You could also bake a loaf of sourdough garlic bread to enjoy with soups. Trying out different variations can give you new flavors and textures, letting you make this family favorite your own.
IV. Frequently Asked Questions
A. How long does homemade bread last?
When stored right, homemade bread should last about 3-5 days at room temperature. If you need to keep it longer, freezing is a good option and it can last up to three months.
B. Can I use gluten-free flour?
Yeah, you can use gluten-free flour blends with this recipe. You might need to play around with the amount of liquid and add things like xanthan gum to get the right texture though.
C. What should I do if my dough doesn't rise?
If your dough isn't rising, it might be because the yeast is not active or it's too cold where you let it rest. Always make sure your yeast is fresh and let your dough rise in a warm, no-draft spot.
D. Can I freeze homemade bread?
Of course! It's best to slice the bread first then wrap it tightly in plastic wrap and put it in a freezer bag. When you're ready, just thaw the slices as needed.
E. How can I make my bread more flavorful?
One way to up the flavor is by adding herbs, spices or even cheese into the dough. You can also try different sweeteners like honey or maple syrup to make it taste even better.
V. Personal Touch: Grandma's Tips for Baking Bread
A. The Importance of Patience
One of the most important parts of making bread is being patient. Not rushing the rising process is key, cause if you hurry it, you might end up with a disappointing loaf. Enjoy each step and let your kitchen fill with that wonderful smell.
B. Using the Right Ingredients
Always go for the best, freshest ingredients you can find. Fresh yeast gives a much better rise. Good quality flour and natural fats really help the bread taste and feel special.
VI. Conclusion
Mixing tradition, love and a few simple ingredients, Grandma's Perfect Homemade Bread is more than just a baking recipe-it's a journey that brings generations together. When you try this recipe, you're not just making bread, you're creating memories in your kitchen. So, gather your stuff, enjoy the process, and share the warmth of homemade bread with the people you love.

Grandma’s Perfect Homemade Bread
Equipment
- 1 large mixing bowl
- 1 measuring cups and spoons
- 1 wooden spoon or dough scraper
- 1 loaf pan (9x5 inches)
- 1 kitchen towel or plastic wrap
- 1 oven
Ingredients
- 4 cups all-purpose flour
- 2 tablespoons sugar
- 1 tablespoon salt
- 1 tablespoon active dry yeast
- 1.5 cups warm water About 110°F
- 2 tablespoons unsalted butter Melted
Instructions
- In a large mixing bowl, combine 2 cups of flour, sugar, salt, and active dry yeast. Mix well.
- Gradually add the warm water to the dry ingredients, stirring with a wooden spoon until the mixture is combined.
- Add the melted butter and continue adding the remaining flour, one cup at a time, until a soft dough forms.
- Once the dough comes together, turn it out onto a floured surface. Knead the dough for about 8-10 minutes until smooth and elastic.
- Place the kneaded dough back into the bowl and cover with a kitchen towel or plastic wrap. Let it rise in a warm area for about 1 hour, or until it has doubled in size.
- Preheat your oven to 350°F (175°C).
- Punch down the risen dough and transfer it to a lightly floured surface. Shape the dough into a loaf and place it into the greased loaf pan.
- Cover the loaf pan with a towel and let the dough rise for another 30 minutes, or until it’s puffed up.
- Bake the bread in the preheated oven for about 30 minutes, or until the top is golden brown and the bread sounds hollow when tapped on the bottom.
- Remove from the oven and let it cool in the pan for about 10 minutes. Then transfer it to a wire rack to cool completely.