The pot lid rattles and you know dinner is almost ready. There's this kinda anticipation that fills the kitchen, like you spot those little vibrations and your mind starts thinking of the sweet carrot raisin cake waiting for you. It's funny how a pressure cooker can make such a cozy dessert while you're still wrapping up the meal prep.
You recall mixing the spices with the grated carrots, seeing the raisins tossed in all cozy like, knowing the batter's going into the cooker next. It's a kinda comfort watching steam gently puff as the broth depth inside the pot does its job holding heat just right. That lid rattling signals a slow release coming up-your cue to stay close and get ready for the smell that's about to fill your kitchen.
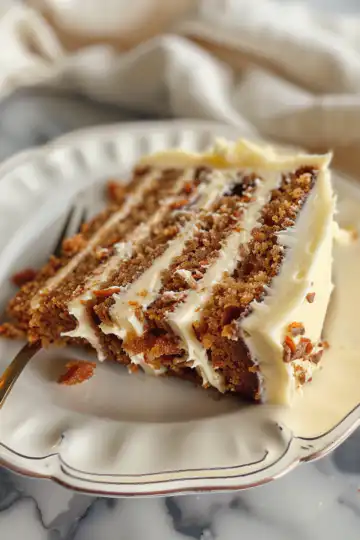
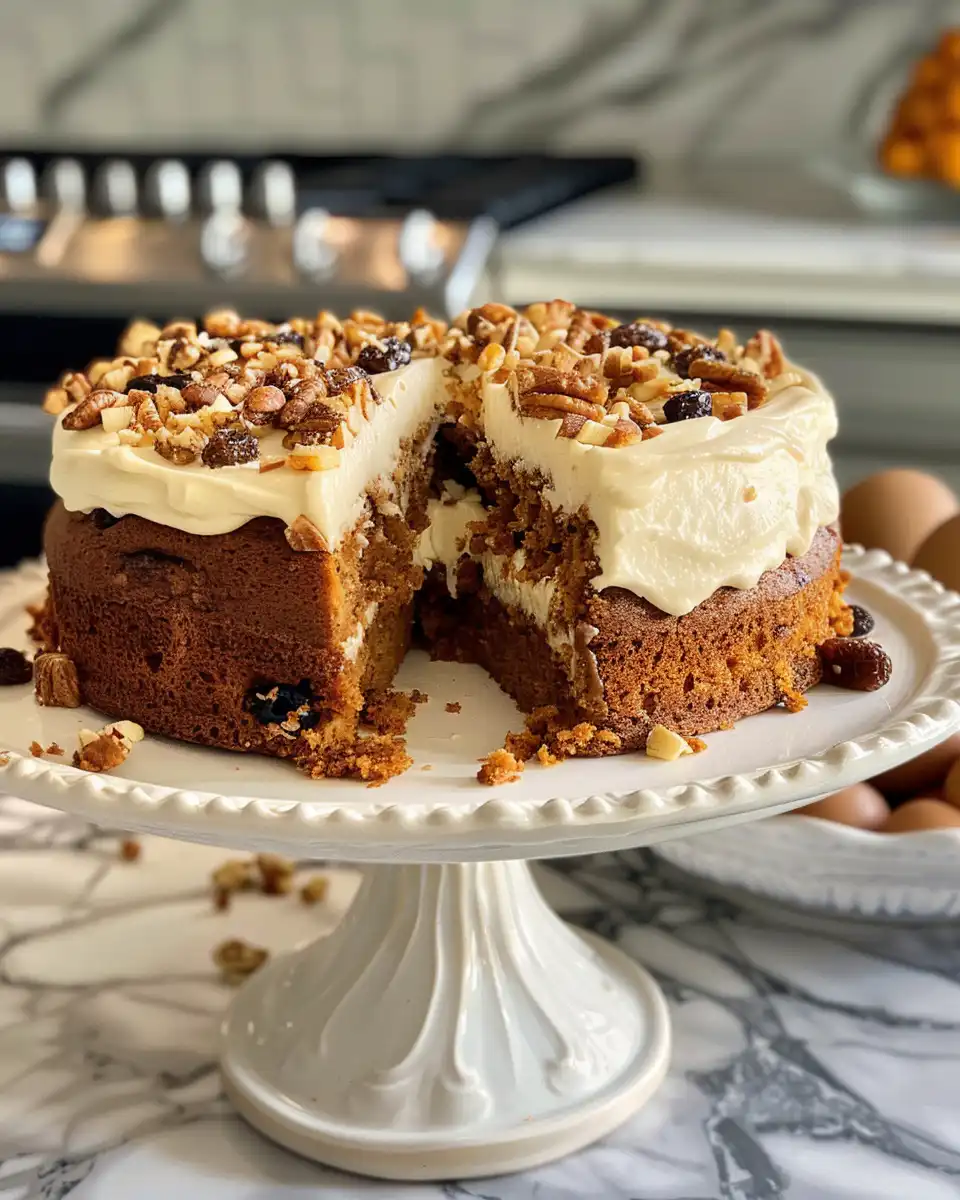
Once the natural release is done, you gotta open the lid and see that moist tender pull of the cake. It's more than just a dessert; it's a moment where the quick release from the cooker meets the sweet texture you were hoping for. You catch the steam swirling up and your mouth waters even before the first slice touches your fork.
What Makes Pressure Cooking Win Every Round
- Pressure cooking speeds things up so you get tasty results quicker than waiting for the oven alone.
- The sealed environment traps moisture, keeping your carrot raisin cake super moist and tender.
- Broth depth in the pot provides even heat distribution, making sure no part cooks too fast or dries out.
- Quick release lets you stop the cooking exactly when you want, perfect for keeping the right texture.
- Natural release finishes off the gentle cooking process, helping flavors deepen without rushing.
- It saves you energy since you don't need to keep the oven on for a long time.
- The pressure cooker is insanely versatile, so you can use it for stews and cakes alike. Great kitchen buddy.
For those looking to expand cooking techniques, try our pressure cooker tips and check out the popular classic carrot cake recipe which also features moist baking.
Everything You Need Lined Up
You gotta prep these ten items before diving in. Getting them ready makes the whole process flow better without a hiccup.
- 1 cup All Purpose Flour for that soft cake base.
- 1 teaspoon Baking soda to help it rise just right.
- A pinch of salt to balance all the sweetness.
- ¼ cup Yogurt brings a nice tang and keeps the cake moist.
- 2 teaspoon Ground cinnamon for that warm spicy feel you love.
- 1 teaspoon Ground nutmeg, subtle but a must-have buddy for cinnamon.
- ½ cup Vegetable oil makes the crumb melt in your mouth.
- ¾ cup Granulated sugar adds sweet punch.
- ¼ cup Lightly packed brown sugar for a deeper chew and caramel vibe.
- 2 teaspoon Vanilla extract to round out all those flavors.
- 2 large eggs to hold everything together.
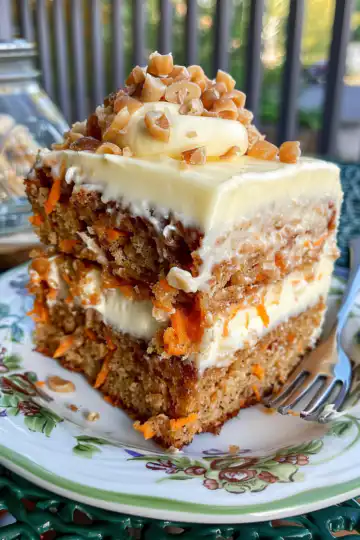
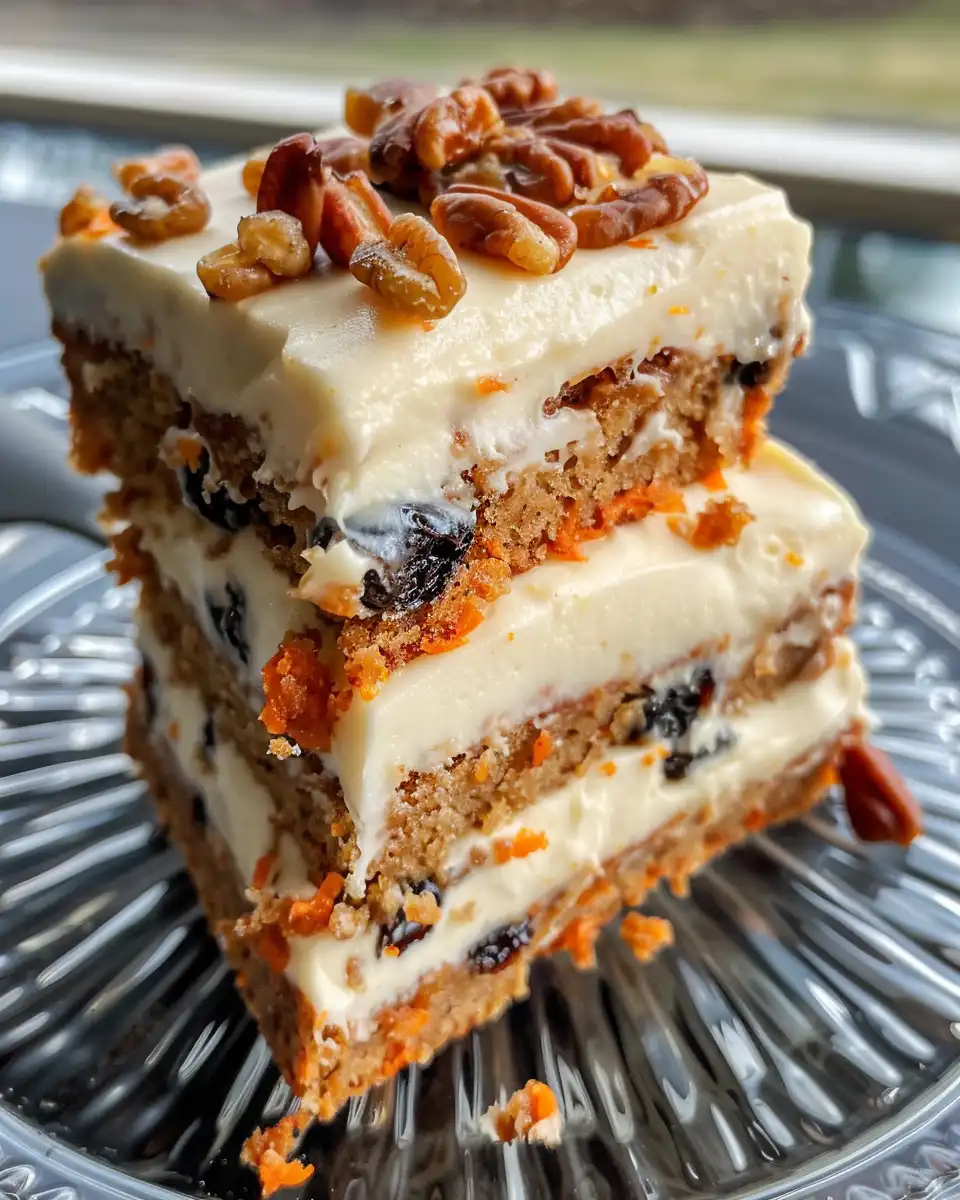
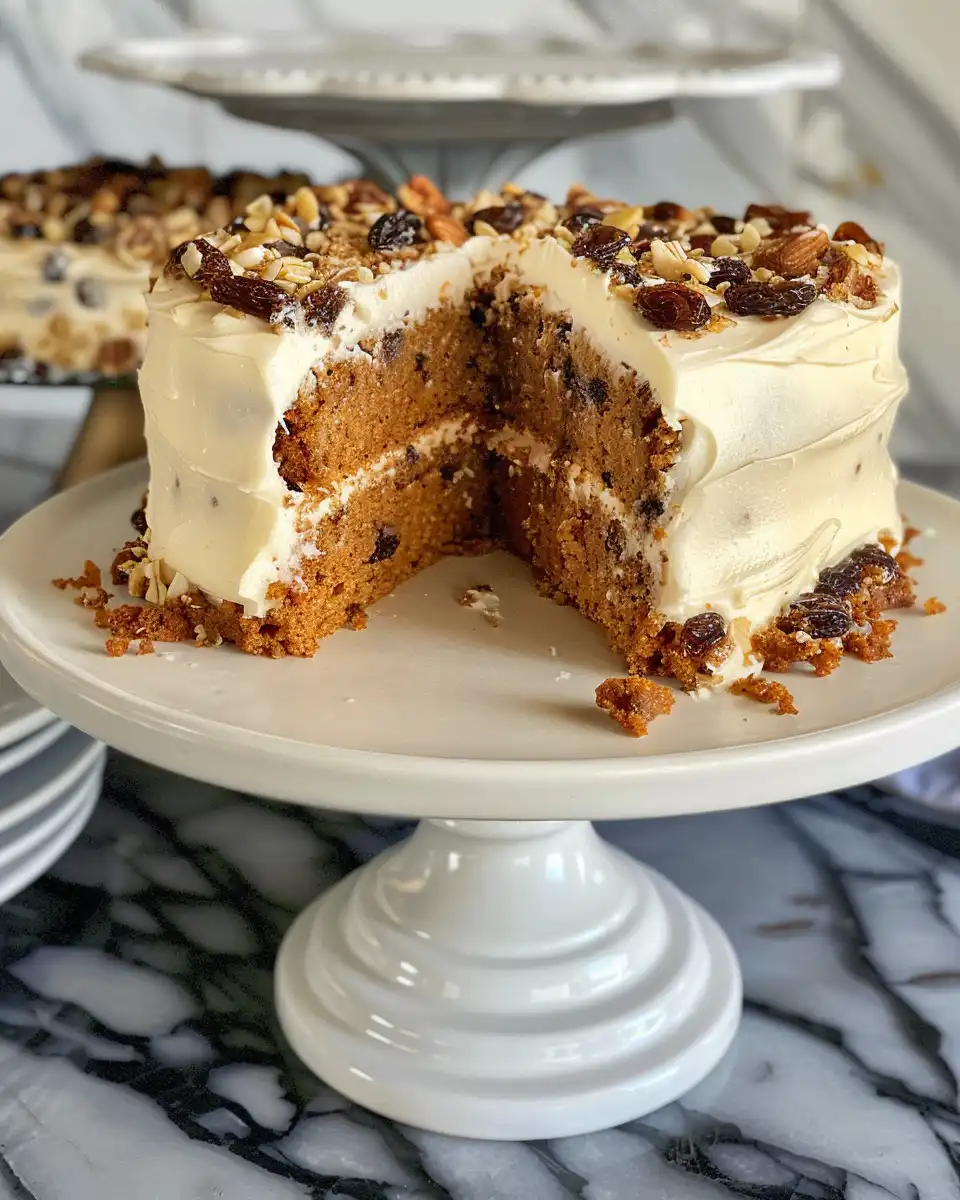
- 1 ½ cups Grated peeled carrots-don't skip on these!
- ¼ cup Raisins that plump up during baking.
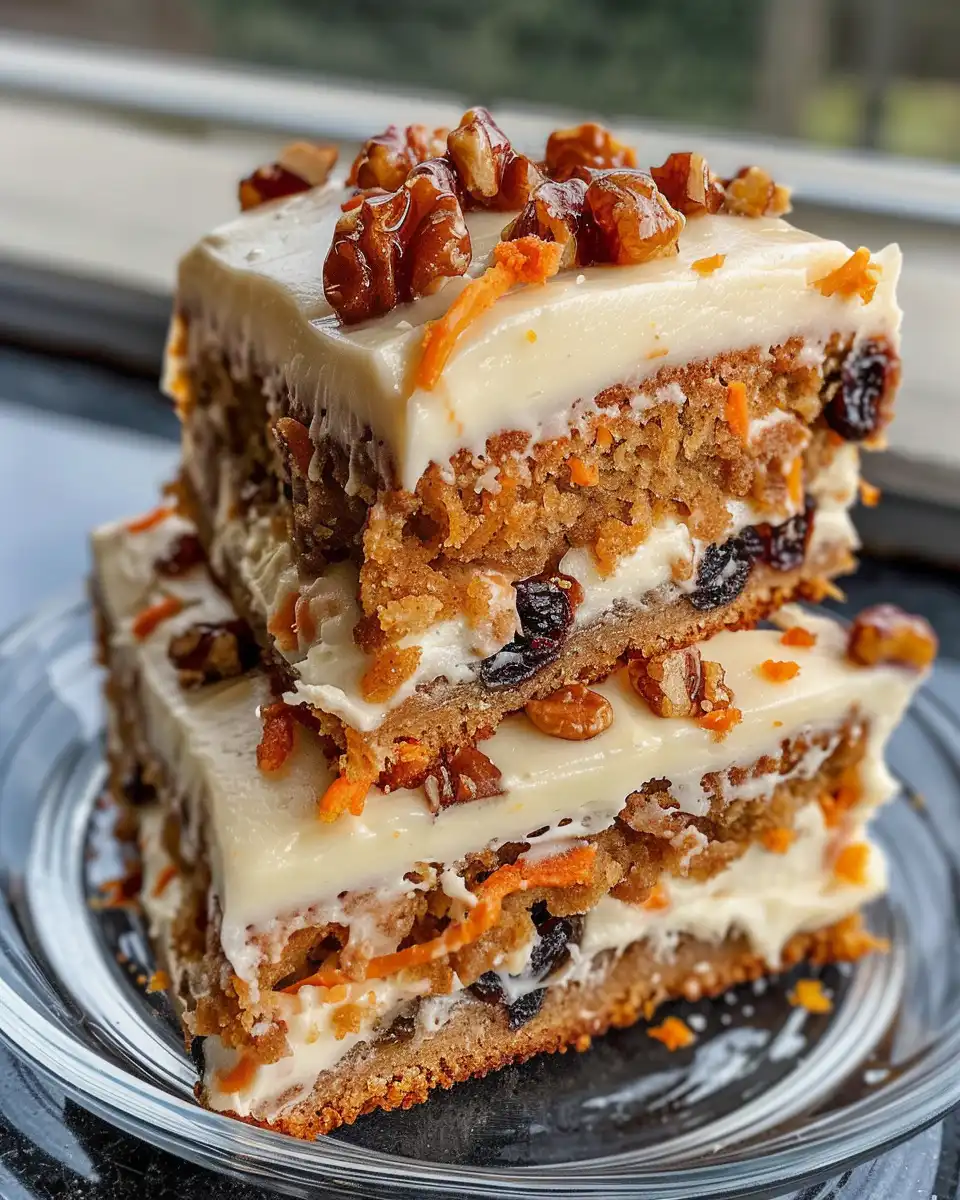
Don't forget the goodies for the frosting and garnish. Cream cheese at room temp, powdered sugar, and heavy whipping cream make a dreamy frosting. For a little crunch and extra taste, sprinkle chopped walnuts and dates on top.
Your Complete Cooking Timeline
Step 1: Preheat your oven if you're doubling the method or to warm up your kitchen while prepping the rest. Usually at 350°F (175°C).
Step 2: Mix your dry ingredients first-flour, baking soda, and salt. This way you get that even rise and no clumps messing up your batter.
Step 3: In a separate bowl, blend your wet ingredients: yogurt, cinnamon, nutmeg, vegetable oil, granulated sugar, brown sugar, and vanilla. You wanna get it nice and smooth.
Step 4: Gradually add the dry stuff into the wet mix. Mix it just enough to combine, don't overbeat or your cake gets tough.
Step 5: Fold in those grated carrots and raisins gently but evenly. You want every bite to have that sweet and spiced goodness.
Step 6: Pour the batter into a greased cake pan sized to fit your pressure cooker. Make sure the broth depth under the rack is just right so your cake doesn't get soggy.
Step 7: Cook in the pressure cooker using slow release for about 30 minutes. Then you can go to natural release before you lift that lid. The tender pull of the cake will tell you the wait was worth it.
Quick Tricks That Save Your Time
- Grate your carrots a day before and keep them in the fridge so you only gotta scoop and mix.
- Use store-bought raisins already plumped by soaking them quickly in warm water.
- Mix dry ingredients in a jar the night before; shake it up and use it whenever ready.
- Start your frosting while the cake cooks so it's ready to go the moment cake cools a bit.
That First Bite Moment
Your first bite feels like a warm hug from the inside. The tender pull of the cake melts just right, not dry, not soggy-just pure comfort.
The cinnamon and nutmeg dance with the sweetness of the brown sugar and raisins. You catch that slight tang from the yogurt which plays perfectly against the creamy frosting that waits for you on the side.
Every bite packs this cozy, homey feeling you didn't know you needed today. And that crunchy walnut and date garnish? It's like a little surprise snap that makes you wanna go back for more.
Smart Storage That Actually Works
Wrap leftovers tight in plastic wrap or aluminum foil to keep the moisture locked in. It keeps the cake from drying out over the next day or two.
Storing in an airtight container in the fridge works best for keeping the cream cheese frosting fresh without getting runny or overly hard.
For longer storage, slice the cake, put pieces in freezer bags, and pop them in the freezer. When you want a slice, thaw gently on the counter and it tastes almost as fresh.
Common Questions and Real Answers
Q1: Can I skip the yogurt?
A1: You can, but yogurt keeps the cake moist and tender. If you ain't got it, sour cream or buttermilk works too.
Q2: What's broth depth got to do with baking?
A2: It's the water level under your rack in the cooker that controls steam and heat. Too much and cake can get soggy; too little, it won't cook all the way.
Q3: Can I use a quick release instead of a natural release?
A3: For this cake, it's better to wait the natural release to keep the texture perfect. Quick release shocks the cake and might cause cracks.
Q4: Why fold raisins instead of stirring hard?
A4: Gentle folding keeps the batter fluffy. Stirring hard can make the cake tough.
Q5: How do I know when it's done?
A5: Use a toothpick or skewer and poke the center. If it comes out clean or with a few crumbs, it's good to go.
Q6: Can I swap walnuts for something else?
A6: Totally! Pecans, almonds, or even pumpkin seeds work great if you wanna switch it up.
For other moist carrot cake ideas, have a look at our classic carrot cake with cream cheese frosting and carrot cake cupcakes recipes.

Really Really GREAT Carrot Raisin Cake
Equipment
- 1 Pressure cooker
Ingredients
Main ingredients
- 1 cup All Purpose Flour for that soft cake base
- 1 teaspoon Baking soda to help it rise just right
- A pinch Salt to balance all the sweetness
- ¼ cup Yogurt brings a nice tang and keeps the cake moist
- 2 teaspoon Ground cinnamon for that warm spicy feel you love
- 1 teaspoon Ground nutmeg subtle but a must-have buddy for cinnamon
- ½ cup Vegetable oil makes the crumb melt in your mouth
- ¾ cup Granulated sugar adds sweet punch
- ¼ cup Lightly packed brown sugar for a deeper chew and caramel vibe
- 2 teaspoon Vanilla extract to round out all those flavors
- 2 Large eggs to hold everything together
- 1 ½ cups Grated peeled carrots don't skip on these!
- ¼ cup Raisins that plump up during baking
Instructions
Instructions
- Preheat your oven if you’re doubling the method or to warm up your kitchen while prepping the rest. Usually at 350°F (175°C).
- Mix your dry ingredients first—flour, baking soda, and salt. This way you get that even rise and no clumps messing up your batter.
- In a separate bowl, blend your wet ingredients: yogurt, cinnamon, nutmeg, vegetable oil, granulated sugar, brown sugar, and vanilla. You wanna get it nice and smooth.
- Gradually add the dry stuff into the wet mix. Mix it just enough to combine, don’t overbeat or your cake gets tough.
- Fold in those grated carrots and raisins gently but evenly. You want every bite to have that sweet and spiced goodness.
- Pour the batter into a greased cake pan sized to fit your pressure cooker. Make sure the broth depth under the rack is just right so your cake doesn’t get soggy.
- Cook in the pressure cooker using slow release for about 30 minutes. Then you can go to natural release before you lift that lid. The tender pull of the cake will tell you the wait was worth it.