Steam curls up from the valve and your stomach starts talking back. You're in the kitchen, got your pressure cooker all set with that pretty sealing ring in place. That hiss from the valve tells you things are gonna get done soon.

The sweet smell of chocolate floating up makes you kinda impatient, but also excited. It's like your kitchen is turning into something from a candy shop, dang if that ain't a good feeling. You catch yourself smiling because hey, this fun treat is almost ready.
Every time you see that steam cue, it reminds you how the broth depth underneath keeps things just right. No jokes here, it's perfect for melting chocolate smooth and getting marshmallows all covered up nice. You remember how great it is when food makes your day better.
Why This Recipe Works Every Single Time
- You got the perfect sealing ring that holds pressure so nothing escapes and melts go perfectly.
- Broth depth controls the heat so chocolates melt evenly without burning.
- Steam cues guide your timing so you know exactly when to check your progress.
- The valve hiss tells you the pressure build is just right for cooking without overdoing it.
- Using microwave for chips gives quick smooth melt before dipping marshmallows.
- Simple steps that anyone can follow make this recipe foolproof and fun.
Everything You Need Lined Up
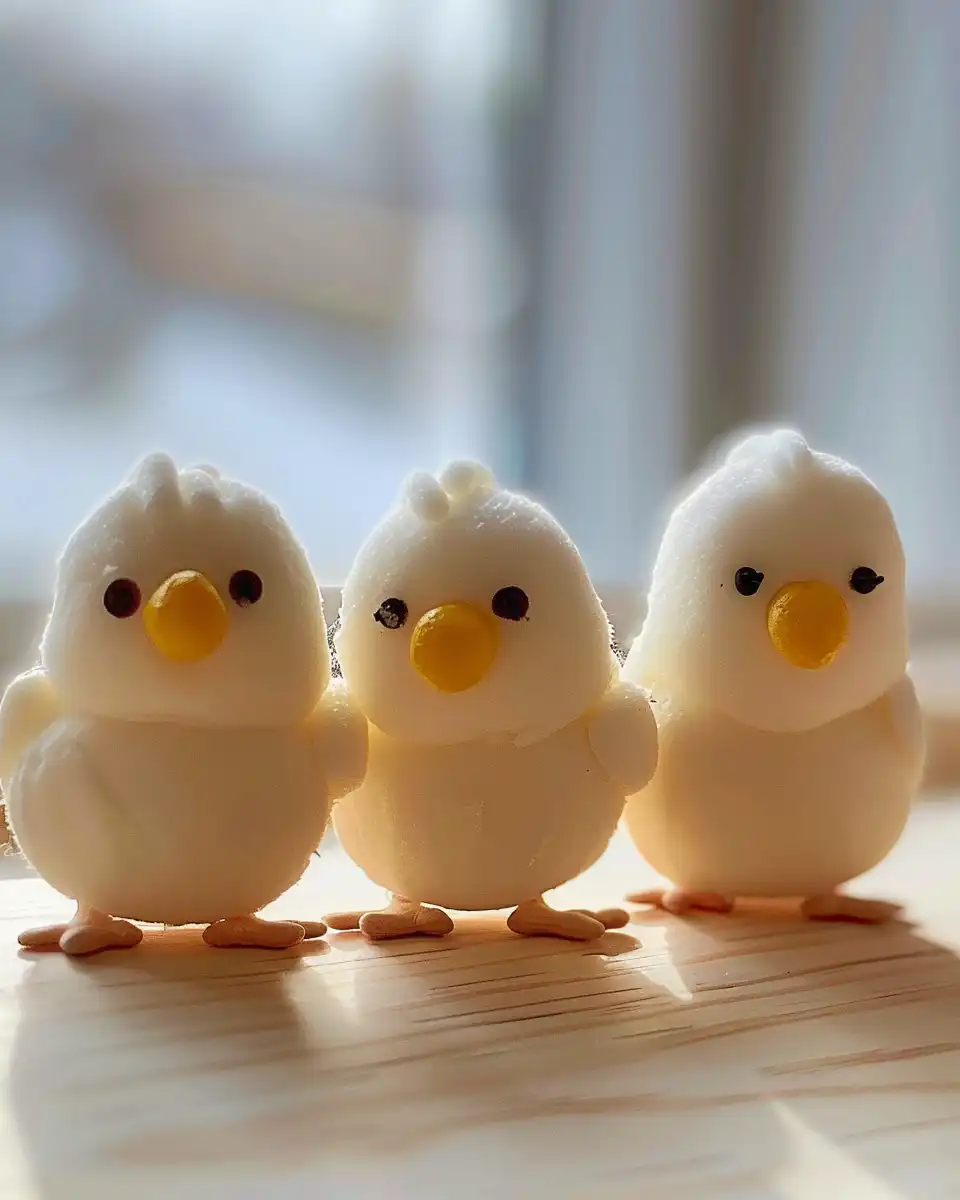
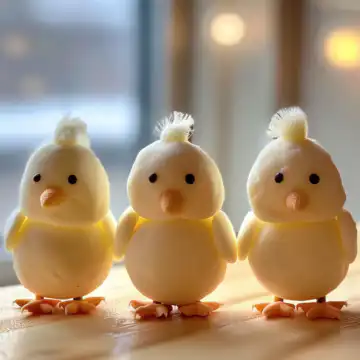
- 2 cups marshmallows: big or small, they soak up chocolate real good.
- 1 cup chocolate chips: melts down smooth, you gonna love that creamy coat.
- ¼ cup yellow candy melts: for those cute little beaks on your chicks.
- ½ cup edible eyes: makes your chicks look dang adorable and lively.
- ¼ cup shredded coconut (optional): perfect for a nest if you wanna get fancy.
- Parchment paper: keeps your marshmallow chicks from sticking.
- Microwave-safe bowl: to melt the chocolate chips without mess.
- Toothpicks: for dipping the candy melts and creating details on chicks.
- Small spoon or spatula: helps stir melted chocolate smooth and silky.
- Serving platter: present your chicks like a pro Easter chef.
The Full Pressure Cooker Journey
- First step set your pressure cooker with the sealing ring right in. Add a little water to the bottom to get that broth depth going. You gotta watch that so it does not dry out.
- While that's heating, melt the chocolate chips in your microwave-safe bowl. Do it in 30-second bursts stirring after each so it turns smooth, no lumps allowed.
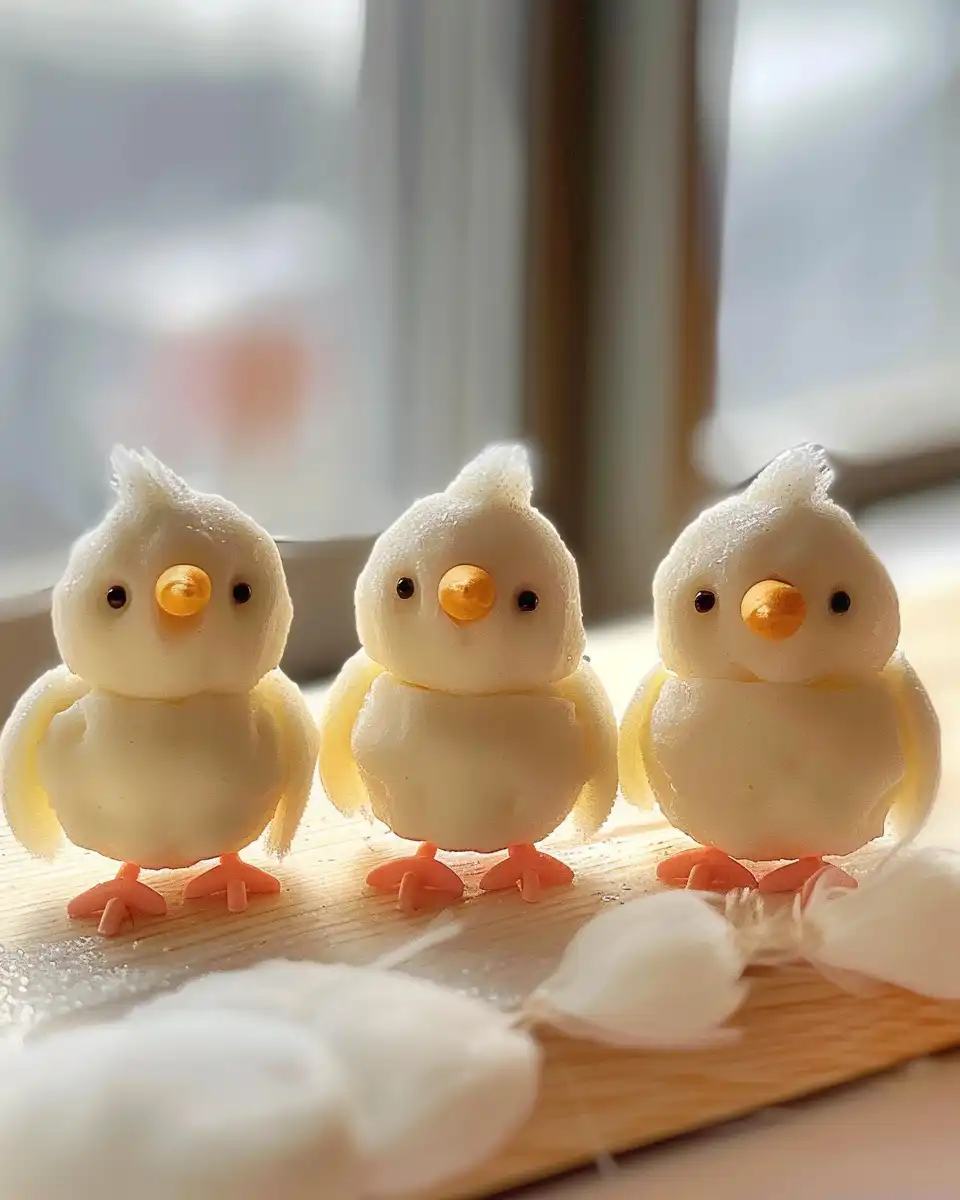
- Next, dip each marshmallow one by one into that silky chocolate. Coat 'em real good then put each chick on parchment paper to cool and set.
- Once they're mostly firm, grab your toothpick and dip it into the yellow candy melts. Dab on beaks for every chick, careful not to get too much or too little.
- Use a little melted chocolate to stick the edible eyes on each chick. They get that playful look that really gets you smiling.
- Last, if you wanna jazz it up, sprinkle some shredded coconut on a serving platter. Nest your chick crew on top and look at that dang cute Easter display.
Smart Shortcuts for Busy Days
- Melt chocolate chips in microwave while pressure cooker's cooking. Saves you time and keeps everything moving smooth.
- Buy pre-made edible eyes and yellow candy melts. They're ready to go, no extra fuss, simple to use with toothpick.
- If shredded coconut is too much hassle, skip it or just toss the chicks on a cute plate. They still steal the show with all that chocolate goodness.
What It Tastes Like Fresh From the Pot
Right when you bite into a marshmallow chick, you catch a soft, sweet cloud of marshmallow fluff. That chocolate coat is smooth and creamy, still warm enough to melt little bits on your tongue.
The yellow candy beak adds a tiny pop of sugary fun that you didn't expect but definitely appreciate. And those edible eyes don't just look good-they bring a playful crunch to each bite.
If you went with the coconut nest, it gives a little texture that mixes sweet and slightly nutty, cool contrast to the gooey marshmallow inside.
All together, dang if this ain't a dessert that feels like a bright kinda sunny Easter morning right in your mouth.
Your Leftover Strategy Guide
- Store marshmallow chicks in an airtight container at room temp. Keeps them soft without melting or getting sticky.
- If it's warm and humid, pop them in the fridge but let them come to room temp before serving so chocolate stays creamy.
- Wrap individually in wax paper for sharing or gifting to friends and family. Cute and practical.
- Freeze if you wanna keep them longer. When ready to eat, thaw slowly at room temp to keep texture nice.
Your Most Asked Questions Answered
- Q Can I use different candy colors for beaks? A Yeah, you can totally switch it up. Orange or pink candy melts work great too!
- Q What if my chocolate chips seize up? A A little splash of butter or oil helps smooth 'em out real quick.
- Q How long should I wait for the chocolate coating to set? A Usually about 15 to 20 minutes at room temp is perfect.
- Q Is there a way to make this without a microwave? A Yup, a double boiler on your stove works just fine for melting chocolate.
- Q Can I swap marshmallows for something else? A You could try soft marshmallow candies, but regular marshmallows stick best.
- Q What if I don't have a sealing ring? A It's key for pressure build so I wouldn't skip it. You can find replacements online easy.
For more fun pressure cooker treats, see our Carrot Cake Cupcakes and Classic Hot Cross Buns, both baked with pressure cooker magic.
Marshmallow Chicks, Just in Time for Easter
Equipment
- 1 Microwave-safe bowl to melt the chocolate chips
- 1 Pressure cooker with sealing ring
- 1 Toothpicks for detailing
- 1 Small spoon or spatula for stirring chocolate
- 1 Serving platter to present chicks
Ingredients
Main ingredients
- 2 cups Marshmallows big or small
- 1 cup Chocolate chips melts down smooth
- ¼ cup Yellow candy melts for beaks
- ½ cup Edible eyes makes chicks look adorable
- ¼ cup Shredded coconut optional for nest
Instructions
Instructions
- Set your pressure cooker with the sealing ring and add water to maintain broth depth.
- Melt chocolate chips in microwave-safe bowl in 30-second bursts, stirring until smooth.
- Dip each marshmallow in silky chocolate, place on parchment paper to set.
- Use toothpick to dab yellow candy melts to create beaks on the marshmallows.
- Stick edible eyes using a little melted chocolate.
- Optionally, sprinkle shredded coconut on a platter as a nest for chicks.