The pot lid rattles and you know dinner is almost ready. That little sound feels like a signal that something warm and comforting is cooking right under your nose. You're watching the float valve rise and thinking about the tender pull of that perfectly cooked cake soon to come.

You catch a whiff of that sweet, vanilla scent poking through the kitchen air. It's kinda like a cozy hug, reminding you why you love your pressure cooker so much. It's not just about speed but the way it locks in flavors, creating this broth depth in every bite that you just can't get from a regular oven.
As the seconds tick, you remember how that sealing ring keeps everything tight and cozy inside the pot, guaranteeing that moist, melt-in-your-mouth texture every single time. The quick release will have the cake ready before you finish wiping the counter down. That's the beauty of this recipe; it's like a sweet little reward waiting for you at the end of a busy day.
Why Your Cooker Beats Every Other Pot
- You get that consistent heat which means a tender pull on every slice, nothing dry or tough here.
- The float valve lets you know the pressure is just right; no guesswork involved.
- The sealing ring keeps all that flavor and moisture locked in tight so your cake is juicy, not crumbly.
- Quick release means you don't gotta wait long after cooking to dig in, perfect for impatient bakers.
- It's super versatile so you can use it for more than just cake; soups, stews, even yogurt.
- Cleanup is a breeze since it's just one pot, less mess on your kitchen counters.
What Goes Into the Pot Today
- 2 cups all-purpose flour - this is the base, making sure your cake's got body to hold all that fluff.
- 1 cup granulated sugar - to give it that sweet kiss you're gonna love.
- ½ cup unsalted butter, softened - bring smooth richness and help with the melt-in-mouth feel.
- 1 cup milk - adding moisture so your cake stays nice and tender.
- 3 eggs - these hold everything together while keeping it light.
- 2 teaspoons baking powder - this gets your cake rising just right, no flat spots.
- 1 teaspoon vanilla extract - the little secret that makes every bite so cozy and delightful.
- ¼ teaspoon salt - balances out sweetness and just makes the flavors pop.

Your Complete Cooking Timeline
- Preheat your pressure cooker using the sauté mode for a few minutes. You wanna make sure it's warm before you start, kinda like warming your oven.
- Grease and flour your 9x13 inch baking pan real good so your cake loosens up easy after cooking.
- Cream together the softened butter and sugar in a large bowl until it's fluffy and kinda pale, showing you it's whipped just right.
- Add your eggs one at a time. This part's hands-on and you gotta beat well after each egg to keep it all smooth.
- Stir in the vanilla extract and feel that sweet aroma fill your kitchen.
- Mix the flour, baking powder, and salt in a separate bowl. Then slowly add this to your creamed mixture, alternating with milk. It sounds fussier than it is, but it works real good for a smooth batter.
- Pour all that batter into the prepared pan. Try not to lick the spoon yet, it's serious business!
- Place the pan on a trivet inside your pressure cooker. Lock the lid in place, making sure the sealing ring's on right, then cook on high pressure for about 30 minutes. When done, use quick release for best results, then check with a toothpick for that tender pull.
Easy Tweaks That Make Life Simple
- Swap out milk for almond or oat milk if you want something dairy-free. Your cake'll still turn out moist and tasty.
- Add a handful of chocolate chips or small fruit chunks to the batter for a fun twist without extra mess.
- No 9x13 pan? Use smaller pans but remember to adjust cooking times, probably a bit shorter.
- Use pre-mixed baking powder and flour combo to save a step, just cut back a little on salt when you do.

When You Finally Get to Eat
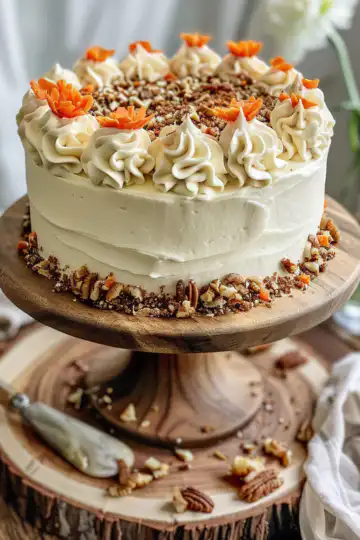
You notice the cake is soft and warm when you slice it, steam rising off each slice like a gentle cloud. It's exactly that tender pull you were hoping for.
The flavor is simple but right, with vanilla notes carrying that sweet richness and a smooth texture from the butter and milk combo. It kinda melts right in your mouth, no chewing required.
Whether it's a nice way to end your day or a surprise treat to share, this cake hits that comforting spot you didn't even know you wanted. You catch yourself smiling at the first bite.
Keeping Leftovers Fresh and Ready
- Wrap leftover slices tightly in plastic wrap or foil, then pop them in the fridge. They keep well up to 3 days and still taste fresh.
- Use an airtight container to avoid drying out the cake, especially if your fridge is kinda crowded.
- For longer storage, freeze slices individually wrapped in wax paper inside a freezer bag. Thaw at room temp when you're ready for a quick snack fix.
Your Most Asked Questions Answered
- Can I use a different size pan in my pressure cooker? Yeah, just make sure it fits comfortably with the lid on. Smaller pans usually need less cook time, watch for a clean toothpick test.
- What if my float valve doesn't rise? That likely means the pot isn't sealed well. Check the sealing ring for cracks or bugs, and make sure lid's locked tight.
- Is quick release the only way to open after cooking? Mostly, yeah. Quick release stops cooking fast and keeps things from drying out, but sometimes you can do natural release if you've got time.
- Can I add frosting or toppings? Sure thing, but add them after the cake fully cools so it doesn't melt off or get soggy.
- Can I make this cake without the pressure cooker? Totally, but baking in the oven takes longer. This cooker version keeps it moist and tender in much less time.
- How do I know when the cake is done? Use the toothpick test by poking the center; if it comes out clean or with just a few crumbs, you're good to go.
Melt In Your Mouth Cake
Equipment
- 1 Pressure Cooker For cooking the cake
Ingredients
Cake Ingredients
- 2 cups all-purpose flour base for the cake's body
- 1 cup granulated sugar for sweetness
- ½ cup unsalted butter softened
- 1 cup milk for moisture
- 3 eggs for binding
- 2 teaspoons baking powder for rising
- 1 teaspoon vanilla extract for aroma
- ¼ teaspoon salt for flavor balance
Instructions
Instructions
- Preheat your pressure cooker using the sauté mode for a few minutes to warm it up, like an oven.
- Grease and flour your 9x13 inch baking pan well so your cake loosens easily after cooking.
- Cream together the softened butter and sugar in a large bowl until it’s fluffy and kind of pale.
- Add the eggs one at a time, beating well after each to keep the mixture smooth.
- Stir in the vanilla extract for a sweet aroma in your kitchen.
- Mix the flour, baking powder, and salt in another bowl. Gradually add to the creamed mixture, alternating with milk for a smooth batter.
- Pour all the batter into the prepared pan.
- Place the pan on a trivet inside the pressure cooker. Lock the lid with the sealing ring in place, then cook on high pressure for 30 minutes.
- When done, use quick release. Check with a toothpick for doneness.