
The pot lid rattles and you know dinner is almost ready. You spot the steam sneaking out from under the sealing ring of your pressure cooker and your heart kinda jumps. That float valve pops up just right, telling you the magic numbers are in place for a tasty feast ahead. The kitchen fills with a cozy warmth that wraps you up like a soft blanket.
You sense the early smells of coconut and sugar, kinda sweet and inviting. It's funny how a scent can make you feel like you're somewhere else, a little far away from the city noise. You remember the last time you made this cake and how it was gone in a blink, folks begging for more.
The bubbling quiet is like a calm before a storm of flavor. You check the broth depth that's just right so everything cooks tender. You feel that mix of excited and patient, cause now you gotta wait just a bit longer but the reward is about to be worth it. Don't rush the quick release or you'll lose some of that tender pull you worked hard for. Soon enough, you'll be slicing up a piece of Brazilian heaven right in your own place.
The Truth About Fast Tender Results
- You gotta trust that sealing ring is snug tight or you'll lose pressure and time.
- The float valve tells you when it's full pressure so you're not guessing.
- Broth depth matters not just for soups, but for cakes too in the pressure cooker.
- Quick release can be tricky; splash guard is your friend to stop mess.
- Using egg whites whipped to stiff peaks gives a tender, fluffy texture you'll adore.
- Always let your cake rest a tad after pressure cooking or it might fall apart.
Remember, when you use your pressure cooker correctly, you can achieve results just like our broccoli cauliflower casserole. That one also depends on a snug sealing ring and proper pressure levels for great texture.
Don't forget to check out our broccoli chicken and rice casserole for more ideas on how to nail broth depth and sealed cooking for tender meals.
All the Pieces for This Meal
- 4 large eggs, separated in whites and yolks - this is so key for the lightness you want.
- ¾ cup granulated white sugar - adds just the right sweet touch.
- 1 teaspoon vanilla extract - gives that homey, warm flavor.
- ¾ cup unbleached all-purpose flour - the base that holds it all together.
- 1 teaspoon baking powder - the little agent that helps your cake rise nice.
- ½ cup unsweetened coconut milk - brings moisture and that coconut kiss.
- ¾ cup sweetened condensed milk - sweet and creamy, yum!
- ⅓ cup unsweetened coconut milk - this one's gonna mix with the shredded coconut for glaze.
- ¾ cup shredded coconut (sweetened or unsweetened, both work) - the best topping for your Brazilian cake.
- A pinch of patience and a smile - you'll definitely need these too!

The Exact Process From Start to Finish
- Get your oven preheated to 350° F. You won't be baking the whole cake in the pressure cooker, but some parts need that oven help.
- Grease and flour a cake pan real good - stickiness just ain't fun.
- Beat those egg whites till they're stiff in a clean bowl with your mixer or whisk. This gives you that airy fluffiness that holds up well under pressure.
- In another bowl, beat egg yolks with sugar and vanilla till creamy and kinda thick. This step smells so good, it's hard not to sneak a lick.
- Gently add the flour and baking powder into your yolk mix, blend it slow so you don't kill the air bubbles.
- Stir in half a cup coconut milk and the sweetened condensed milk till everything is smooth and inviting.
- Now fold in your whipped egg whites gently. Don't rush this part or you'll lose the tender pull you want in your cake texture. Be patient, it's worth it.
- Pour all that goodness into your prepared pan. Pop it in the oven and bake for 30 minutes, or until you can stick a toothpick in and it comes out clean. While it's baking, mix ⅓ cup coconut milk with your shredded coconut for that super moist glaze.
Once done, take the cake out, pour that coconut glaze over the top right away. Let it soak in as the cake cools. You'll be so glad you did.
Quick Tricks That Save Your Time
- Whip egg whites while you gather your other ingredients, saves a bunch of back and forth.
- Use pre-shredded coconut if you wanna cut the prep time down like a boss.
- Set a timer for the oven and pressure cooker separately so you don't overcook anything.
- Grease and flour your pan the night before if you got some spare minutes, so you just pour and go later.
- Mix your glaze ingredients in a jar with a lid, then just shake it up quick when you're ready.
That First Bite Moment
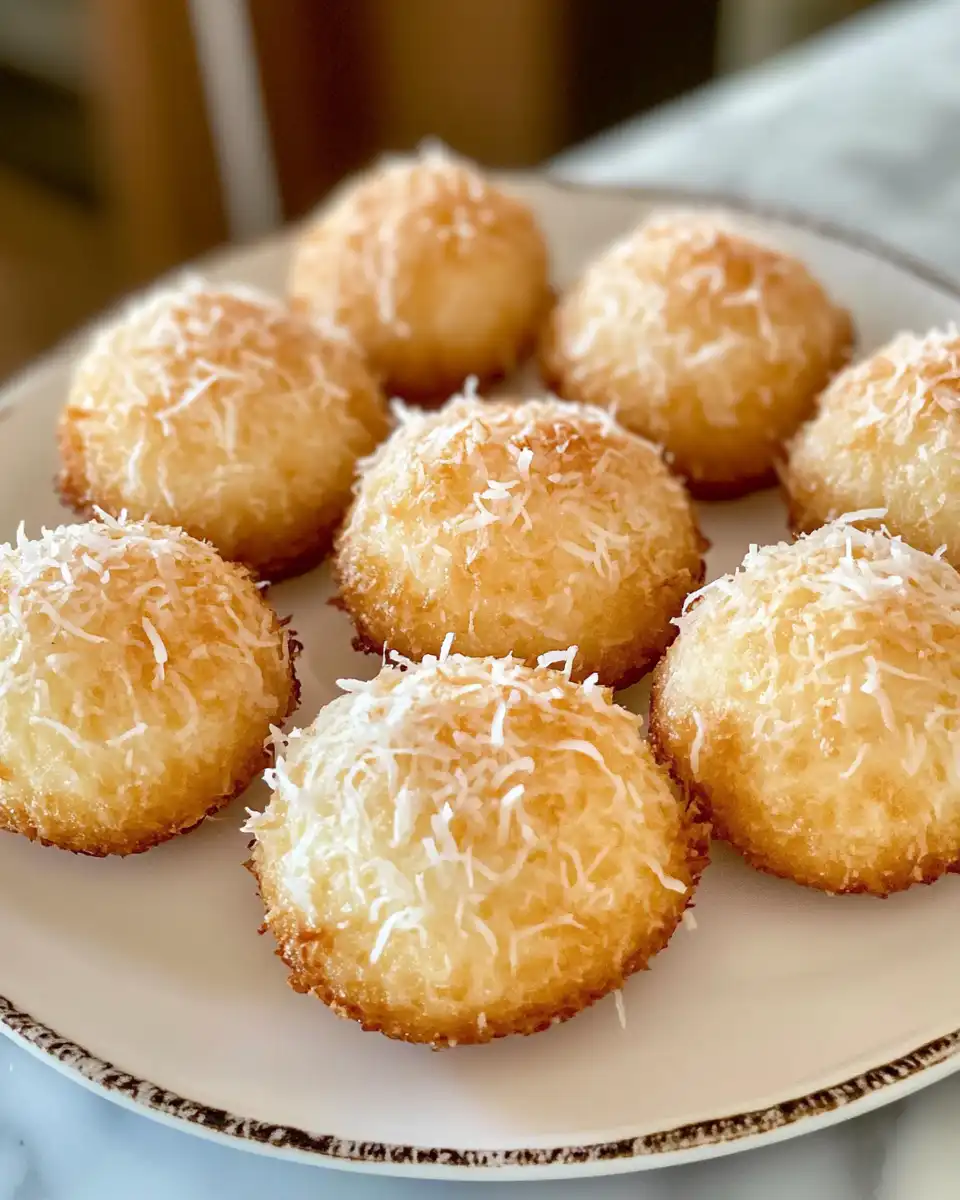
You slice into the cake and it's soft, almost like it's waiting to melt in your mouth. That coconut glaze has soaked in perfectly, making the crumb moist and tender. You spot the little bits of shredded coconut dotted all through, giving texture and bursts of flavor.
The sweet scent lingers each time you breathe in, kinda like a warm hug from childhood. You remember the way it tastes sweet but not too much, balanced just right by that touch of vanilla and eggy richness.
With every bite, the cake pulls apart gently on your fork - that tender pull you aimed for with your careful folding and cooking steps. It's comforting and familiar yet special enough to impress.
You feel proud knowing you've nailed this Brazilian treat right in your own kitchen, using your trusty pressure cooker and a little oven magic. The whole room kinda fills with that happy, satisfied vibe y'all hope for when you cook.

Making It Last All Week Long
First things first, keep your cake in an airtight container once cooled down. This helps lock in that moisture so it won't dry out real fast on the counter.
If you wanna extend its life, pop it in the fridge. This slows down spoilage but can firm up the texture a bit. If it seems a little firm when cold, just let it sit at room temp for a bit before eating.
For longer storage, slice and wrap individual pieces in plastic wrap, then freeze 'em. When you want a treat, thaw a slice overnight in the fridge or warm it up gently in the microwave. It works real good for keeping your Brazilian goodies fresh over days.
What People Always Ask Me
- Can I make this cake entirely in the pressure cooker? You can cook it in the pot, but the top won't get that nice baked crust you want. The oven step helps give it that perfect finish.
- Is it okay to use unsweetened coconut for the glaze? Absolutely, cause the sweetened condensed milk brings enough sweet to balance it out.
- What if I don't have coconut milk? Can regular milk work? Yup, regular milk's fine. The coconut milk adds flavor, but it's not a deal breaker.
- How important is folding in the egg whites gently? Super important or your cake gets dense instead of fluffy and tender.
- Why does the float valve matter so much? It tells you when the cooker's sealed and pressure is right, so your cake cooks evenly and fast.
- Can I add other flavors or nuts to the cake? You sure can. Just fold them in with the batter but keep in mind extra stuff might change cooking time a little.

Brazilian Coconut Cake {Bolo de Coco}Bolo de Fuba ~ Brazilian Cornmeal CakeBolo de Fuba ~ Brazilian Cornmeal CakeBrazilian Peanut Candy ~ PaçocaHam and Leek Pie
Equipment
- 1 Hand Mixer or Stand Mixer Optional, but easier for beating the egg whites
- 1 Oven Preheated to 350°F for baking
- 1 Cake Pan Greased and floured
Ingredients
Cake and Glaze Ingredients
- 4 large Eggs separated in whites and yolks
- 0.75 cup Granulated White sugar
- 1 teaspoon Vanilla extract
- 0.75 cup All purpose Flour unbleached
- 1 teaspoon Baking Powder
- 0.5 cup Coconut Milk unsweetened (regular milk is fine too)
- 0.75 cup Sweetened Condensed milk
- 0.33 cup Coconut milk unsweetened, for glaze
- 0.75 cup Shredded coconut sweetened or unsweetened, for topping
Instructions
The Exact Process From Start to Finish
- Get your oven preheated to 350° F. You won’t be baking the whole cake in the pressure cooker, but some parts need that oven help.
- Grease and flour a cake pan real good — stickiness just ain’t fun.
- Beat those egg whites till they're stiff in a clean bowl with your mixer or whisk. This gives you that airy fluffiness that holds up well under pressure.
- In another bowl, beat egg yolks with sugar and vanilla till creamy and kinda thick. This step smells so good, it’s hard not to sneak a lick.0.75 cup Granulated White sugar, 1 teaspoon Vanilla extract
- Gently add the flour and baking powder into your yolk mix, blend it slow so you don’t kill the air bubbles.0.75 cup All purpose Flour, 1 teaspoon Baking Powder
- Stir in half a cup coconut milk and the sweetened condensed milk till everything is smooth and inviting.0.5 cup Coconut Milk, 0.75 cup Sweetened Condensed milk
- Now fold in your whipped egg whites gently. Don’t rush this part or you’ll lose the tender pull you want in your cake texture. Be patient, it’s worth it.
- Pour all that goodness into your prepared pan. Pop it in the oven and bake for 30 minutes, or until you can stick a toothpick in and it comes out clean. While it’s baking, mix ⅓ cup coconut milk with your shredded coconut for that super moist glaze.0.33 cup Coconut milk, 0.75 cup Shredded coconut
- Once done, take the cake out, pour that coconut glaze over the top right away. Let it soak in as the cake cools. You’ll be so glad you did.0.33 cup Coconut milk, 0.75 cup Shredded coconut