Easter is comin and lots of families are gettin into some neat traditions. One of the coolest is makin Jello Easter Eggs. These jiggly treats give a chill twist on the old hard-boiled egg, offering a different, tasty way to enjoy the holiday. With their bright colors and fun shapes, Jello Easter Eggs have become super popular with both kids and adults, addin a playful look to any Easter party.
These Jello eggs are more than just pretty to look at. They show off creativity and bring folks together in the kitchen. Instead of the usual candies, Jello Easter Eggs are a lighter, refreshing option in a season loaded with sweets and chocolate. They not only spice up your Easter baskets but also let you try out a ton of different flavors and styles.
In this article, we're gonna dive into the fun world of Jello Easter Eggs. You'll get easy-to-follow steps to make them, clever ideas for serving, and some cool variations. We'll also talk about why Jello is awesome - from its bright colors to its tasty flavors and how it works with different diets. Stick around as we explore this fun treat that might just become your new Easter favorite.
What are Jello Easter Eggs?
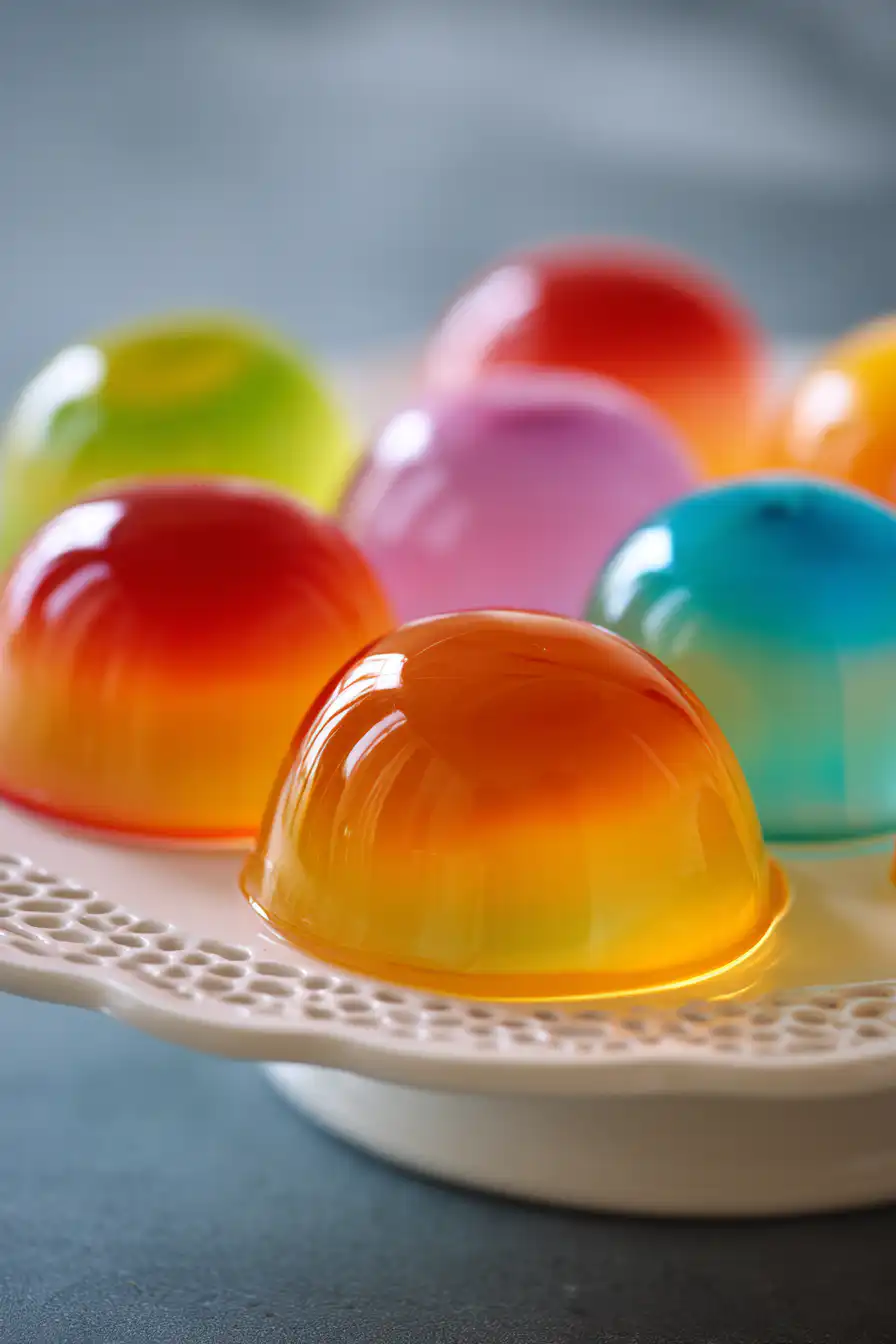
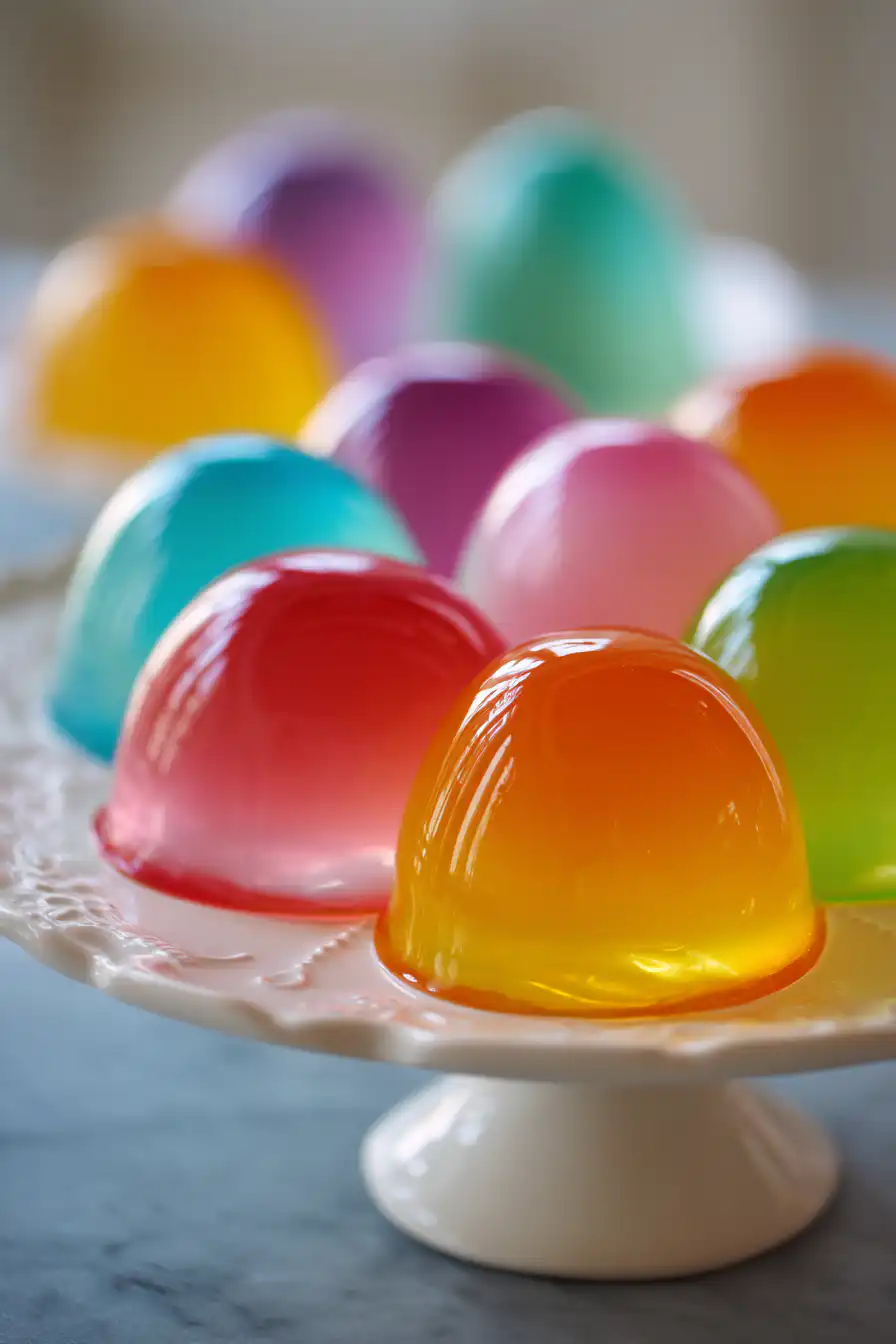
Jello Easter Eggs are these colorful, jiggly treats made to look like traditional Easter eggs. Instead of being hard-boiled and dyed, they're made from flavored gelatin that can be any color you like. This process lets you be creative with how they taste and look, making it a fun family activity.
Unlike the normal boiled and dyed eggs, Jello Easter Eggs come in lots of different flavors and textures. They are made in bright, eye-catching colors that not only taste sweet but also serve as a cool centerpiece for your Easter celebration. Their wobbly texture adds a little surprise factor that makes them extra fun at any get-together.
The trend of making these gelatin eggs has really taken off in the past few years. Families are lookin for a break from the regular candies, opting for flavors like strawberry, lemon, and even more adventurous ones like tropical punch or raspberry. You can even get creative with layered designs or fill them with small candies or fruits, makin them a hit for all ages.
Why Use Jello for Easter Eggs?
There are lots of reasons why Jello is a great choice for making Easter eggs. One big plus is the endless varieties of flavors and colors you can use. You can mix different Jello types to create pretty, multi-layered eggs that look cool and cater to different taste buds. Whether you're into fruity, tangy or tropical flavors, there's a Jello out there for you.
Another reason to choose Jello Easter Eggs is that they're a bit healthier than the typical treats like chocolate eggs or candy jars. Even though they are still sweet, they often have fewer calories and less sugar, giving you a lighter option when everything else around is super sugary. More and more families want options that are a bit healthier, and these eggs fit right in.
A great thing about Jello is how easy it is to customize. If you have dietary restrictions, like being vegan or needing gluten-free items, you can usually find ways around it - even using agar-agar instead of regular gelatin. This means everyone can take part in the fun, and your Jello Easter Eggs can please just about anyone.
Ingredients and Supplies Needed
To make your very own awesome Jello Easter Eggs, you're gonna need a bunch of simple ingredients and some supplies. Check out this list to get started:
- Jello: Pick your favorite colors and flavors.
- Boiling water: Helps in dissolving the gelatin.
- Cold water: Mixes with the gelatin afterwards.
- Egg-shaped molds: Lets you shape your Jello into cute egg forms.
- Cooking spray: Optional, but helps get the Jello out of the molds easier.
You'll also need these extra tools:
- Bowls: For mixing everything together.
- Whisk: So the gelatin dissolves completely.
- Dropper or spoon: Use to fill the molds with your Jello mix.
Detailed Recipe for Jello Easter Eggs
Ingredients
- 2 cups of boiling water
- 2 cups of cold water
- 2 packets of Jello (any flavors/colors you like)
- Cooking spray (for the molds)
Directions
Just follow these steps to whip up your Jello Easter Eggs:
- First, spray your egg-shaped molds lightly with cooking spray. This helps you get the Jello out later on.
- In a big bowl, stir one packet of Jello into 2 cups of boiling water until it's all dissolved.
- After that, mix in 2 cups of cold water really well.
- Then, using a dropper or spoon, carefully fill half of each mold with the Jello mix.
- Put the molds in the fridge for 2 to 3 hours until the Jello sets.
- Once the first layer is firm, repeat the steps with the second packet of Jello to fill up the other half of the molds.
- After the second layer has set, gently take the Jello eggs out of the molds.
- If you want to get extra fancy, you can decorate your eggs with whipped cream, edible glitter, or colorful sprinkles.
- Keep the finished Jello Easter Eggs in the fridge until you're ready to eat them.
Tips for the Perfect Jello Easter Eggs
- Try using several colors and flavors for a super vibrant look.
- Mix different flavors in layers for a unique taste.
- If you like your eggs fruitier, add some fruit purees to the Jello mix before fillin the molds.
Creative Serving Ideas for Jello Easter Eggs
You can serve Jello Easter Eggs in lots of fun ways to boost the Easter vibe:
- Jello Easter Egg Salad: Toss the eggs into a festive salad or dessert platter for a burst of color.
- Easter Baskets: Use 'em to fill baskets, alongside the usual chocolates, for a cool surprise.
- Dessert Table: Set them up on an Easter-themed dessert table for a real standout treat.
- Friends and Family Gatherings: Arrange them on tiered stands or pretty trays to wow your guests.
Storage and Shelf Life
Keeping your Jello Easter Eggs fresh is key:
- Store them in an airtight container in the fridge so they stay fresh.
- If stored right, they can last up to one week.
- To stop them from drying out, avoid too much air exposure; you might even wrap each egg in plastic wrap if needed.
FAQs about Jello Easter Eggs
What is the best way to remove Jello eggs from molds?
Press gently on the outside of the mold or run warm water over it for a few seconds to help loosen the Jello before you pull them out carefully.
Can I make Jello Easter Eggs ahead of time?
Yeah, you can make them a few days in advance and keep them in the fridge until you are ready to serve.
Are there any vegan options for making Jello?
For sure! You can use agar-agar or other plant-based substitutes to whip up vegan-friendly Jello Easter Eggs.
How can I add flavors or extras to Jello?
You can mix in fruit purees, a bit of citrus zest, or small fruit pieces before pourin it into the molds to boost the flavor.
Can Jello Easter Eggs be frozen?
You could freeze them, but it might change the texture. It's usually best to enjoy 'em fresh or kept in the fridge for the best taste and feel.
Popular Variations of Jello Easter Eggs
You can tweak Jello Easter Eggs in lots of cool ways:
- Layered Jello Eggs: Make eggs with multiple layers by letting one layer set before adding a different flavor on top.
- Jello Eggs with Candy Fillings: Fill the eggs with small candies, gummy bears, or fruit bits to add extra sweetness.
- Alcohol-Infused Jello Easter Eggs: For adult get-togethers, you might even mix in a little flavored spirit to make festive Jello shots.
- Custom Flavors: Play around with different flavor combos and colors to create a treat that fits your family's taste.
Conclusion
Jello Easter Eggs aren't just a bright addition to your Easter table - they stand for creativity, family fun, and the joy of cooking together. We really hope you'll give this recipe a shot and share the awesome times with your loved ones this Easter.
jello easter eggs
Equipment
- 1 mixing bowls
- 1 whisk
- 1 measuring cups
- 1 measuring spoons
- 1 plastic egg molds
- 1 small saucepan
Ingredients
- 2 cups boiling water
- 2 packets (3 oz each) flavored gelatin Any colors of your choice.
- 1 cup cold water
- 1 cup whipped cream For optional filling.
- varies applies food coloring Optional.
- spray applies cooking spray For molds.
Instructions
- Prepare the plastic egg molds by lightly spraying the insides with cooking spray to prevent the gelatin from sticking. Set aside.
- In a mixing bowl, combine the two packets of flavored gelatin with 2 cups of boiling water. Whisk until the gelatin is completely dissolved.
- Once dissolved, add 1 cup of cold water to the gelatin mixture. If desired, divide the mixture into smaller bowls and add food coloring as needed.
- Pour the gelatin mixture into the prepared egg molds, filling them about three-quarters full. Leave a small space for whipped cream filling, if desired.
- Place the filled molds in the refrigerator and allow them to set for at least 4 hours, or until firm.
- Once firm, remove the molds from the refrigerator. If using whipped cream, carefully fill each egg with whipped cream before sealing them with the top half of the mold, or serve with whipped cream on the side.
- Gently twist and pull apart the egg molds to release the gelatin eggs.