The pot lid rattles and you know dinner is almost ready. That little noise is kinda like a signal, a reminder you�92ve been waiting for. You spot the steam cues escaping under the lid and your kitchen suddenly feels alive with the warm scent of whatever you got cooking. There�92s this calm before the meal that you kinda savor.
When the valve hiss breaks through, you hear it and you remember why you love this cooker so much. It�92s not just about speed, it�92s about that steady pressure build that gets everything tender and flavorful real fast. You sense something special�92s about to happen in your pot, and you get excited for it.
You recall how easy cleanup is after all that pressure cooking. Unlike other pans that stick and stain, your pressure cooker feels like a trusty friend keeping everything neat. You�92re almost ready to dish out, but you gotta be patient for that natural release to finish. That�92s where the flavors deepen and meld just right.
Why Your Cooker Beats Every Other Pot
- It locks in moisture with steady pressure build so meals stay juicy and tender.
- The valve hiss signals perfect timing, so you don�92t overcook your food.
- Steam cues tell you when the magic starts and stops without guesswork.
- Broth depth is richer because nothing escapes except the right amount of steam.
- Natural release lets flavors settle in, making every bite more satisfying.
Everything You Need Lined Up
- 20 coffee filters, your basic basket material.
- 1 small bowl to shape your little baskets.
- A piece of wire for the handles, flexible but sturdy.
- Acrylic paint in any color you like for some fun flair (optional).
- White craft glue or hot glue to secure your layers tight.
- Newspaper or a workspace you don't mind getting a little messy.
- Paintbrushes if you decided to paint those filters.
- Scissors or wire cutters for trimming your handle.
- Paper towels for cleaning up any glue drips.
- A little patience to let paint and glue dry fully before moving on.
Your Complete Cooking Timeline
Step one is gather up all your materials so everything�92s ready at hand. It kinda helps to keep your workspace organized before you start getting messy.
Next, if you wanna add color, go ahead and paint your coffee filters with your acrylic paint. Make sure you lay them out flat and let them dry really well before folding.

Once your filters are dry, take one and fold it into quarters. This creates a nice little wedge shape that fits inside the bowl perfectly.
Pop that folded filter into your small bowl. This gives you the base shape of your basket ready to build on.
Repeat this folding and shaping for several filters. Stack �91em inside the bowl to get enough layers so your basket feels sturdy and solid enough to hold goodies.
When you got the layers right, use white craft glue or hot glue to stick them together and to the bowl itself. Press gently but firmly so everything bonds well.
Let the glue dry completely before you try moving your basket. This step is important to keep your basket from falling apart while you�92re handling it.
Lastly, cut a piece of wire to your preferred handle length. Push the ends carefully through the coffee filters on each side, then twist the wire ends to lock the handle in place. Double-check your handle feels secure and ready to carry your treats.
Easy Tweaks That Make Life Simple
You can speed things up by painting a bunch of filters at once, then setting them all out to dry in one go. This lets you prep plenty without waiting on each one alone.
If you wanna skip the painting, leave your filters plain for a classic, simple look that still looks great with Spring colors.
Using hot glue instead of craft glue is a quick fix when you�92re in a rush, cause it dries real fast and sticks great. Just be careful not to burn your fingers!
The Flavor Experience Waiting for You
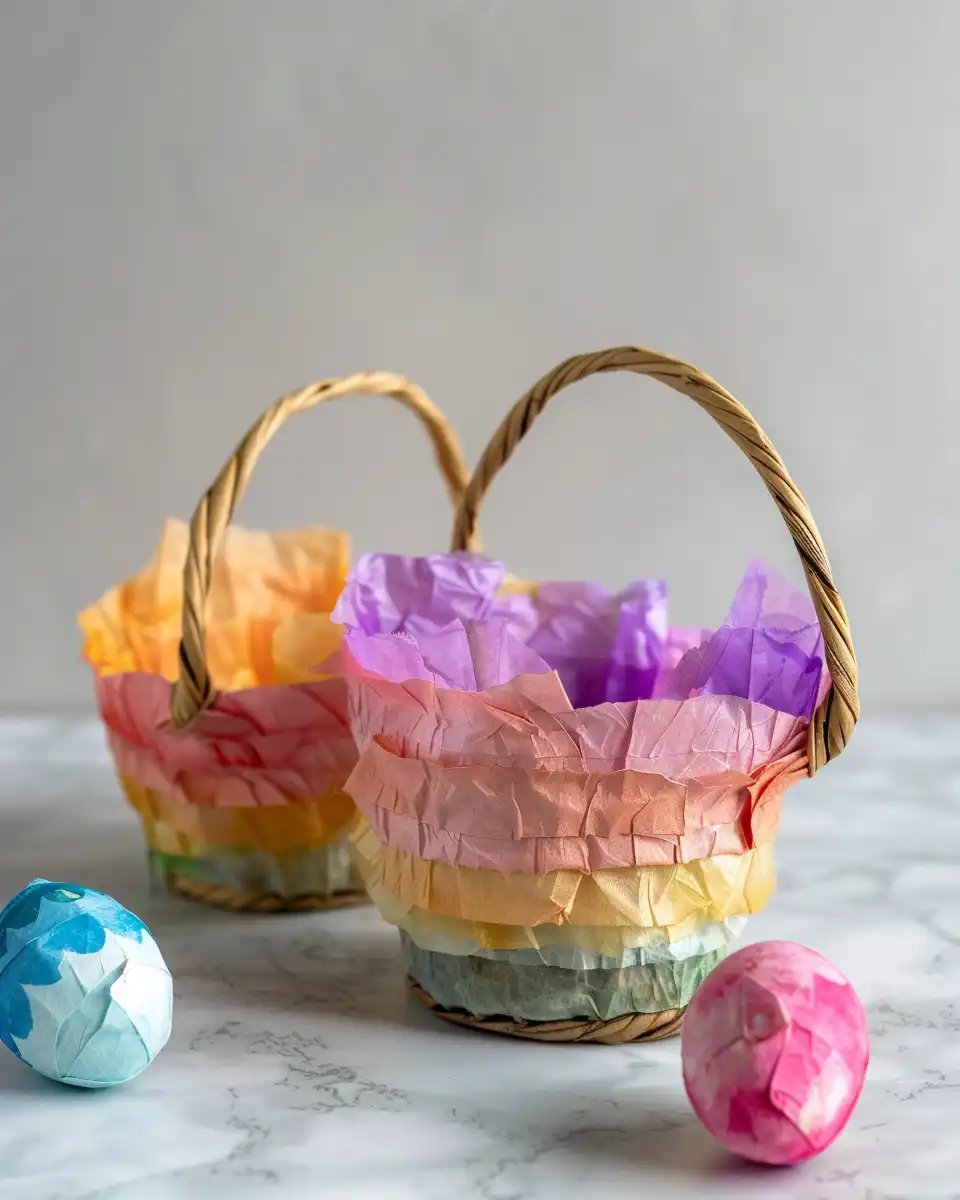
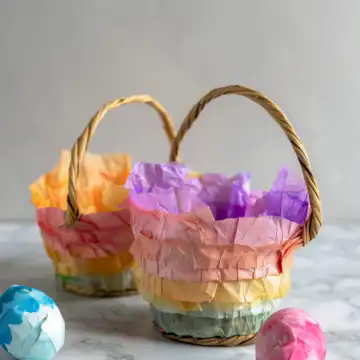
The texture of the layers is kinda like soft petals stacked softly, so your basket looks delicate and inviting. It�92s fun to feel the lightness that coffee filters give you while they hold their shape strong enough for all your eggs and candies.
The colors from painting make each basket pop with personality. You can go bright and bold or soft pastels that give off warm holiday vibes.
When your wire handle�92s on right, it feels sturdy but still moves a little with your touch, giving you this tactile connection to your handmade craft.
All together, these tiny baskets are a cute surprise for anyone who gets one, bringing smiles and a little crafty pride your way for sure.

Making It Last All Week Long
Store your baskets somewhere dry and cool so the filters don�92t get damp or lose their shape. A shelf or cupboard works best.
If you got pets or kids around, keep your baskets away from curious paws to avoid accidental rips or squashed shapes.
You can refresh your baskets by gently wiping them with a dry cloth to remove dust without messing with paint or glue.
Common Questions and Real Answers
Q: Can I use bigger coffee filters for larger baskets?
A: Absolutely, bigger filters make bigger baskets but you might need more layers for strength.
Q: Should I paint the filters before or after shaping?
A: Painting before folding works best so your paint dries flat and looks even.
Q: What if I don�92t have a small bowl? Could I use a cup?
A: Sure thing, any small round container can give you a nice shape for your basket.
Q: Is glue really necessary?
A: Glue keeps everything stuck tight and sturdy so your basket won�92t fall apart when you carry it around.
Q: How long does drying take?
A: Usually at least a few hours, but it�92s better to let it sit overnight if you can for a stronger hold.
Q: Can you reuse the baskets next year?
A: Yep, just store �91em well away from moisture and pets, so they�92re fresh for another season.
For more creative crafting and recipes, check our Carrot Cake Cupcakes and the Classic Hot Cross Buns for delightful treats made with friendly kitchen tools.
How to Make Coffee Filter Easter Baskets
Equipment
- 1 Small bowl To shape baskets
Ingredients
Materials
- 20 Coffee filters basic basket material
- 1 Small bowl to shape baskets
- 1 piece Wire for the handles
- 1 Acrylic paint optional, any color
- 1 White craft glue or hot glue to secure layers
Instructions
Instructions
- Gather up all your materials so everything's ready at hand.
- If you want to add color, paint your coffee filters with your acrylic paint and let them dry flat.
- Once dry, take one filter and fold it into quarters for a wedge shape.
- Put the folded filter into a small bowl to form the basket's base shape.
- Repeat folding and shaping for several filters to create enough layers for sturdiness.
- Use glue to stick the layers together and to the bowl, pressing gently.
- Let the glue dry completely before handling the basket.
- Cut a piece of wire for the handle, push through the filters, and twist ends to secure.
- Ensure the handle is secure before using your basket.