The pressure builds and you start counting down minutes until you eat. Your kitchen fills with that faint valve hiss sound, and you know the float valve is doing its job upstairs, baby. Each second feels a tiny bit longer, but you keep telling yourself it is gonna be worth every little wait.
You fiddle with your phone, check the clock, then look back at the pressure cooker. You notice the smell of lemon zest weaving through the air, teasing your senses like a gentle promise of something tender and bright. That tender pull on the loaf's crust when it's ready, wow, that's what you wanna get to.
Pressure cooking this lemon loaf is kinda a game changer. You remember the days of slow baking, waiting forever and getting dusted by oven heat while you peeked through glass, hoping it's done. But now you got a shortcut that makes your kitchen sing and the dessert come out perfectly every time.
What Makes Pressure Cooking Win Every Round
- Super fast cooking saves you precious time in the kitchen. Check out our pressure cooker tips for even better results.
- Locked-in moisture means your lemon loaf stays tender and won't dry out.
- Consistent heat pressure helps bake the loaf evenly without hot spots. For more even baking, see our even baking techniques post.
- Less energy used compared to firing up that big oven.
- Less mess and fewer dishes 'cause you do it all in one pot.
- Quick release valve lets you stop cooking right on time, no overbaking worries. Learn more about pressure release methods.
- Float valve signals when everything's sealed tight, so no steam slips away and your bake's perfect.
What Goes Into the Pot Today
- 1 ½ cups all-purpose flour - your loaf's foundation, gotta be right.
- 2 teaspoons baking powder - for that lemony lift and fluffiness.
- ¼ teaspoon salt - just a pinch to balance all the sweet.
- 1 cup plain Greek yogurt, full fat or 2% - makes it so moist and tangy.
- ¾ cup sugar - sweet enough to brighten the lemon, but not crazy sweet.
- 3 large eggs - bindin' everything up nice and smooth.
- Zest of 2 lemons - bringing all that fresh citrus zing.
- 1 teaspoon vanilla extract - adds warmth to the bright flavors.
- ½ cup melted coconut oil - for richness that keeps it tender.
Your Complete Cooking Timeline
First, you gotta grease your pressure cooker-safe loaf pan real good so the cake doesn't stick later. While you're at it, zest those lemons and pre-measure all your ingredients - it helps keep you sane.
Mix those dry ingredients - flour, baking powder, salt - in a bowl and set it aside. Then whisk your Greek yogurt, sugar, eggs, lemon zest, and vanilla together until smooth like a creamy dream.
Slowly fold the dry mix into the wet; don't overwork it, just until it's all combined. Then fold in the melted coconut oil 'cause that's the secret to that moist texture you love.
Pour that batter into your greased pan, smoothing the top so it bakes even. Now, place the pan inside your pressure cooker with a rack or trivet under it - no direct pot contact, gotta keep it safe.
Add a cup of water to the cooker base to create steam. Seal up the lid properly. Set your cooker to high pressure and schedule the timer for 30 minutes. Here we go, countdown starts!
Once the timer dings, you'll do a quick release - listen closely for that valve hiss, it's your signal. The float valve will drop, telling you it's safe to open the lid.
Carefully take out the loaf pan and let it cool for about 10 minutes before you tip it onto a wire rack. This way the loaf finishes firming up without getting soggy.
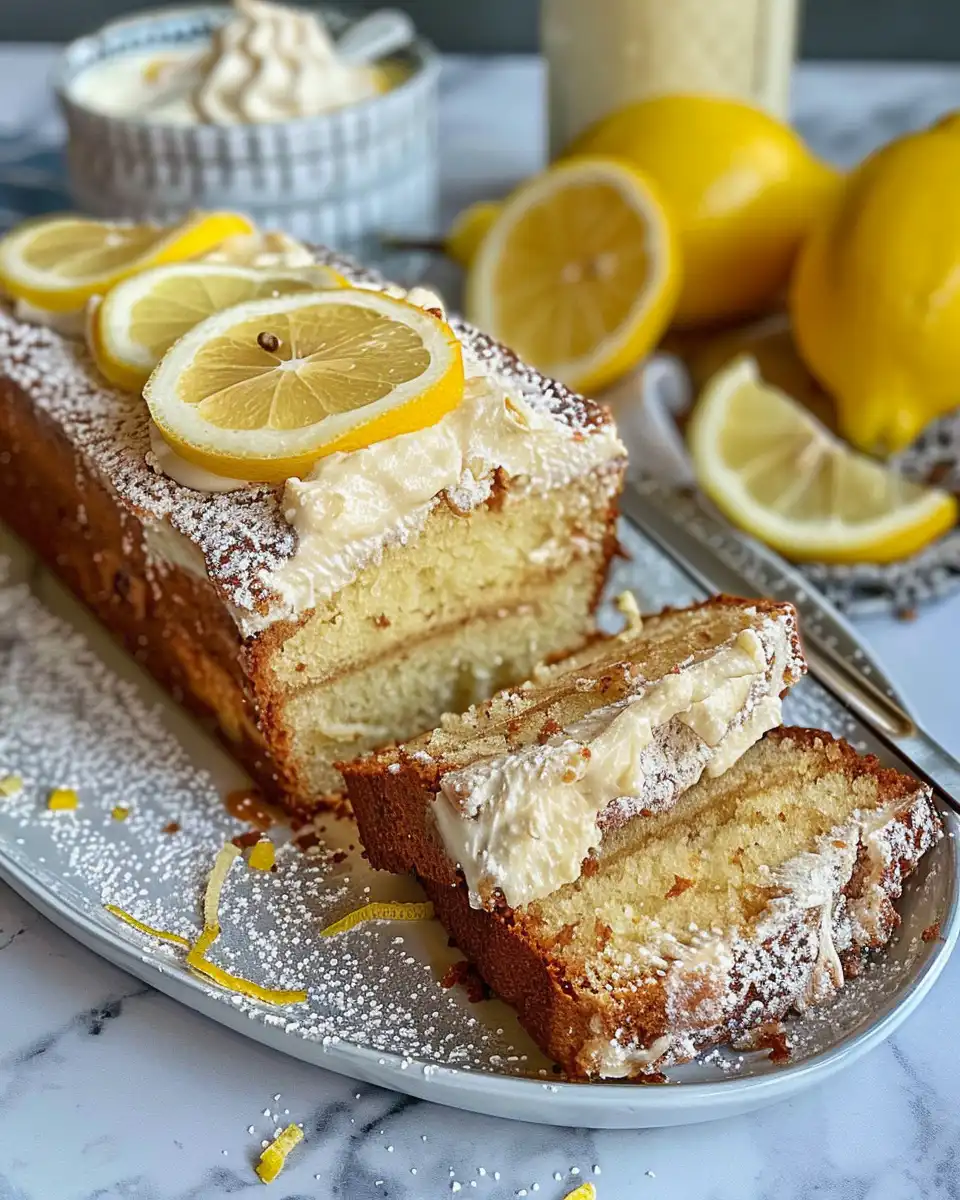
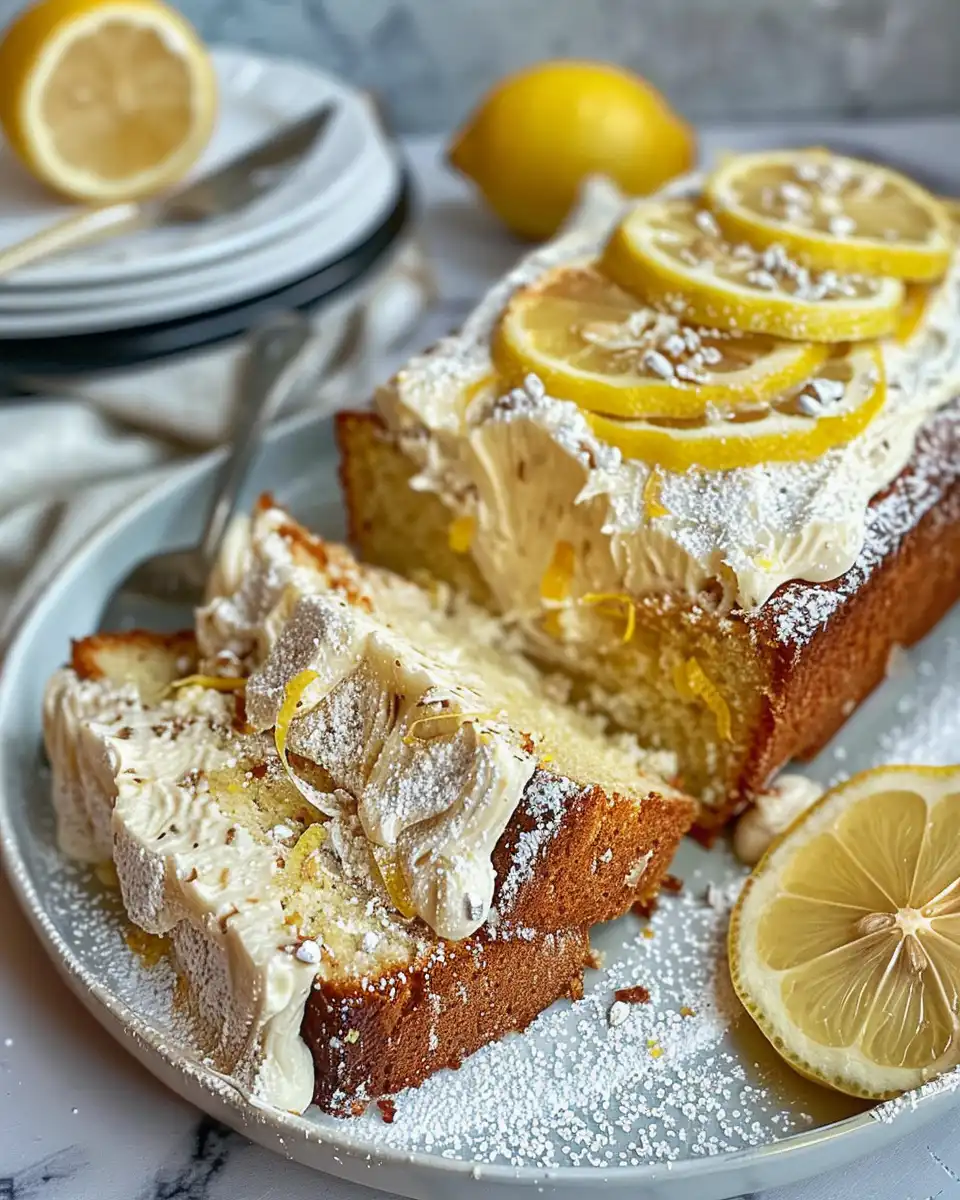
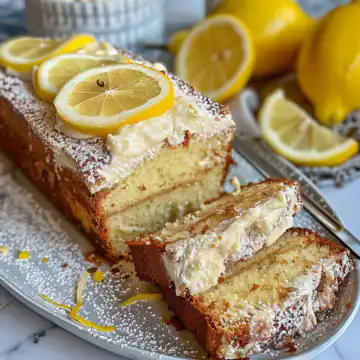
Mix up a simple lemon glaze with powdered sugar, lemon juice, and a bit of lemon zest while the loaf cools, then drizzle it on top when it's almost set for that extra zing.
Valve Hacks You Need to Know
- When you start hearing the valve hiss, that means pressure is building fast - you can kinda predict when the cooking countdown is gonna begin.
- The float valve is your best friend - don't open the cooker until it drops or you'll get a burst of hot steam.
- Quick release is perfect for cakes so you don't overcook, but slow release works better for tougher meats you wanna fall apart tender.
- If steam keeps escaping, your gasket might be off - make sure the seal is snug so all that pressure can build right up.
That First Bite Moment
You slice into the loaf and notice the tender pull of that soft crumb. It's got that perfect spring back that tells you it's moist and just right. The lemon zest aroma floats up making you grin before the first bite even hits your tongue.

When you finally taste it, the flavors are bright but balanced. The tangy yogurt works wonders with the sweet glaze and lemon zest, and the coconut oil adds a gentle richness that keeps the loaf from feeling dry or dense.
It's one of those moments where your kitchen smells like summer and you're thinking, heck yeah, this is gonna be your new favorite loaf. It's kinda comforting but still fresh and lively, you know? Every bite feels like a little sunshine break.
Keeping Leftovers Fresh and Ready
If you don't finish that loaf in one sitting (which is rare, right?) you wanna store it right. Wrap leftover slices tight in plastic wrap or foil. This keeps the moisture in and the flavors fresh.
Another way is to put slices in an airtight container and pop it in the fridge. It lasts a few days this way, and you can warm a slice up quick in microwave for that kinda freshly baked feel.
For longer storage, freeze individual slices in freezer bags. When you're ready, thaw them at room temp or microwave for a few seconds. It still tastes surprisingly fresh and ready for you to dig in.
Your Most Asked Questions Answered
- Can I use low-fat Greek yogurt? You can but the loaf might not be as moist or rich. The 2% or full fat works best for that tender pull you love.
- What if I don't have coconut oil? Butter melted works fine too. It won't change the texture much, just swap it one for one.
- Why is the quick release important for this recipe? Quick release stops cooking right away, so your loaf doesn't get overdone or dry. Cakes like this benefit big time from that quick timing.
- Can I add poppy seeds or nuts? Totally! Stir in about a tablespoon of poppy seeds or some chopped nuts if you want texture and a little crunch.
- What happens if the loaf sticks to the pan? Make sure you grease it well or even line it with parchment paper. Let it cool a bit before removing because the warm loaf can be delicate.
- Is it safe to pressure cook cakes? Yes, absolutely! As long as you use a suitable pan and a rack, your cake bakes evenly with that great moisture locked in.
Greek Yogurt Lemon Loaf Pressure Cooker Recipe
Equipment
- 1 Pressure cooker Suitable for baking
- 1 Loaf pan Pressure cooker safe
- 1 Wire rack For cooling
Ingredients
Main ingredients
- 1 ½ cups all-purpose flour your loaf's foundation, gotta be right
- 2 teaspoons baking powder for that lemony lift and fluffiness
- ¼ teaspoon salt just a pinch to balance all the sweet
- 1 cup plain Greek yogurt full fat or 2%, makes it so moist and tangy
- ¾ cup sugar sweet enough to brighten the lemon, but not crazy sweet
- 3 large eggs binding everything up nice and smooth
- zest of 2 lemons bringing all that fresh citrus zing
- 1 teaspoon vanilla extract adds warmth to the bright flavors
- ½ cup melted coconut oil for richness that keeps it tender
Instructions
Instructions
- Grease your pressure cooker-safe loaf pan very well to prevent sticking.
- Combine flour, baking powder, and salt in a bowl; set aside.
- In another bowl, whisk Greek yogurt, sugar, eggs, lemon zest, and vanilla until smooth.
- Fold dry mixture into the wet mixture until just combined. Stir in melted coconut oil.
- Pour batter into greased pan, smooth the top, and place in pressure cooker on a rack.
- Add a cup of water to the cooker base. Seal the lid and cook on high pressure for 30 minutes.
- Perform a quick release, then remove loaf pan and let it cool for 10 minutes. Transfer to a wire rack.
- Prepare a glaze with powdered sugar, lemon juice, and zest. Drizzle over cooled loaf before serving.