
Childhood ember memory
When I was a kid I remember sitting on a creaky wooden chair at my grandma's place with a bowl of Easy Chocolate Mousse Pie in front of me. The first spoonful felt like a cloud of chocolate cream pie on my tongue. I still recall how the mousse tart filling was so airy it almost floated above the crust. It was a no bake dessert moment I never wanted to end.
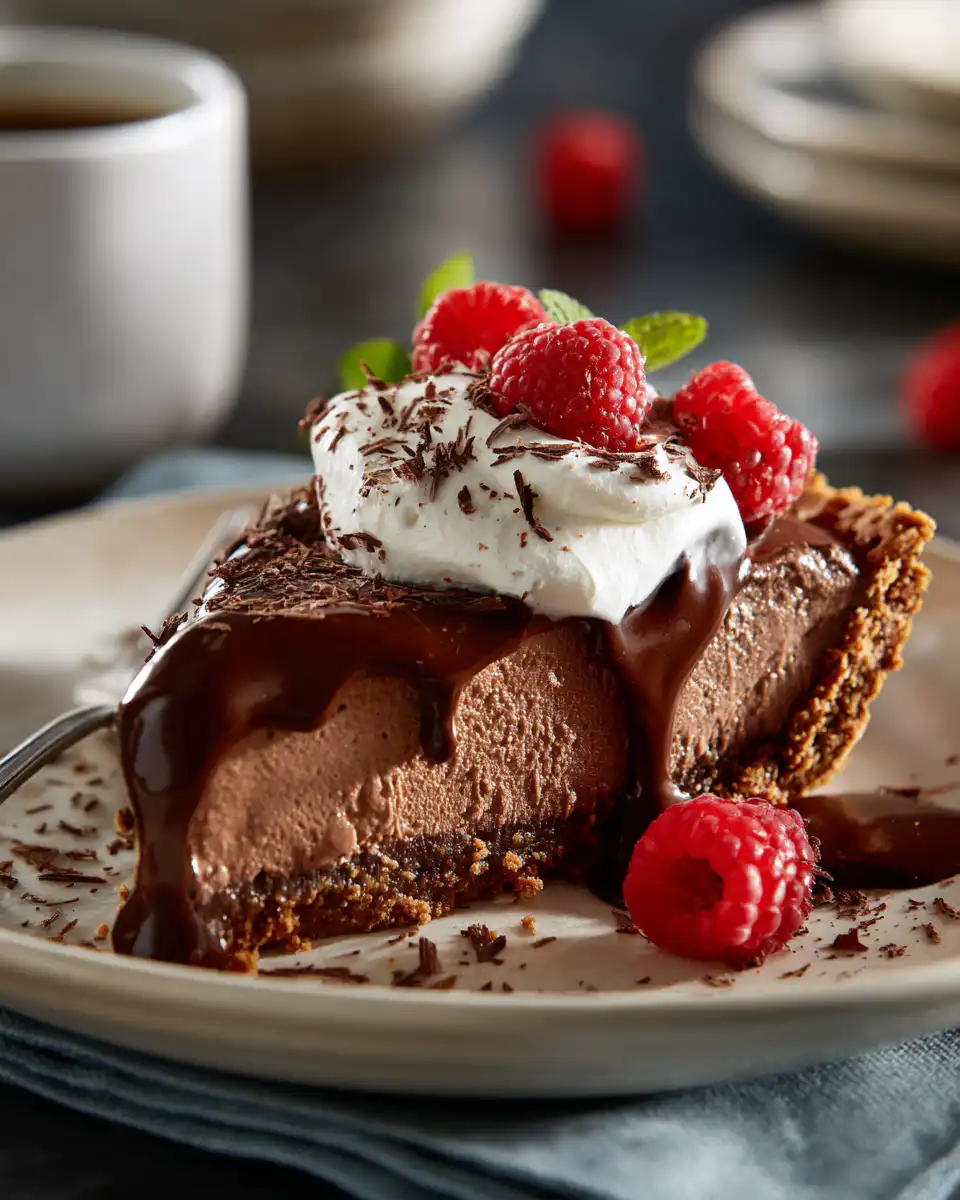
That kitchen was hot in the summer but cool in my memory. The whipped cream topping had soft peaks and my grandma drizzled extra chocolate ganache over the top. I watched the ganache pool on the dessert and I thought yall this is the best thing ever. She winked and said it was her little secret to keep my grin going.
Every time I try that recipe I remember the little spatters on my shirt and the giggles that bubbled up when I sneaked an extra bite. It makes me stop and reflect on how simple ingredients can bring so much joy. You might even find yourself smiling at the recollection of your own first taste of chocolate ecstasy.
Fire craft plain words science
All you need is simple science to turn cream sugar cocoa and eggs into something dang delightful. The whipped cream carries air bubbles while the egg whites or yolks give the mousse a silky smooth texture. When you fold them gently you keep those bubbles intact so the filling stays light. Emulsification is a big nerdy word here but basically it means making water and fat join together in perfect harmony.
The cocoa powder or melted chocolate brings in flavor compounds that float through your nose as aroma. Heat can boost that aroma but here you chill instead. Cold slows down the molecules and lets the mousse set up into that billowy cloud you scoop with a spoon. It is wild how a fridge can transform a loose mixture into a stable dessert that holds its shape.
Pantry grains and spice list six to eight items
For your Easy Chocolate Mousse Pie prep you only need a handful of pantry staples. Yall could already have most of these on the shelf. Here is what you want to gather:
- Graham crackers for the crust base
- Unsalted butter melted to bind the crumbs
- Cocoa powder rich dark style
- Granulated sugar for sweetness
- Eggs separated into whites and yolks
- Heavy whipping cream chilled to whip
- Vanilla extract just a splash
- Salt a pinch to lift flavors
If you feel like you want more flair you can add a dash of cinnamon or a tiny pinch of cayenne to bring a gentle heat. But even plain cocoa powder stands strong. The crust uses the crumbs and butter pressed tight to hold that luscious mousse tart filling above it.
Dough knead ritual steps
First grab a mixing bowl and crush your graham crackers by hand or in a plastic bag with a rolling pin. You want a mix of fine crumbs and small bits so the crust has texture. Then pour in your melted butter and stir with a spoon until every crumb is slick and sticks together. That is the kind of dough bloom you feel under your fingers even if it is more crumb than dough.
Next you press that mixture into the bottom and up the sides of a pie pan. Use the flat bottom of a glass to make an even layer. Press firmly so it does not fall apart when you slice the pie later. Then pop the crust into the fridge or freezer to chill. That cold will help it set up and hold the mousse filling.
While the crust chills you can start the mousse filling. Beat egg yolks with sugar until they get pale and thick. Melt your chocolate or cocoa in a double boiler or microwave in short bursts stirring often. Then whisk the hot chocolate into the yolk mix until silky smooth. Let that cool to room temp so you do not melt the whipped cream.

In a separate bowl whip your heavy cream until soft peaks form. Then whip the egg whites until they hold stiffer peaks. Fold the cream into the chocolate slurry first with gentle sweeping strokes. Then fold in the egg whites just until no white streaks remain. That technique keeps live air pockets intact so the mousse stays lofty.
Rising dough aroma scene
When you pull the crust out of the fridge it smells of sweet buttery crumbs. Opening the fridge again to add the mousse you get a cold sweet breeze mixed with cocoa aroma. The air seems thick with chocolate promise. It takes a bit of discipline not to dive in right away by the scent. But that chill is what makes the pie set and keeps it so dreamy on your first bite.
Flip and char checkpoints
There is no actual flip or char here but you do check how the filling holds shape. Gently tap the pie pan on the counter and watch for any jiggle that looks too loose. If the mousse still dances like jelly give it more chill time. You want just a hint of spring when you nudge it.
After about four hours in the fridge the top should be matte with a tiny bit of frost on it. That means it is ready. If you try cutting a slice at this point the edges hold firm and the center yields slightly under pressure. That is your checkpoint for the perfect texture. You avoid any messy spills and serve nice neat pieces.
Smoke kiss notes
Okay so we aint using smoke here but the fragrance of cocoa is kinda like a gentle kiss on your tastebuds. When you warm a spoon on your palm and swirl it through the mousse a warm mouthfeel highlights the chocolate aroma. That contrast of cool filling and slightly warm spoon tip brings out more flavor notes.
You could add a drizzle of melted dark chocolate on top right before serving. That little topping cools fast into a thin firm sheen that breaks when your spoon goes through. It almost mimics a light char or snap that you crack open. It is a neat trick to boost experience without a flame.
Shared platter touches
Place the pie in the center of the table and watch everyone's eyes get big. Surround it with small spoons or pretty forks on a plate. Let folks take turns serving themselves. A dust of cocoa or a few chocolate shavings on the platter rim makes it pop.
Kids and grown ups both love that moment when the first slice is lifted from the pan. That gentle tug sound ya know. The smooth mousse follows the fork tip and lands on a dessert plate so dang gracefully. You might wanna tell everyone to go slow so they get a full taste of that creamy delight.
Seasonal stuff twist
For a festive twist around holidays you can stir in a drop of peppermint extract or fold in some crushed candy cane. The white bits pop against the dark chocolate and bring in a minty breeze. In warmer months try stirring in a spoonful of orange zest or a swirl of raspberry puree before the mousse sets.
Summer berries pressed gently on top add color and tang. Little mint leaves or toasted coconut flakes can dress it up for any occasion. The recipe stays the same only you swap out a tiny ingredient and voila festive surprise.
Store reheat love guide
Keep any leftover pie covered in plastic wrap or a pie keeper box in the fridge. The mousse stays fresh for up to three days. If the crust starts to soften just let it sit at room temp for ten minutes before serving. That brief rest revives a bit of crispness.
If you prefer a slightly warmer dessert scoop small portions into ramekins and microwave for ten to fifteen seconds. The center gets a hint warmer while the edges stay cool. It is dang fun to mix temperatures in one bite.
You can also break up slices and fold them into chocolate parfait for a quick Sunday treat. Or layer leftover crumbs and mousse in a glass to make a chocolate parfait. It feels like a new dessert but it is really just your love for that pie getting remix.
Family toast and FAQs
Gather round raise a spoon to celebrate simple joys and shared moments. A slice of this pie is more than dessert it is a little ritual that brings folks together with smiles. Here are some common questions I hear when folks try this recipe for the first time
- Can I skip the eggs You could use whipped aquafaba from chickpea water for a vegan version but the texture shifts a bit
- How do I melt chocolate without burning it Use short microwave bursts stirring in between or double boiler on low heat
- Can I use store bought whipped cream Sure it works fine just fold it in gently
- Why did my mousse deflate You might have over folded or added ingredients that were too warm
- Can I freeze slices Yes wrap each piece tight and freeze up to two months thaw overnight in the fridge
Now you are ready to dig in and make your own memories with this Easy Chocolate Mousse Pie. Here is to good times and sweet bites that bring yall closer together.

Easy Chocolate Mousse Pie
Equipment
- 1 9-inch pie dish
- 1 mixing bowl
- 1 electric mixer or whisk
- 1 rubber spatula
- 1 double boiler or microwave-safe bowl
- 1 plastic wrap
Ingredients
- 1 ¼ cups chocolate cookie crumbs
- ½ cup unsalted butter Melted
- 2 cups heavy whipping cream
- 1 cup semi-sweet chocolate chips
- 3 large eggs Separated
- ½ cup granulated sugar
- 1 teaspoon vanilla extract
- 1 pinch salt
Instructions
- In a mixing bowl, combine the chocolate cookie crumbs and melted butter. Stir until the mixture resembles wet sand.
- Press the cookie mixture firmly into the bottom and up the sides of a 9-inch pie dish to form the crust. Refrigerate for at least 30 minutes to set.
- Meanwhile, melt the chocolate chips using a double boiler or in a microwave-safe bowl in 30-second intervals, stirring until smooth. Allow to cool slightly.
- In a separate bowl, beat the egg yolks, remaining sugar, and vanilla extract until thick and pale in color.
- Gradually add the melted chocolate to the egg yolk mixture, mixing until fully combined.
- In another bowl, beat the heavy whipping cream until stiff peaks form. Reserve about ½ cup for topping.
- Gently fold the chocolate mixture into the whipped cream until completely incorporated.
- In a clean bowl, beat the egg whites with a pinch of salt until soft peaks form. Carefully fold the beaten egg whites into the chocolate mousse mixture, being cautious not to deflate the volume.
- Pour the mousse filling into the chilled crust and spread it evenly. Cover with plastic wrap and refrigerate for at least 3 hours or until set.
- Once set, remove from the refrigerator, and garnish with reserved whipped cream if desired. Slice and serve.