You catch the smell through the steam vent and suddenly you are starving. It809s just that kinda warm, homey scent that makes your tummy start to grumble without warning. You spot the little valve hiss and you know something good is about to come out.
That sealing ring keeps everything tight so none of that tasty steam leaks. You remember the last time you made eggs in the pressure cooker and how quickly everything came together. The float valve popping up means you809re in the final stretch.
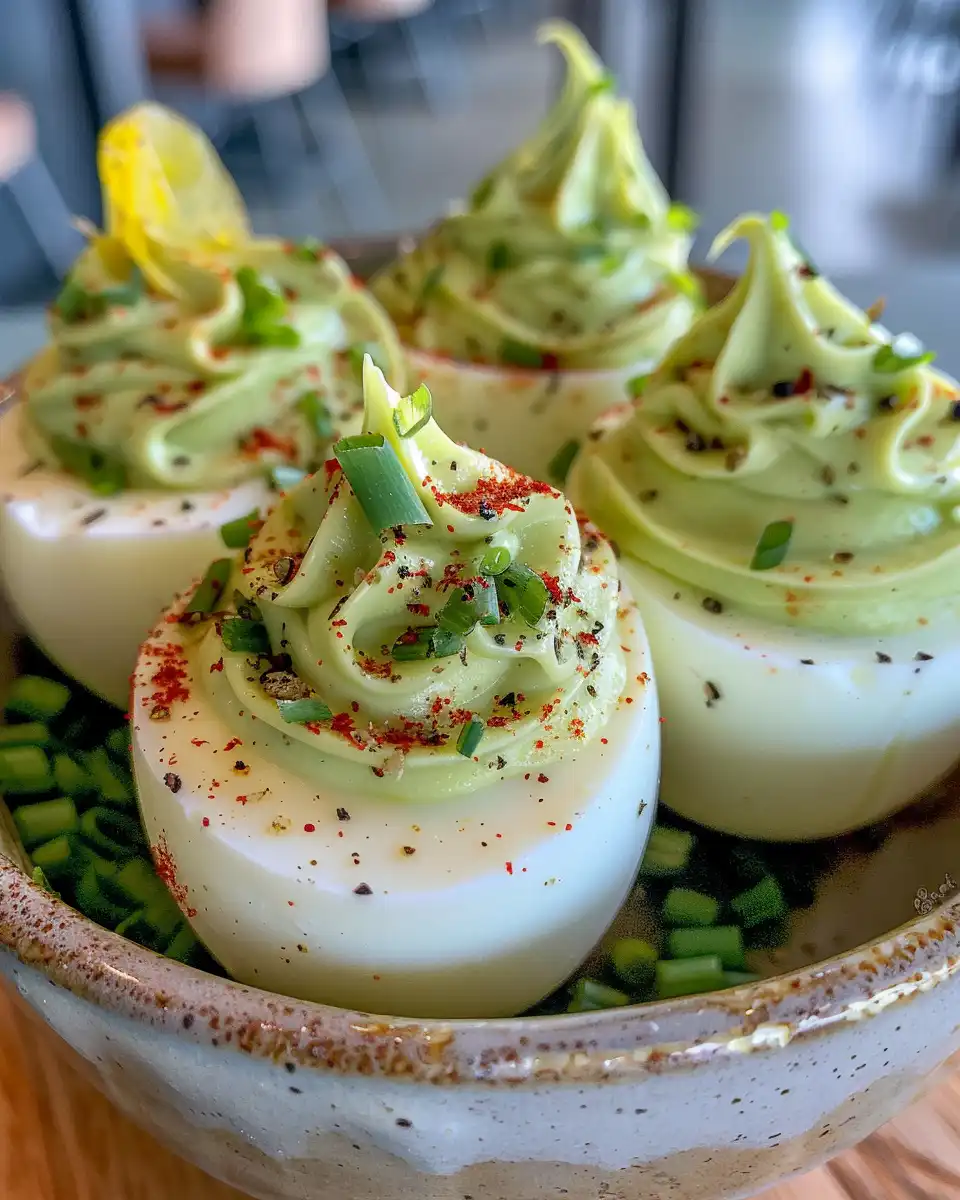
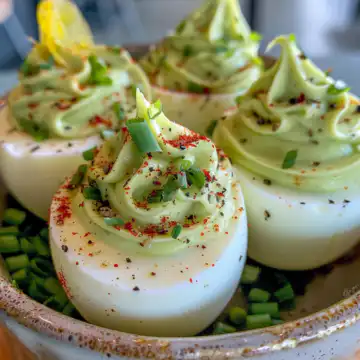
You feel kinda proud watching the broth depth inside your cooker, knowing you got the timing just right. When you finally get to that natural release, the kitchen fills with the smell that just makes you wanna dig right in. Heck, you809re already thinking bout how cute these Easter Bunny Deviled Eggs gonna look on your table.
The Truth About Fast Tender Results
- The pressure cooker locks in steam tight with that sealing ring to cook eggs perfectly every time.
- You get a steady valve hiss sound as the cooker builds pressure and you feel like a pro.
- The float valve lets you know when it809s reached full pressure so no guesswork needed.
- Broth depth matters for even cooking, just enough to cover the eggs but not too much.
- Natural release makes sure eggs finish tender and don7t crack from sudden cool down.
- No long wait to peel either since pressure cooking loosens those shells real good.
Learn more about pressure cooker tips and master the art of timing with your pressure cooker. For further guidance on egg prep, our egg cooking guides page is a treasure trove for perfect results every time.
Your Simple Ingredient Checklist
- 6 hard-boiled eggs peeled 809you gotta have 60em cooled and ready before starting.
- 3 tablespoons light mayonnaise 809keeps the yolks creamy without being heavy.
- 1 teaspoon Dijon mustard 809adds just a little zing that wakes up the flavor.
- Eighth teaspoon kosher salt 809perfect to balance out the creaminess and bring out taste.
- Chives cut into 74-inch pieces 809these lil green sticks will become your Bunny809s whiskers, super cute.
- Black olives cut into very small pieces 809for the Bunny809s eyes, sharp and salty.
- Red bell pepper cut into very small pieces 809the button nose you didn79t know you needed.
- Thin carrot slices cut into "ears" 809this bit is gonna make your eggs adorable and festive.
- Curly parsley optional 809toss on for some green flair if you wanna make 7em pop a little more.
- Water or broth for cooking the eggs 809just enough broth depth to cover the eggs in the pressure cooker.
How It All Comes Together Step by Step
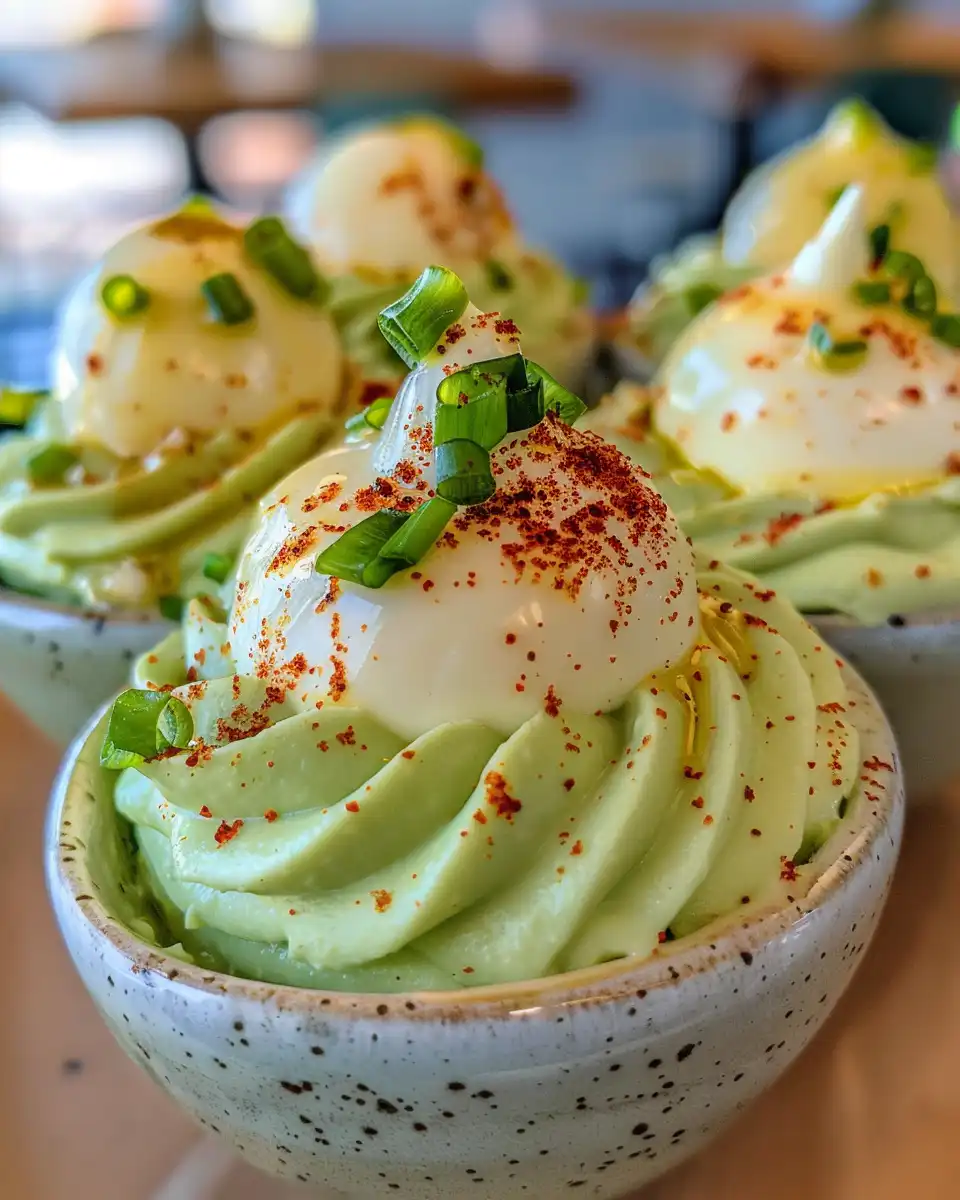
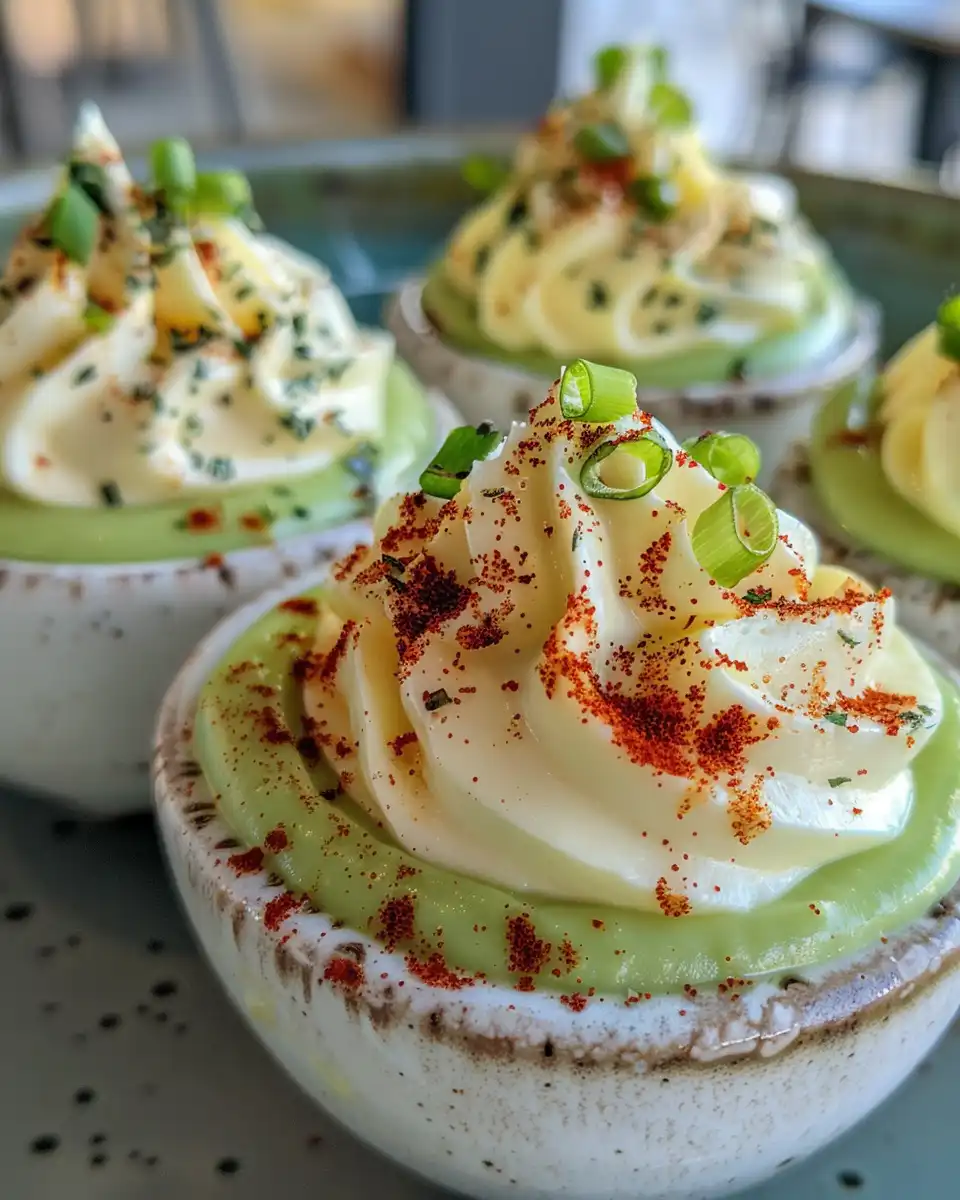
Step 1. Start by cutting your hard-boiled eggs in half lengthwise. You gonna wanna set the whites on a plate, careful not to break them.
Step 2. Scoop out the yolks and pop them into a mixing bowl. You spot those little golden centers, waiting to be mashed.
Step 3. Mash the yolks with light mayonnaise, Dijon mustard, and kosher salt until you get a smooth, creamy mix. You feel that texture is just right when it809s soft to the touch but still thick enough to pipette.
Step 4. Now spoon or pipe that yolk mixture back into the egg white halves. This is where you can get creative, gently filling each cavity like a mini nest.
Step 5. Use your chives to create whiskers by laying 60em gently across the yolk filling. You gotta think bunny face here!
Step 6. Add the black olives for eyes, placing those tiny pieces nice and close for the best expression.
Step 7. The red bell pepper gets chopped super small and placed in the center for a cute little nose. It809s those little details that bring the bunny to life.
Step 8. Finally, garnish with thin carrot slices as ears and a sprig of curly parsley if you809re feeling fancy. These last touches will have you smiling big.
Smart Shortcuts for Busy Days
- Use pre-cooked peeled eggs from your local store if you wanna shave off the boiling step.
- Mix your yolk filling in a food processor to get it extra smooth without much fuss.
- Chop your veggies in bulk and store in fridge so you can assemble faster next time.
- Pipe the yolk mixture right from a plastic bag with a corner snipped off instead of spooning for cleaner presentation.
When You Finally Get to Eat
You pick up that first Easter Bunny Deviled Egg and your fingers feel that cool smooth egg white outside. The yolk filling is creamy and rich, almost like it melts in your mouth first touch.
The touch of Dijon mustard sneaks in with a mild tang that balances the mayo809s smoothness perfectly. It809s simple but clever, like a little surprise with every bite.
You crunch through the tiny bits of black olive and red bell pepper, adding bits of salty and sweet that really make the bunny face pop. It809s playful food that tastes just as fun as it looks.
The carrot ears and fresh parsley bring a teeny crisp texture and green freshness that wakes up each bite. You find yourself smiling, thinking this recipe809s gonna be your springtime go-to snack.
How to Store This for Later
Hard-boiled eggs with deviled filling keep best in an airtight container in the fridge for up to 3 days. You wanna keep those bunny decorations on top intact, so handle them gently.
If you809re prepping ahead, wait to add the chives, olives, peppers, and carrot ears until right before serving. That way the veggies stay fresh and colorful.
You can cover the egg halves with plastic wrap or a loose lid to avoid drying out. Just be sure your container doesn809t squash the delicate ears or whiskers.
Everything Else You Wondered About
- Can I use brown eggs for this recipe? Sure you can. Brown eggs taste about the same but might look a little different. It809s all good.
- What does the sealing ring do in the pressure cooker? It keeps the lid sealed tight so steam builds up right and cooks your eggs evenly without leaks.
- How do I know when to natural release the pressure? Once the cooking time is up and float valve starts to drop, you let it set without touching the valve for about 5-10 minutes.
- Can I skip the mayonnaise? You can but it809ll change the creamy texture in the filling. Maybe try Greek yogurt if you wanna swap it out.
- How do I keep the carrot ears from wilting? Slice them thin right before serving and keep them dry until you place 60em on the eggs.
- Is it okay if my eggs crack a bit during cooking? Yeah, don809t stress. Pressure cooking loosens shells for easy peeling but sometimes slight cracks happen. Still tastes great.
For more Easter-themed treats, see our Easter deviled eggs post, or try classic deviled eggs for more traditional flavors. If you like boosting flavors, explore our spicy deviled eggs variety for a kick. Elevate your gathering with these fun and easy recipes!
Easter Bunny Deviled Eggs
Equipment
- 1 Pressure cooker used to cook the eggs
Ingredients
Ingredients
- 6 hard-boiled eggs peeled
- 3 tablespoons light mayonnaise keeps the yolks creamy without being heavy
- 1 teaspoon Dijon mustard adds just a little zing that wakes up the flavor
- ⅛ teaspoon kosher salt perfect to balance out the creaminess and bring out taste
- Chives cut into ¾-inch pieces for whiskers
- Black olives cut into very small pieces for the eyes
- Red bell pepper cut into very small pieces for the nose
- Thin carrot slices for ears
- Curly parsley optional
- Water or broth for cooking the eggs
Instructions
Instructions
- Start by cutting your hard-boiled eggs in half lengthwise. You gonna wanna set the whites on a plate, careful not to break them.
- Scoop out the yolks and pop them into a mixing bowl. You spot those little golden centers, waiting to be mashed.
- Mash the yolks with light mayonnaise, Dijon mustard, and kosher salt until you get a smooth, creamy mix. You feel that texture is just right when it’s soft to the touch but still thick enough to pipette.
- Now spoon or pipe that yolk mixture back into the egg white halves. This is where you can get creative, gently filling each cavity like a mini nest.
- Use your chives to create whiskers by laying ’em gently across the yolk filling. You gotta think bunny face here!
- Add the black olives for eyes, placing those tiny pieces nice and close for the best expression.
- The red bell pepper gets chopped super small and placed in the center for a cute little nose. It’s those little details that bring the bunny to life.
- Finally, garnish with thin carrot slices as ears and a sprig of curly parsley if you’re feeling fancy. These last touches will have you smiling big.