
Butter tarts are a super popular treat in Canada that lots of people really love, even though their history is a bit fuzzy. They first showed up in Ontario sometime in the early 19th century, and they mix a light, flaky pastry with a gooey blend of sugar, butter, and eggs. Even though we don't know exactly when they started, one thing's for sure: butter tarts are a major part of Canadian food and home cooking.
Butter tarts are really important in Canadian cuisine and are celebrated at food fairs and local competitions. They bring back lots of memories and give people that homey feel. Whether they are served at family dinners, holiday parties, or just as a tasty treat, butter tarts connect people of all ages to their roots. Sure there are many different kinds out there now thanks to different regional twists, but the old school version still wins many hearts.
In this article, we are gonna dive into the world of butter tarts. We will talk about what they are, where they come from, the special ingredients that make them so tasty, and the different kinds you can find all over Canada. We'll also give you a step-by-step guide on how to make the classic butter tarts at home with some useful tips for getting that perfect crust and filling. And if you're looking for something different, we'll mention some awesome bakeries across the country known for their own spin on butter tarts, and compare them with other versions of this cool dessert.
What is a Butter Tart?
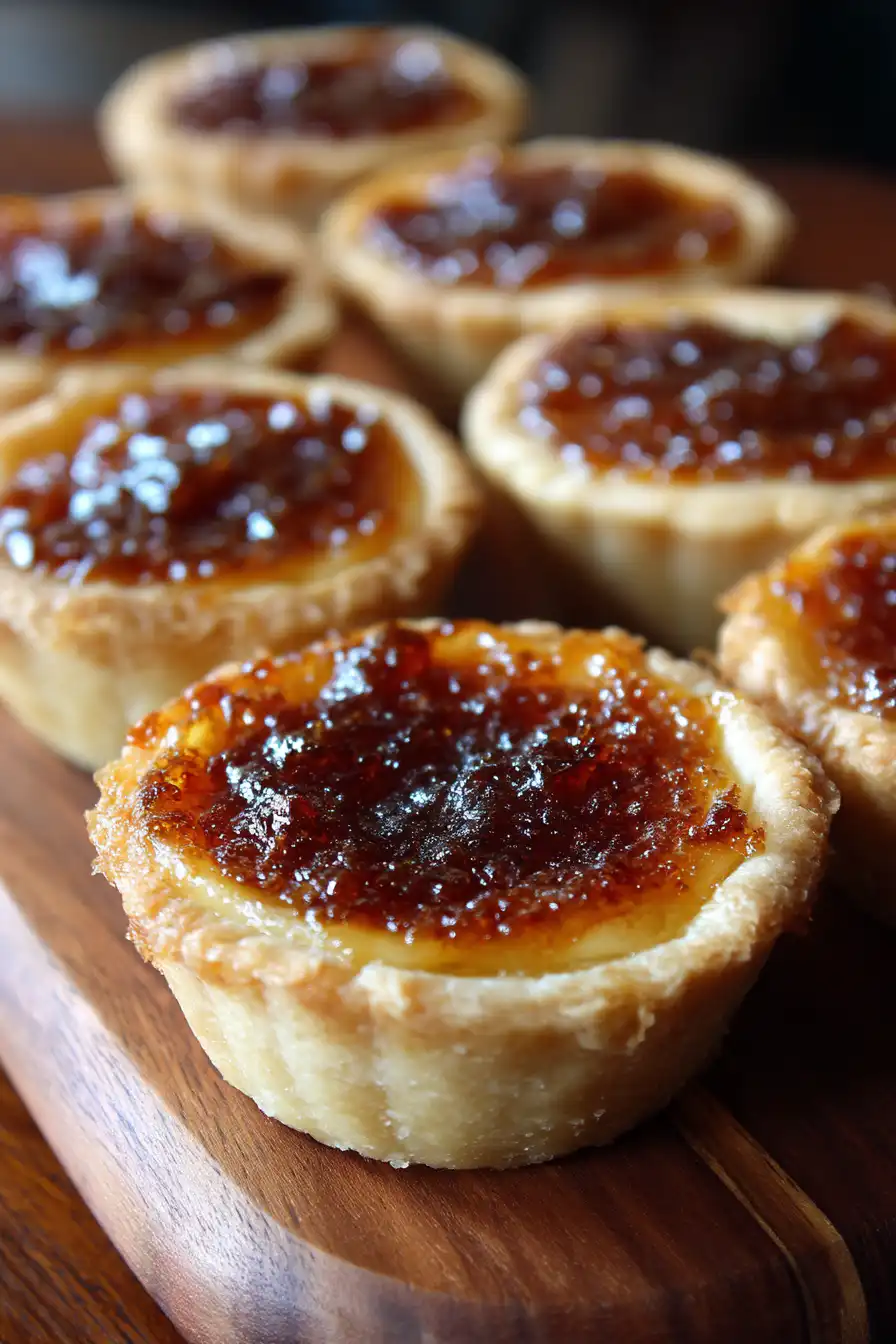
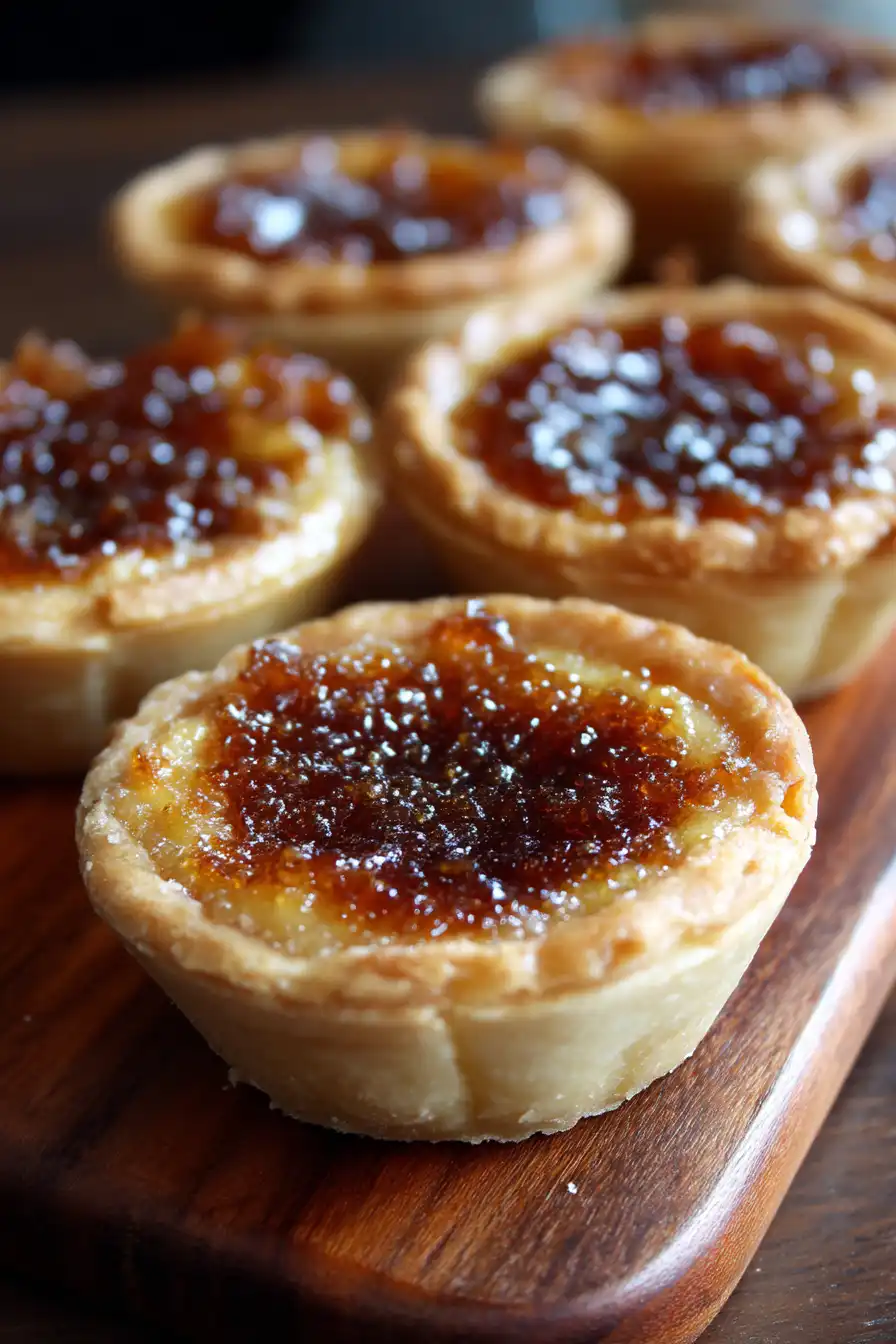
A butter tart is a Canadian pastry that comes with a flaky, buttery crust filled with an awesome mixture of sugar, butter, and eggs. This sweet treat is baked so that the filling is mostly set, but it usually stays a bit gooey in the middle which adds to its charm. The origin of butter tarts goes back to early 19th-century Ontario where they probably evolved from British tarts and custards. While the exact story is kinda hazy, there's no doubt that they're one of Canada's favorite desserts.
When we talk about butter tarts, there are three main parts: the pastry shell, the sweet filling, and sometimes a topping (which can change based on taste). The classic filling is made out of brown sugar, butter, and eggs, giving it a full rich flavor that most people just cant get enough of. Some recipes might add a bit of vanilla or even maple syrup to give it extra flavor.
All over Canada, you will find many different takes on the butter tart. Some places add raisins or nuts, while others like to get creative with chocolate or coconut. But the traditional butter tart is still known for its smooth, gooey center paired with that crisp pastry that makes it special.
The Classic Butter Tart Recipe
To really get what makes Canadian food so cool, making your own butter tarts at home is a must. These treats not only remind you of the good old days but also let you mix up the recipe to match your own taste. Below, we go through the basic stuff of this sweet treasure, listing the ingredients and giving you a simple step-by-step to make a delicious batch of butter tarts.
Ingredients
- Pastry:
- 1 ½ cups all-purpose flour
- ½ cup unsalted butter, chilled and cubed
- ¼ cup granulated sugar
- ¼ cup cold water
- ¼ teaspoon salt
- Filling:
- 1 cup brown sugar, packed
- ½ cup unsalted butter, melted
- 2 large eggs
- 1 teaspoon vanilla extract
- Optional ingredients: raisins, pecans, or chocolate chips
Directions
Preparing the Pastry
To make the pastry dough, mix the flour, salt, and sugar together in a big bowl. Then cut in the chilled butter using a pastry cutter or even your fingers until the mix looks like coarse crumbs. Slowly add the cold water and stir until the dough just comes together. Don't overwork the dough cause that can make it tough. Roll out the dough on a lightly floured surface and use a cutter to make circles that fit your tart pans or muffin tins. Gently press the dough circles into the molds, making sure to cover the bottom and sides.
Making the Filling
In another bowl, whisk the melted butter, brown sugar, eggs, and vanilla extract together until its smooth. If you want, fold in extra stuff like raisins or nuts, but be careful cuz it can change the flavor. Fill each pastry shell with the mixture, but dont overfill so theres room for it to puff up while baking.
Baking the Butter Tarts
Preheat your oven to 350°F (175°C). Bake the butter tarts for about 20-25 minutes, or until the filling is set but still a bit wobbly in the center. The edges of the pastry should turn golden brown. After you take them out of the oven, let them cool a bit before moving them to a wire rack so they can cool completely.
Advice for Perfect Butter Tarts
Getting your butter tarts to come out just right takes a bit of care and a few helpful tips. Here are some things that might help:
- Pastry Consistency: Make sure your dough isn't too wet or too crumbly when you roll it out. Chilling the dough for at least 30 minutes before rolling really helps it to stay together.
- Filling Techniques: Keeping the filling a bit gooey instead of totally set gives you that true butter tart feel. If your filling gets too firm, try cutting the baking time just a bit.
- Storage Tips: You can store butter tarts in an airtight container at room temp for up to three days. If you need them to last longer, you can pop them in the fridge.
- Serving Suggestions: Serve the tarts with a scoop of vanilla ice cream or a side of whipped cream for a rich treat. A cup of coffee or tea goes great, too.
The Best Butter Tart Bakeries Across Canada
If you wanna try butter tarts outside your home, there are some awesome bakeries in Canada that really know how to do them right. Here are a few spots you might wanna check out:
- The Butter Tart Store (Ontario) - They are known for sticking to the classic recipe while mixing in seasonal flavors, which has earned them a lot of fans.
- Sweet Delights Bakery (British Columbia) - This bakery is super creative with twists like salted caramel butter tarts, making it a hit with locals.
- Elmira's Butter Tart Festival (Ontario) - Not exactly a bakery, but this yearly festival brings bakers from all over Canada together to show off their unique butter tart recipes.
- Beaux-Arts Bakery (Quebec) - A cute bakery that offers a range of flavors including chocolate ganache butter tarts, which many people rave about.
Comparing Classic Butter Tarts to Other Variations
Even though the classic butter tart is still a crowd favorite, there are a bunch of different versions now that suit all kinds of tastes. Check out these comparisons:
- Raisin Butter Tarts: These tarts have plump raisins that give them a chewy texture. Some people like the extra texture, while others prefer the super smooth filling of a classic tart.
- Pecan Butter Tarts: Adding pecans gives a nice nutty crunch. However, if you have a nut allergy, it's probably best to stick with the original recipe.
- Chocolate Butter Tarts: Mixing in chocolate gives an extra rich flavor, and for chocolate fans, this might be even better than the classic. Traditionalists, though, might say it strays too much from the original taste.
All these versions have their good and bad points. Classic butter tarts are loved for being simple and full of memories so they're perfect for family get-togethers, but the variations are fun and can spice up any dessert table.
Frequently Asked Questions (FAQ)
What are the main ingredients in a butter tart?
The basic parts of a butter tart usually include a flaky pastry shell and a filling made of brown sugar, butter, and eggs. These simple ingredients come together to create the yummy, rich taste of a butter tart.
Can I make butter tarts ahead of time?
Yes, you can totally make butter tarts ahead of time. You can prepare the pastry and filling separately and keep them in the fridge until you are ready to bake. Also, once baked, you can store them in an airtight container for up to three days.
How do I know when butter tarts are done baking?
You know they are done when the center is still a bit jiggly but then firms up as it cools, and the pastry edges turn a nice golden brown. Plus, your kitchen will smell amazing with caramelized sugar!
Can butter tarts be frozen?
Yep, you can freeze butter tarts. Just make sure they are completely cool first, then wrap each tart in plastic wrap and pop them in an airtight container. When you want to eat them, just let them thaw in the fridge or on the counter.
Conclusion
Butter tarts really hold a special spot in the hearts of Canadians and they are a treat that gets passed down through families. Making them at home not only keeps the tradition alive but also gives you a chance to add your own twist. So why not give it a try and share these sweet treats with your family and buds?

Best Classic Canadian Butter Tarts
Equipment
- 1 muffin tin
- 1 mixing bowl
- 1 whisk
- 1 rolling pin
- 1 pastry cutter
- 1 measuring cups and spoons
- 1 spatula
Ingredients
- 1.5 cups all-purpose flour
- 0.5 cup unsalted butter Cold and cubed.
- 0.25 teaspoon salt
- 3 tablespoons cold water
- 0.5 cup unsalted butter Melted.
- 1 cup brown sugar Packed.
- 0.5 cup corn syrup
- 2 large eggs
- 1 teaspoon vanilla extract
- 0.5 teaspoon salt
- 0.5 cup raisins or chopped nuts Optional.
Instructions
- Preheat your oven to 400°F (200°C).
- In a mixing bowl, combine the flour and salt. Add the cold diced butter and use a pastry cutter or your fingers to blend until the mixture resembles coarse crumbs.
- Gradually add cold water, one tablespoon at a time, mixing until a dough forms.
- Gather the dough into a ball, wrap it in plastic wrap, and refrigerate for about 30 minutes.
- In another bowl, whisk together the melted butter, brown sugar, corn syrup, eggs, vanilla extract, and salt until smooth and well combined.
- Roll out the chilled pastry dough on a floured surface to a thickness of about ¼ inch. Cut out circles that fit into the muffin tin.
- Press each circle into the muffin tin cups to form a pastry shell.
- If using, sprinkle a few raisins or nuts into each pastry shell.
- Carefully pour the filling into each shell, filling them to just below the edge of the crust.
- Bake in the preheated oven for 20-25 minutes, or until the filling is bubbly and the edges are golden.
- Remove from the oven and let cool in the pan for 5 minutes, then transfer to a wire rack to cool completely.