The pressure builds and you start counting down minutes until you eat. You remember the little hiss from the valve opened just right, signaling the start. That moment when the float valve pops up is like your timer kicking in, and you gotta feel the buzz of anticipation.

You catch the soft steam cues as the cooker does its thing, filling the kitchen with that sweet and tangy mango smell. The broth depth under the chicken lets those flavors soak while the timer ticks down. You spot the seconds slowly melting away, and your stomach starts rumbling loud enough to hear.
When you finally crack open that lid, a rush of fragrant air greets you, kinda like a warm hug. The chicken's glazed to perfection, and you feel that mix of excitement and relief. Dinner is about to get real good, and you know it's gonna hit the spot.
The Truth About Fast Tender Results
- Pressure cookers force moisture in fast so chicken gets tender quicker than stove methods.
- The float valve locking means the heat's just right and your dish cooks evenly.
- Steam cues help you predict when pressure's peaking and when it's safe to open.
- Braising chicken in broth under pressure locks in juicy flavors you'd miss with dry cooking.
- Quick pressure build saves you time without sacrificing that slow-cooked taste.
- Glazing after pressure cooking lets the sauce thicken without burning or overcooking.
Enhance your pressure cooking skills with our Garlic Parmesan Chicken recipe, perfect for delicious dinner ideas. Also, check out tips on fast tender cooking in our Taco Rice Bowl post to expand your culinary repertoire.
Your Simple Ingredient Checklist
You gotta gather 1.5 pounds of boneless skinless chicken thighs or breasts for this recipe. Chopping 'em into bite-sized pieces makes eating a breeze. Don't forget 1 tablespoon of cornstarch to help the chicken get that nice crispy coating before cooking.
For cooking, grab 2 tablespoons of cooking oil like avocado or sesame oil-it adds subtle flavors and keeps the chicken juicy. Salt and pepper's your basic seasoning making everything pop just right.

The mango glaze is where this gets exciting. You need one ripe mango or about a cup of frozen mango, thawed-either one works fine. Then mix in 2 tablespoons low-sodium soy sauce for that salty umami punch, 2 tablespoons honey or maple syrup to sweeten things up, and 1 tablespoon of rice vinegar or apple cider vinegar for that tanginess.
Flavor boosters you won't wanna skip include 1 teaspoon sesame oil, 2 cloves garlic minced, and 1 teaspoon freshly grated ginger. Feeling bold? Add 1 teaspoon sriracha or chili garlic sauce to the glaze if you're up for a little kick.
Top it off with chopped green onions, toasted sesame seeds, and lime wedges if you want that perfect garnish and extra zing.
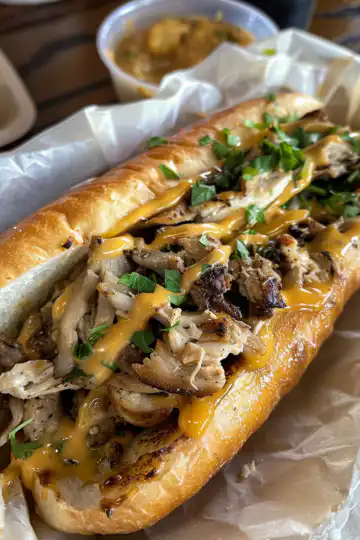
Our Chicken Philly Cheesesteak recipe uses a similar flavor layering technique and quick cooking approach, making it a great companion read to this mango chicken post.
Walking Through Every Single Move
First, toss your chopped chicken pieces with that tablespoon of cornstarch till each piece's coated well. This helps with the texture when it cooks, trust me.
Next, heat up your pressure cooker on the sauté setting or grab a skillet or wok if you wanna do that part outside the cooker. Add the 2 tablespoons of oil and wait for it to get nice and hot.
Add the chicken in, sprinkle it with salt and pepper, and cook until it's browned on all sides and mostly cooked through. Should take about 5 to 7 minutes. Stir up occasionally so nothing sticks.
While the chicken's cooking, toss your mango pieces in a food processor or blender and blend until super smooth. This makes the glaze nice and silky.
In a small bowl, mix the blended mango with soy sauce, honey, and vinegar. Stir that up good so all flavors get along.
Pour the mango glaze over your browned chicken. Stir everything so that glaze coats all pieces evenly. This is when those sweet and tangy flavors start shining.
Cook everything together for another 3 to 5 minutes so the glaze thickens a bit and sticks to the chicken good. When that happens you're ready to serve hot and garnish with green onions or extra mango if you want.
Quick Tricks That Save Your Time
You don't gotta wait till dinner time for mango to ripen. Keep frozen mango on hand and thaw it out quickly in warm water or the microwave.
Use your pressure cooker's sauté function to do the browning step right inside the pot. It saves washing extra pans and speeds up the whole thing.
Make the mango glaze ahead and keep it in the fridge. Just warm it up briefly when you're ready to toss with the cooked chicken. This little prep hack works real good on busy nights.
Your First Taste After the Wait

When you take your first bite, you notice the chicken's perfectly tender but still juicy. The pressure cooking locked all those flavors in just right, no dryness in sight.
The mango glaze hits your tongue first, that sweet and tangy punch balancing softly against the savory chicken. There's a hint of sesame and that zing from garlic and ginger sneaking in behind.
Each bite feels like a little burst of sunshine with a tiny spicy kick if you added sriracha. It's the kinda meal that makes ya wanna close your eyes and just savor every chew.
For similar succulent results, try the rich flavors of our Garlic Parmesan Chicken for a cozy dinner option that delights. Or warm up with our Guinness Beef Stew, great for chilly nights.
Your Leftover Strategy Guide
If you got leftovers, pop them in an airtight container. Store in the fridge and they'll keep tasty for up to 3 days. Reheat gently so the glaze doesn't dry out.
Want to freeze some? Sure thing. Just cool the chicken completely first. Then place in a freezer-safe bag or container. It stays good for up to 2 months and reheats well in the microwave or on the stovetop.
For on-the-go lunches, pack the chicken separately from any rice or sides. That way you can reheat just the chicken quickly and keep other stuff fresh. It's a neat little trick that saves time later.
Everything Else You Wondered About
- Can I use chicken breasts instead of thighs? Yep, chicken breasts work fine too. Just watch cook time since they get dry quicker.
- What if I don't have a blender? No worries, just finely mash the mango with a fork or potato masher. It won't be silky but still tasty.
- Is frozen mango okay? Totally. Thaw it first and you're golden. Makes using mango anytime easy.
- Can I skip the sriracha? Sure! It's optional and only adds some heat. The recipe's sweet and tangy as is.
- How do I know when pressure is at the right level? When you see that float valve lock in place and steam pushing gently from the valve hiss, you're good. Those steam cues are your best guide.
- Can I use rice vinegar substitute? Yup, apple cider vinegar works just as good and adds a mellow tang.

Asian Mango Glazed Chicken
Equipment
- 1 Pressure cooker with sauté function
Ingredients
Main ingredients
- 1.5 pounds boneless skinless chicken thighs or breasts chopped into bite-sized pieces
- 1 tablespoon cornstarch
- 2 tablespoons cooking oil such as avocado or sesame oil
- Salt
- Pepper
- 1 ripe mango or 1 cup frozen mango, thawed
- 2 tablespoons low-sodium soy sauce
- 2 tablespoons honey or maple syrup
- 1 tablespoon rice vinegar or apple cider vinegar
- 1 teaspoon sesame oil
- 2 cloves garlic minced
- 1 teaspoon freshly grated ginger
- 1 teaspoon sriracha or chili garlic sauce optional
- Chopped green onions for garnish
- Toasted sesame seeds for garnish
- Lime wedges for garnish
Instructions
Instructions
- Toss your chopped chicken pieces with that tablespoon of cornstarch till each piece’s coated well.
- Heat up your pressure cooker on the sauté setting or grab a skillet or wok if you wanna do that part outside the cooker. Add the 2 tablespoons of oil and wait for it to get nice and hot.
- Add the chicken in, sprinkle it with salt and pepper, and cook until it’s browned on all sides and mostly cooked through. Should take about 5 to 7 minutes. Stir up occasionally so nothing sticks.
- While the chicken’s cooking, toss your mango pieces in a food processor or blender and blend until super smooth. This makes the glaze nice and silky.
- In a small bowl, mix the blended mango with soy sauce, honey, and vinegar. Stir that up good so all flavors get along.
- Pour the mango glaze over your browned chicken. Stir everything so that glaze coats all pieces evenly. This is when those sweet and tangy flavors start shining.
- Cook everything together for another 3 to 5 minutes so the glaze thickens a bit and sticks to the chicken good. When that happens you’re ready to serve hot and garnish with green onions or extra mango if you want.