That first hiss from the cooker tells you something good is happening. It's that little sound that makes you pause, take a breath, and smile 'cause you're already halfway to a delicious meal. You gotta respect the pressure cooker for making dinner come together so quick.
As the steam builds up, you remember how a sealing ring works its charm holding all that flavor inside. You spot the timer, knowing soon it'll be time for natural release and that smell? Dang, it's gonna be good. You sense the broth depth getting richer even without adding extra steps. It's like the cooker's doing its own thing while you chill out.

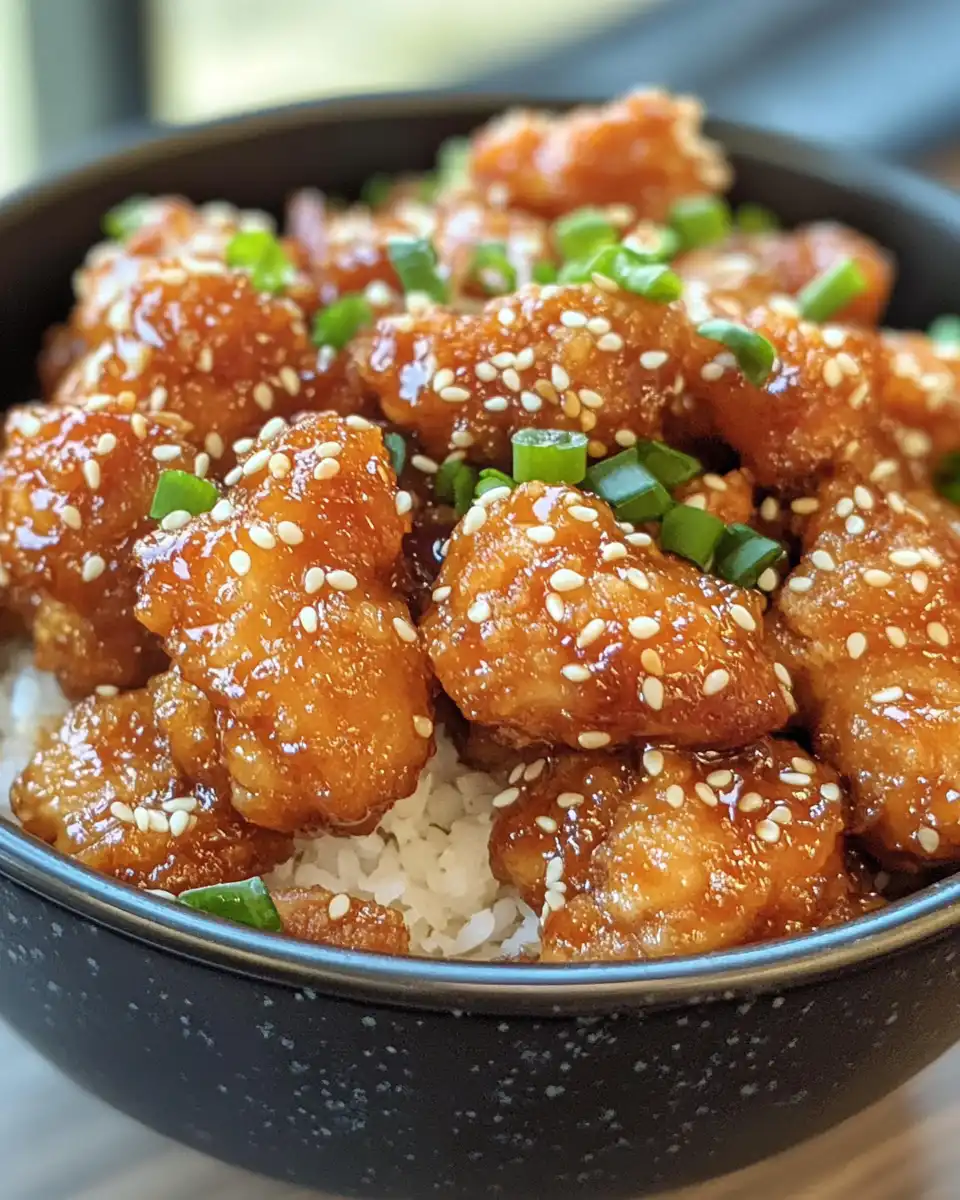
In your tiny kitchen, you're already planning what side dishes will go with this sesame chicken. Maybe some boiled rice or simple noodles. You catch yourself thinking about how the sticky Asian sauce is gonna cling to every crispy piece. It's the kinda dinner that makes you wanna invite friends over just to brag a little.
What Makes Pressure Cooking Win Every Round
- Pressure build happens super fast so your cooking time drops big time. This technique is similar to the speedy methods seen in our Stuffed Pepper Soup recipe.
- Sealing ring keeps all the aromas locked in, giving you flavor-packed meals, much like other one-pot dishes such as Garlic Butter Beef Bites & Potatoes.
- Natural release helps your food finish gently, keeping chicken juicy and tender.
- Less cleanups 'cause you're often cooking everything in one pot.
- Broth depth gets real rich even if you keep recipes simple.
Everything You Need Lined Up
- 5 tablespoon vegetable oil
- 2 eggs, lightly beaten
- 3 tablespoon cornflour (cornstarch)
- 10 tablespoon plain (all-purpose) flour
- ½ teaspoon salt
- ½ teaspoon pepper
- ½ teaspoon garlic salt
- 2 teaspoon paprika
- 3 chicken breast fillets, chopped bite-size
- 1 tablespoon sesame oil (optional but does add nice flavor)
- 2 cloves garlic, peeled and minced
- 1 tablespoon Chinese rice vinegar (white wine vinegar works too)
- 2 tablespoon honey
- 2 tablespoon sweet chilli sauce (adjust for your spice love)
- 3 tablespoon ketchup
- 2 tablespoon brown sugar
- 4 tablespoon soy sauce
- Boiled rice for serving
- 2 tablespoon sesame seeds
- Small bunch spring onions/scallions, chopped for garnish
Your Complete Cooking Timeline
First things first, grab a big bowl and mix up your dry coating - cornflour, plain flour, salt, pepper, garlic salt, and paprika. You wanna get that coating just right so the chicken comes out crispy and flavorful.
Next, dip your chicken chunks in the beaten eggs, then toss them in the flour mix. Make sure each piece is totally coated, no spots missed! This step seals in moisture and ensures that crispy crust you're after.
Heat your vegetable oil in a frying pan over medium-high heat. Time to get that oil hot enough so the chicken sizzles when it hits the pan. Fry in batches so the pieces don't crowd and steam. Each batch should take around 5 to 6 minutes until golden brown and crispy. Drain on paper towels, keep them warm if you can.
While frying, start the sticky sauce: warm the sesame oil in a separate pan if you're using it. Then throw in garlic, rice vinegar, honey, sweet chilli sauce, ketchup, brown sugar, and soy sauce. Let it simmer and thicken up. You'll see it go from runny to nice and sticky real quick.
Once your sauce is ready, toss your crispy chicken into that pan with sauce. Stir and coat every piece good so the sticky sauce clings all over. Let it cook together for another minute or two but don't overdo it or your chicken loses crunch.
Serve it up hot, sprinkled with sesame seeds and chopped scallions. Grab some boiled rice or noodles on the side to soak up all that delicious sauce. Dinner in about 30 minutes, trust me it works real good.
Easy Tweaks That Make Life Simple
- If you're short on time, skip the frying and pressure cook the chicken chunks with the sauce right in the pot. You'll lose some crunch but it's still tasty.
- Use less oil for frying if you want a lighter dish. Just gotta keep an eye so chicken doesn't stick.
- Swap sweet chilli sauce with a bit of sriracha if you want a different kinda heat.
- Prep your sauce ingredients the night before. Saves you chopping and mixing on busy nights.
- You can totally bake the coated chicken if frying feels like too much mess.
Your First Taste After the Wait
The crunch of that sesame-coated chicken is the first thing that hits your senses. It's crispy but still tender underneath, like a little party in your mouth. Crispy and juicy all at once, dang it's satisfying.
Then the sticky Asian sauce floods in with flavor - sweet, tangy, just enough heat. The honey and brown sugar bring this amazing caramelized depth while the soy sauce keeps it savory and balanced.

You scatter sesame seeds and scallions on top, adding just that little extra texture and freshness. Each bite is an explosion of taste and texture that makes dinner feel special and, yeah, pretty dang impressive.
Smart Storage That Actually Works
- Pop your leftovers in an airtight container and keep in the fridge. Should be good for 3-4 days, just reheat gently to keep the sauce nice.
- You can freeze the cooked chicken but best if you freeze the chicken and sauce separately. Reheat and combine for fresh taste.
- If you wanna keep crispiness longer, store chicken and sauce in separate containers. Add sauce right before eating.
- Use glass containers if you got 'em because they don't hold onto smells and you can see what's inside without opening.
The FAQ Section You Actually Need
- Can I use thighs instead of breast? Yeah, thighs work great and tend to be more juicy. Just adjust cooking time a bit since thighs are fattier.
- Does frying the chicken first matter? Frying gets you that crispy texture. Without it, chicken is softer but still tasty if you pressure cook with sauce.
- What if I don't have sweet chilli sauce? You can swap with a mix of honey and a little hot sauce or chili flakes depending on your spice level.
- How do I know when pressure is built? When the pressure cooker starts making that steady hiss and steam escapes slowly, sealing ring is doing its job locking the heat in.
- What's natural release vs slow release? Natural release is when you let the pressure drop on its own without opening the valve quickly. Slow release is opening the valve just a bit to let pressure out gradually-a good trick to keep food texture nice.
- Can I make this recipe gluten free? Sure, swap plain flour for a gluten-free blend or rice flour and make sure soy sauce is gluten free too.

Crispy Sesame Chicken with a Sticky Asian Sauce
Equipment
- 1 Mixing bowl Large
- 1 Frying pan Use wide pan for frying chicken in batches
- 1 Saucepan For thickening sticky sauce
Ingredients
Main Ingredients
- 5 tablespoon vegetable oil
- 2 eggs lightly beaten
- 3 tablespoon cornflour (cornstarch)
- 10 tablespoon plain (all-purpose) flour
- ½ teaspoon salt
- ½ teaspoon pepper
- ½ teaspoon garlic salt
- 2 teaspoon paprika
- 3 chicken breast fillets chopped bite-size
- 1 tablespoon sesame oil optional but does add nice flavor
- 2 cloves garlic peeled and minced
- 1 tablespoon Chinese rice vinegar white wine vinegar works too
- 2 tablespoon honey
- 2 tablespoon sweet chilli sauce adjust for your spice love
- 3 tablespoon ketchup
- 2 tablespoon brown sugar
- 4 tablespoon soy sauce
- boiled rice for serving
- 2 tablespoon sesame seeds
- 1 bunch spring onions/scallions chopped for garnish
Instructions
Instructions
- Mix cornflour, flour, salt, pepper, garlic salt, and paprika in a bowl.
- Dip chicken in eggs then dredge in flour mix. Coat well.
- Heat vegetable oil in a pan and fry chicken in batches 5–6 minutes until golden and crispy.
- While frying, start sauce in another pan. Heat sesame oil (optional), then add garlic, vinegar, honey, sweet chili sauce, ketchup, brown sugar, and soy sauce.
- Simmer sauce until thickened.
- Toss crispy chicken into sauce pan and coat each piece well. Cook for an additional 1-2 minutes.
- Serve hot with boiled rice, sesame seeds, and chopped scallions.