Steam curls up from the valve and your stomach starts talking back. You catch that bright hint of lemon mixing with garlic and ginger wafting through your kitchen. It kinda makes you feel right at home, like dad's been cooking just for you again.
The sealing ring does its thing, locking in all the good stuff so you get that deep broth depth flavor without waiting hours. You notice the float valve dancing as pressure builds, promising something yummy's just minutes away. Dang, you just can't help but peek at that timer.
And when the quick release lets out a burst of steam, you're almost there. You sense the warmth even before you open the lid. The natural release you wait for sure makes the chicken tender and soaking in all those bold flavors from the sauce. This is real-deal comfort food with no fuss or fancy stuff.
Why This Recipe Works Every Single Time
- The sealing ring seals tight so all the flavors stay locked in, giving you that rich broth depth.
- Using chicken thighs keeps the meat juicy and tender, not dry like breast sometimes.
- Double coating the chicken in cornstarch, flour, and egg helps it fry up crispy before pressure cooking.
- The natural release step lets the pressure come down slow which makes the chicken soak in sauce better.
- Quick release at the end keeps your texture just right, no overcooked mushy bits.
Your Simple Ingredient Checklist
- 1 lb boneless skinless chicken thighs, cut into bite size pieces
- ½ cup cornstarch
- 2 eggs, beaten
- ¼ cup all-purpose flour
- ¼ cup soy sauce
- ¼ cup fresh lemon juice
- 2 tablespoons sugar
- 1 tablespoon rice vinegar
- 1 tablespoon cornstarch mixed with 2 tablespoons water (cornstarch slurry)
- 2 cloves garlic, minced
- 2 teaspoons grated ginger
- ¼ teaspoon white pepper
- Vegetable oil for frying
- Sliced green onions for garnish
- Lemon slices for garnish
The Full Pressure Cooker Journey
Step one, grab a bowl and toss those chicken pieces in cornstarch, flour, and beaten eggs. You wanna make sure every piece is covered nice and even.
Heat your vegetable oil in a deep pan or wok, medium-high heat works best. Fry the chicken pieces in batches till they get golden and cooked through. This takes about 4-5 mins per batch.
Drain the fried chicken on paper towels so it doesn't sit in oil. Then set it aside while you work on the sauce.
In another pan, mix soy sauce, lemon juice, sugar, rice vinegar, garlic, ginger, and white pepper. Bring that to a simmer over medium heat so the flavors can hang out.
Stir in your cornstarch slurry. Let the sauce thicken for about 2-3 minutes, you'll see it getting glossy and perfect.
Now add the fried chicken pieces to the sauce pan and toss to coat every bite with that tangy, sweet goodness.
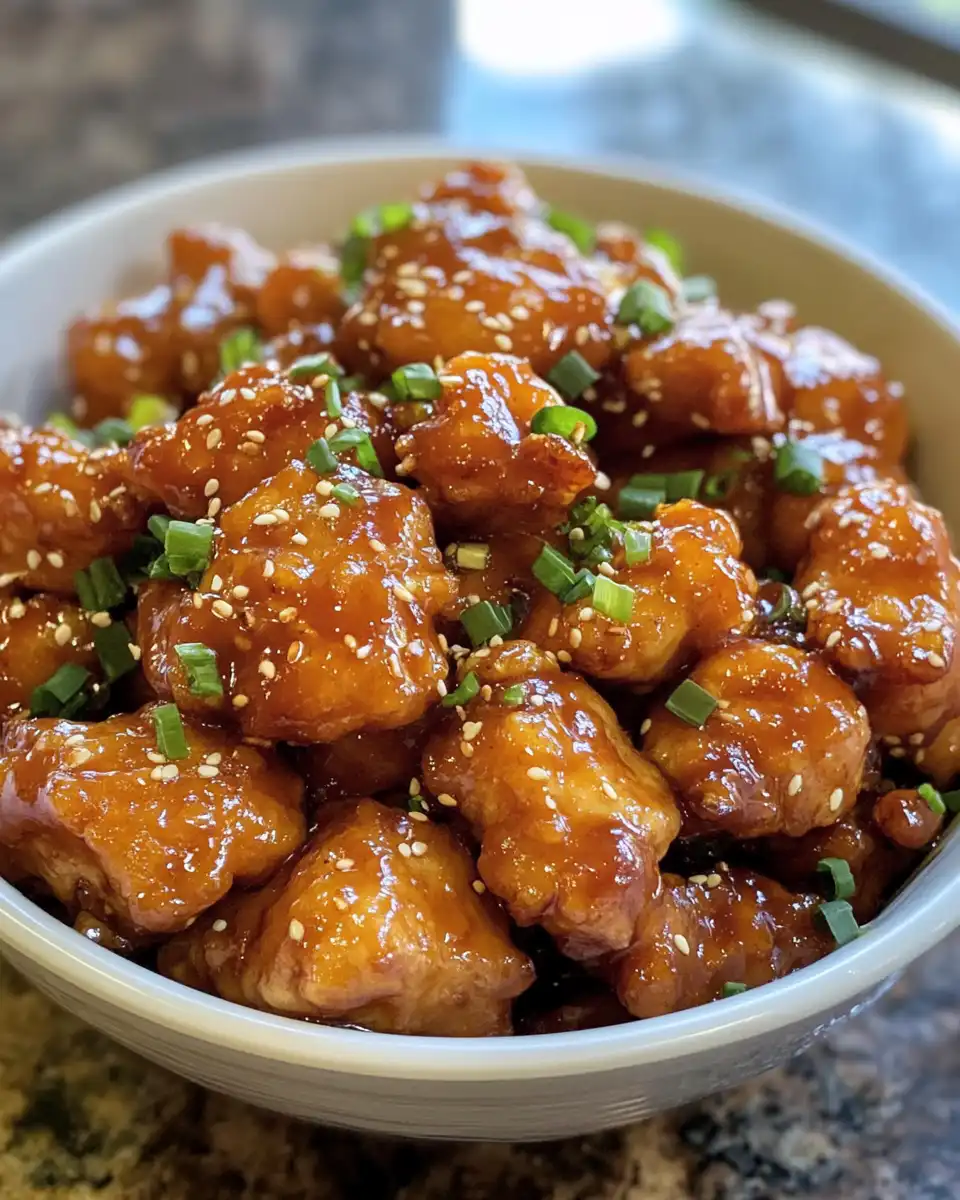
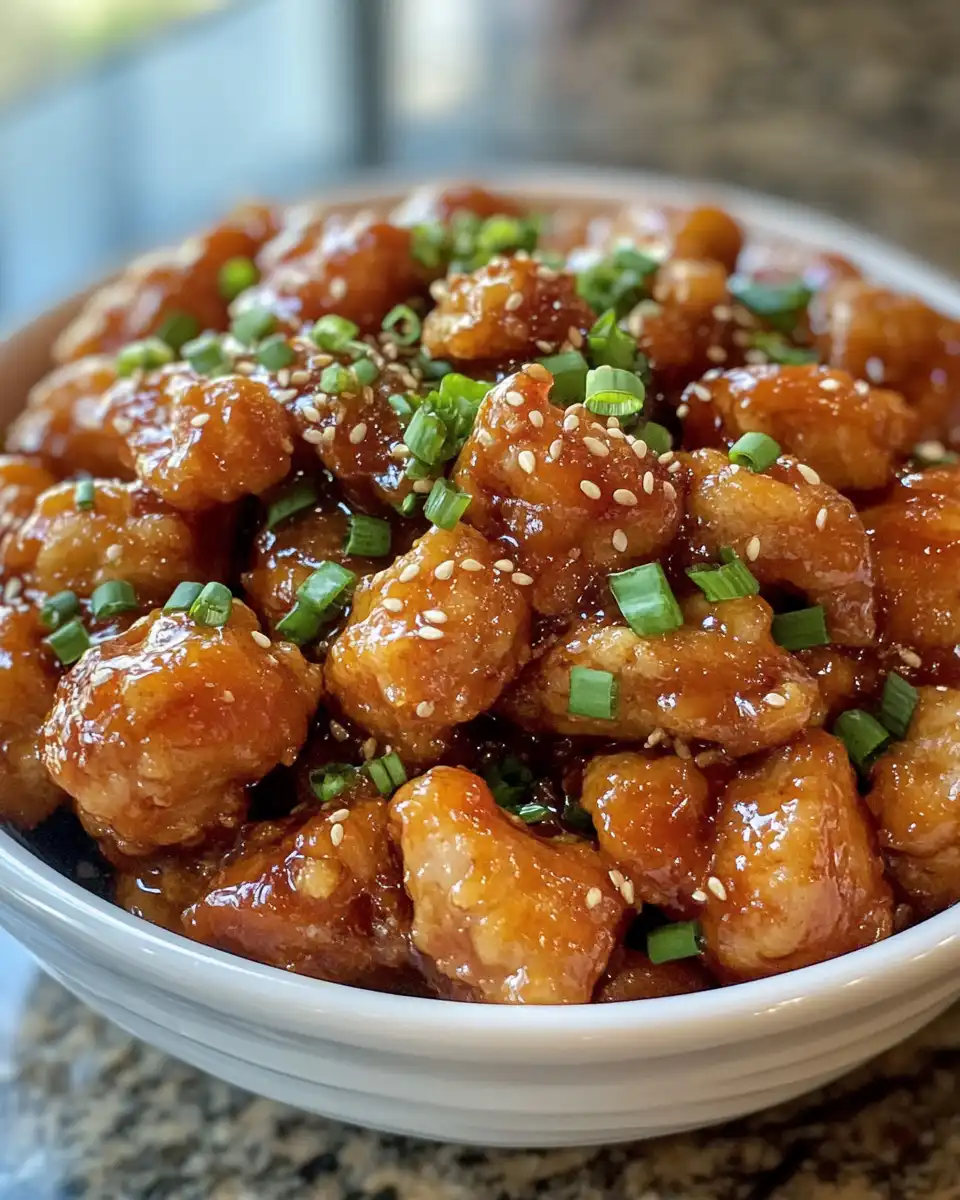
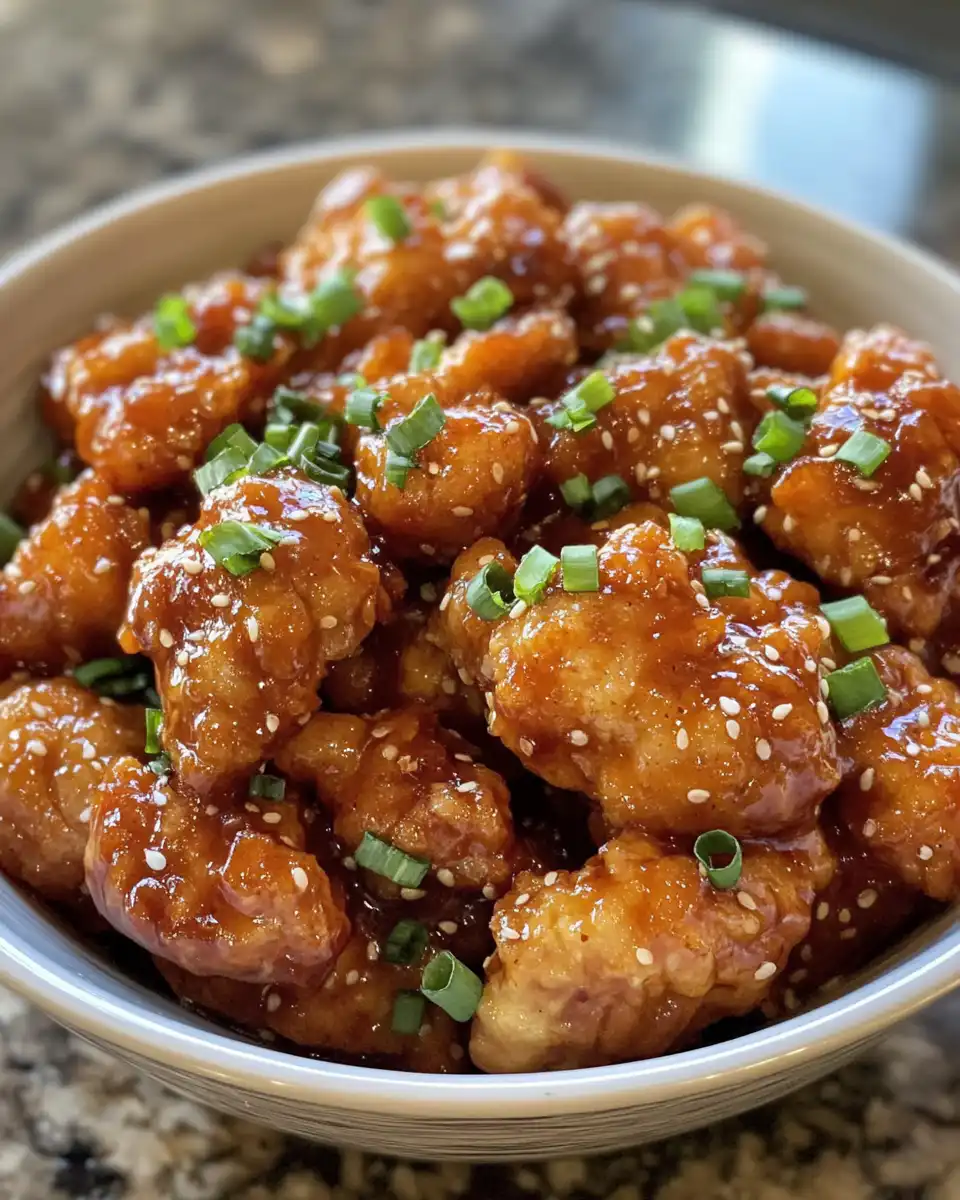
Before serving, sprinkle sliced green onions and lemon slices on top for a fresh pop. You're ready to dig in.
Smart Shortcuts for Busy Days
First shortcut is to prep your chicken earlier. Coat it with the mix and keep covered in fridge so you just pop it in the fryer later.
Make the sauce ahead too, keep it in fridge. When you're ready, heat it up and toss in chicken quick.
Don't wanna fuss with frying? You can try broiling the chicken pieces on a rack to get crispy without the oil mess. The sauce still does all the work flavor wise.
Your First Taste After the Wait
That first bite always hits you with the crispy chicken skin soaked with lemon tang. It's kinda bright and fresh tasting but knows it's got some savory depth from all the garlic and ginger.
The texture's just right, tender inside but with that little crisp outside. You notice the sweet and sour notes doing a fun dance on your tongue.
You catch the subtle heat from white pepper making it warm without burning. The green onion garnish adds a nice green snap to cut through the richness.
And finally, the lemon slices on top you squeeze a bit more juice from if you want. It lifts everything up in a way that's dang satisfying. Real deal home cooking you'll wanna make again and again.
How to Store This for Later
If you got leftovers, cool 'em down quick once you're done eating. You can pop the chicken and sauce in an airtight container for fridge storage.
This recipe keeps best for about 3 days chilled, so it's great for next day lunches or quick dinners when you're tired.
For longer keeping, freeze your cooked chicken and sauce in freezer-friendly bags. When you thaw, just reheat gently on the stove so you don't overcook the chicken. It still tastes dang good after that.
Common Questions and Real Answers
- Can I use chicken breast instead of thighs? You can, but breast meat tends to dry out faster. Thighs keep it juicy and tender which works better here.
- What's the sealing ring do in this recipe? It keeps all the steam and flavors locked in while pressure cooks so your broth depth is full.
- How important is the natural release step? It's kinda key. Letting the pressure come down slow helps the chicken soak in the sauce better instead of getting tough.
- Can I skip frying the chicken? You could bake or broil for less oil if you want. Frying gets that crisp texture but sauce still tastes great either way.
- What if my float valve doesn't pop up? That usually means not enough pressure built or seal could be off. Check your sealing ring and make sure it's on right.
- How do I fix a sauce that's too thin? Whisk in a little more cornstarch slurry and simmer till it thickens. Takes just minutes.
Explore more delicious recipes like our Stuffed Pepper Soup or savor the rich flavors of Slow Cooker Garlic Butter Beef Bites & Potatoes to keep your meals exciting and delightful.

Dad's Authentic : A Chinese Chef's Secrets
Equipment
- 1 Mixing bowl For coating chicken
- 1 Deep pan or wok For frying
- 1 Saucepan For simmering sauce
Ingredients
Main Ingredients
- 1 lb boneless skinless chicken thighs cut into bite size pieces
- ½ cup cornstarch
- 2 eggs beaten
- ¼ cup all-purpose flour
- ¼ cup soy sauce
- ¼ cup fresh lemon juice
- 2 tablespoons sugar
- 1 tablespoon rice vinegar
- 1 tablespoon cornstarch mixed with 2 tablespoons water (slurry)
- 2 cloves garlic minced
- 2 teaspoons grated ginger
- ¼ teaspoon white pepper
- Vegetable oil for frying
- Sliced green onions for garnish
- Lemon slices for garnish
Instructions
Instructions
- In a bowl, toss chicken pieces in cornstarch, flour, and beaten eggs until evenly coated.
- Heat vegetable oil in a deep pan or wok over medium-high heat. Fry chicken pieces in batches until golden brown, about 4-5 minutes each.
- Drain fried chicken on paper towels. Set aside.
- In a separate pan, combine soy sauce, lemon juice, sugar, rice vinegar, garlic, ginger, and white pepper. Simmer over medium heat.
- Stir in cornstarch slurry and cook until sauce thickens, about 2-3 minutes.
- Add fried chicken to sauce and toss to coat evenly.
- Garnish with sliced green onions and lemon slices. Serve hot.